Using the DirX Identity Business User Interface
DirX Identity Business User Interface is an application with a responsive Web design approach aimed at allowing desktop Webpage content to be viewed according to the size of the device being used to access the content. The application provides a fast and easy way to carry out selected tasks within DirX Identity’s self-administration feature suite from a user’s desktop. The application communicates with the DirX Identity Representational State Transfer (REST) Service through HTTPS.
The Business User Interface is available in the DirX Identity installation package and is configured with the DirX Identity Configurator application.
This document provides an overview of how to use the Web based DirX Identity Business User Interface. The dialogs presented here are taken from the default configuration. Because the interface can be configured in many ways, the dialogs that you see with your installation may look different from the dialogs shown in this document. In addition, depending on the access policies and access rights configured with your installation and the customizations made by your company’s administrator, you may not be able to view or use all the features described here, or you may see more or fewer parameters.
For details on how to configure the Business User Interface on the server side, see the DirX Identity Business User Interface Configuration Guide.
Accessing the Business User Interface
The Business User Interface does not require client-side configuration.For details on how to configure the Business User Interface on the server side, see the DirX Identity Business User Interface Configuration Guide.
To access the Business User Interface, an HTML5-compatible browser must be available on the desktop.We recommend using Google Chrome for best experience and performance.
If your Business User Interface installation requires authentication with a user certificate (Public Key Infrastructure / PKI), this client certificate must be available in the certificate store that is used by your browser.
You request URL access to the Business User Interface from a DirX Identity administrator.The URL may contain different values depending on the DirX Identity installation and configuration and is defined by your company’s administrator.
where the Business User Interface is available on the server my-server.my-domain.com at port 443.The application is installed with the name BusinessUserInterface and is configured for the DirX Identity domain *My-Company*.
Please ask your company’s administrator for the URL you need to use.
The Business User Interface does not provide any back or forward buttons.Although you can use your browser buttons for back and forward navigation, we recommend using the page navigation options within the Business User Interface.
Logging in to the Business User Interface
You can launch the Business User Interface from your desktop browser.The following figure provides an example of how the Business User Interface might look, depending on how it is configured:
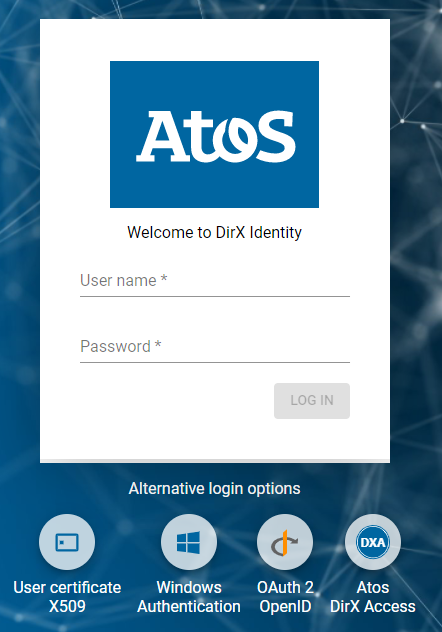
To log in, enter your account name and password and then click LOG IN.Your credentials are authenticated with the DirX Identity REST Service.If they are invalid, the browser will return you to the authentication page to try again.
Alternatively, you can choose Alternative login options to switch to the X.509 Public Key Infrastructure (PKI) authentication method if it is available and has been configured by your administrator.You will see the following login page:

Put your PKI card into your device’s card reader and then click LOG IN. Follow your browser instructions for getting access to your certificate.
Another authentication method provided is Windows Authentication (Kerberos). This authentication method must be configured and enabled to DirX Identity REST services. The Internet browser will automatically provide Windows credentials to the DirX Identity REST services when this method is used. The login page will look like this:
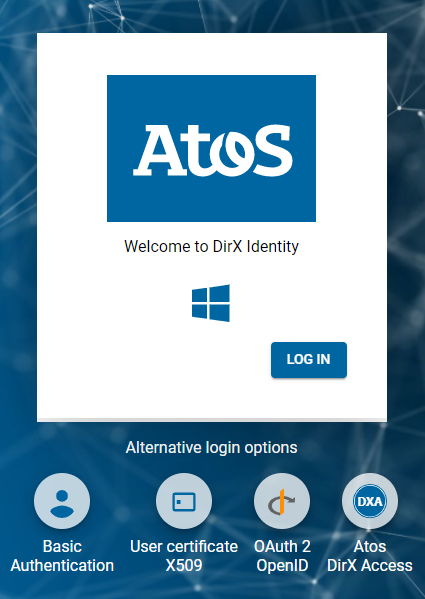
To log in to the application, click LOG IN.
Another authentication method provided is the DirX Access Policy Enforcement Point (PEP). This authentication method is enforced by DirX Access, which protects the DirX Identity REST services with a security layer that provides support for authentication. With this method, the DirX Identity REST services do not provide the authentication process; instead, the Business User Interface delegates the authentication task to DirX Access.

To log in to the application, click LOG IN. Because is no authenticated user yet, the Business User Interface redirects the Web browser to the DirX Access Authentication page. Select your preferred authentication method provided by DirX Access (Basic Authentication, PKI, etc.) and provide your authentication information (username/password, PKI card). If authentication is successful, DirX Access returns the Web browser to Business User Interface application with an authenticated session.
Another authentication method provided by the Business User Interface is the OAuth2 Open ID Connector (OAuth2 OpenID PKCE). With this method, the Business User Interface authentication process is delegated to an Identity Provider server (DirX Access, RedHat Keycloak) configured to work with the OAuth2 protocol; in particular, the OpenID variant or OAuth2.
The Business User Interface application communicates with the Identity Provider server with the PKCE extension of the OpenID protocol.
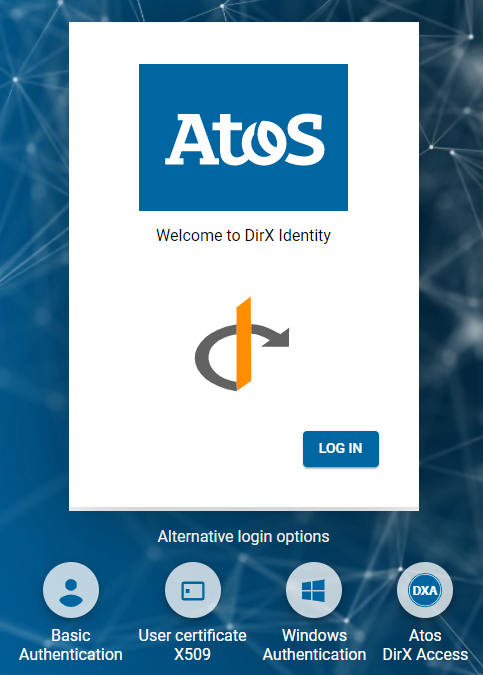
To log in into the application, click LOG IN. Because there is no authentication session, the Business User Interface redirects the Web browser to the OAuth2 OpenID Identity Provider login page. Select your preferred authentication method provided the Identity Provided and provide your authentication information (username/password, PKI card, etc.). If authentication is successful, Identity Provider server returns the browser to the Business User Interface application with an authentication token.
NOTE: You directly access the login page for a specific authentication method by using the Business User Interface application URL.
For example:
https://my-server.my-domain.com/BusinessUserInterface-My-Company/ #/login/Basic – to display Username/password login page
https://my-server.my-domain.com/BusinessUserInterface-My-Company/ #/login/X509 – to display PKI login page
https://my-server.my-domain.com/BusinessUserInterface-My-Company/ #/login/Kerberos – to display Windows Authentication login page
https://my-server.my-domain.com/BusinessUserInterface-My-Company/ #/login/DXAPEP – to display DirX Access PEP login page
https://my-server.my-domain.com/BusinessUserInterface-My-Company/ #/login/OAuth2 – to display OAuth2 login page
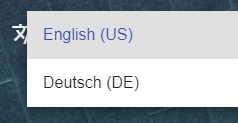
The login page is displayed in the language configured for use with the browser if a translation for this language is available; if it is not, English (U.S.) is used. To change the language dynamically, click the selection arrow in the upper right corner of the login page and then choose the language that best suits you from the list.
After a successful login, the user interface is displayed in the language that has been configured as your preferred language in DirX Identity. You can change this language manually.
If you take no action on the Business User Interface website, the session expires, and you are notified about it at the bottom of the page.

To remove this message, click DISMISS and then log in again.
If you have logged in with a client certificate (PKI), you are not allowed to log in again for security reasons after logout or an expired session.The reason is that the browser is caching your certificate information, which could be misused by a login without any authentication.As a result, you must restart the complete browser (not just the tab) to login again.
The Home Page
The Business User Interface home page displays a header and several large widgets:
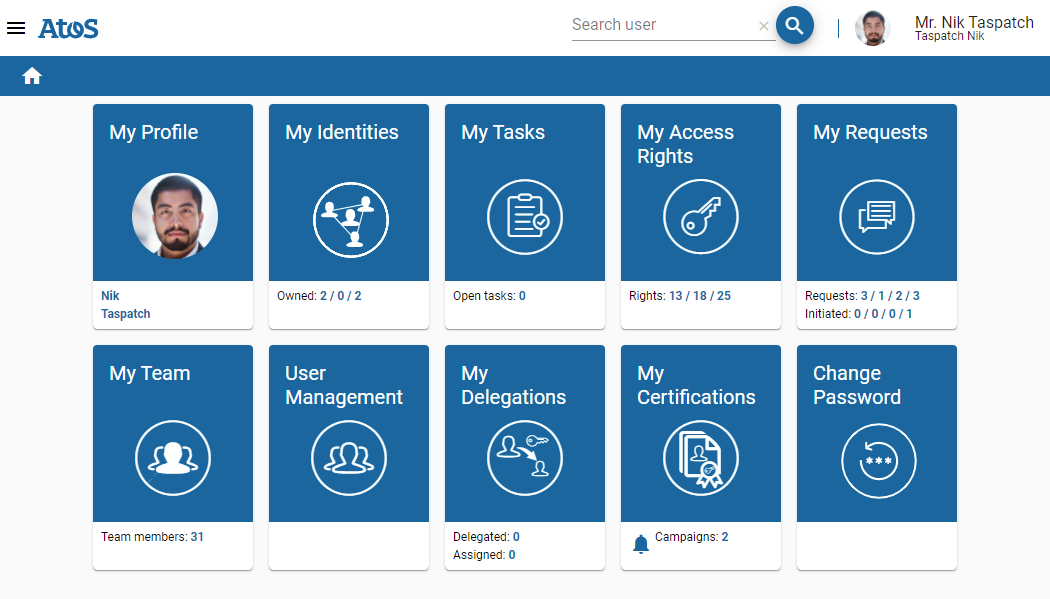
On the home page:
-
My profile takes you to a page that contains your profile data, some of which is editable.
-
My Identities takes you to a page that contains your other identities such as your functional users assigned to you, personas, and user facets for your identity.
-
My Tasks takes you to the tasks that need your approval. The Open tasks value displays how many approval tasks there are for you to review. The tasks page contains access to task summary with more details about a task and possibility to search and obtain details about your closed tasks.
-
My Access Rights takes you to the privileges (= access rights) that are already assigned to you. The Rights value displays how many roles, permissions, and groups you have. You can edit or delete your assigned access rights or request new access rights for yourself here. Depending on the central configuration, only some of these privilege types may be displayed (e.g.: display only role assignments).
-
My Requests gives you an overview of all the ongoing privilege and profile changes that are requested for you and their status. The Requests values displays how many pending requests there are for you for roles, permission, groups, and profile changes. Depending on the server-side configuration, only some of these privilege types may be displayed.
-
My Team gives you as a manager access to your team member data (subordinates). The Team members value displays the number of team members in your team.
-
User Management gives you access to a large list of users and possibility to search (on server) for one or more users by name, email address, department, or phone number. Access and limits for search results are configurable in DirX Identity REST services.
-
My Delegations gives you an overview of all your assigned delegations and the delegations assigned to other users. The Assigned values displays how many delegations are assigned to you, and Delegated values displays how many delegations are assigned to other users. For more information about delegation, see the DirX Identity Provisioning Administration Guide.
-
Change Password takes you to a page where you can change your password.
In the home page header:
-
The top right corner displays your name with the salutation that is configured for you in DirX Identity. The username you have used for login or a symbol for PKI login is displayed below your name and an optional profile picture is displayed to the left of your name if your administrator has configured it.
-
Also, the top right corner displays an icon with a badge with a selected privileges number in Privileges Requests pages (My Privilege Requests, My Team Privilege Requests and User Management Privilege Requests).If you click the icon, a dialog like the following is displayed:
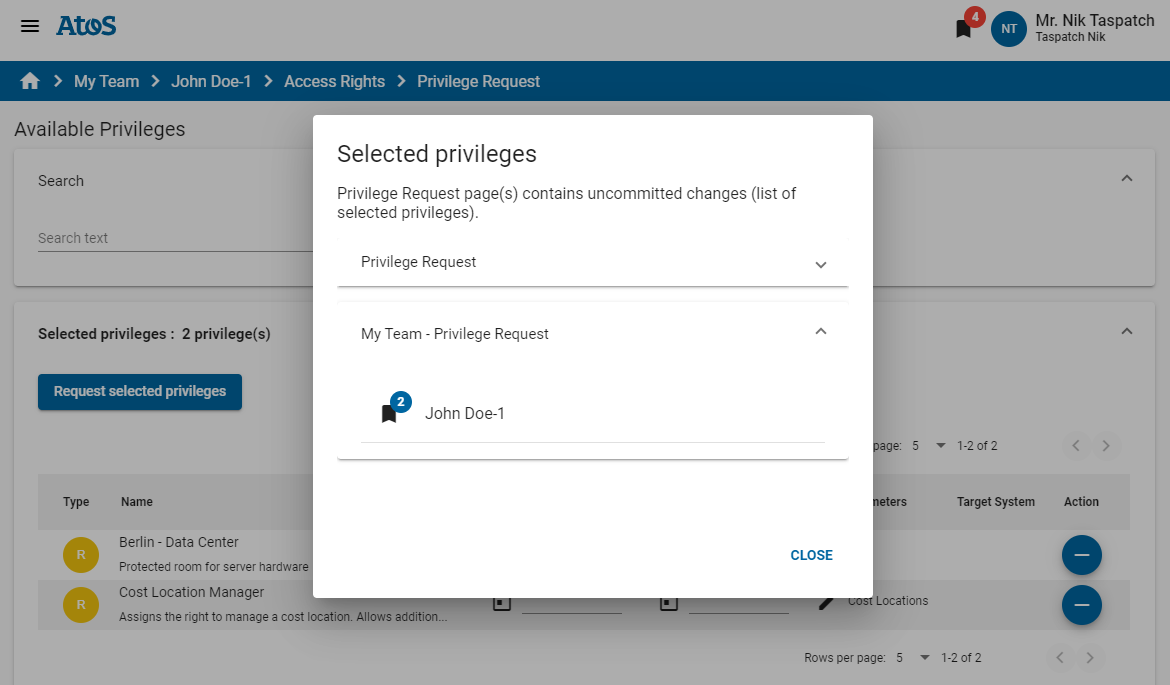 Figure 9. Selected Privileges Dialog
This dialog displays information about current selected privileges in Privilege Requests pages that are not yet requests to DirX Identity REST services.You can expand and collapse panels to see on which page these selections exist and which user has them (Me is your user, selected privileges for yourself).If you click on username, the application is redirected to the Privilege Requests page for that user (you, a user from My Team or a user from User Management).If you do not want to navigate, click Close, or click outside the window.
-
The top right corner also contains fast access to a user with the Search User control.You can type a keyword to search a specific user (for example, keyword “Doe-5”) and a search result page is displayed.
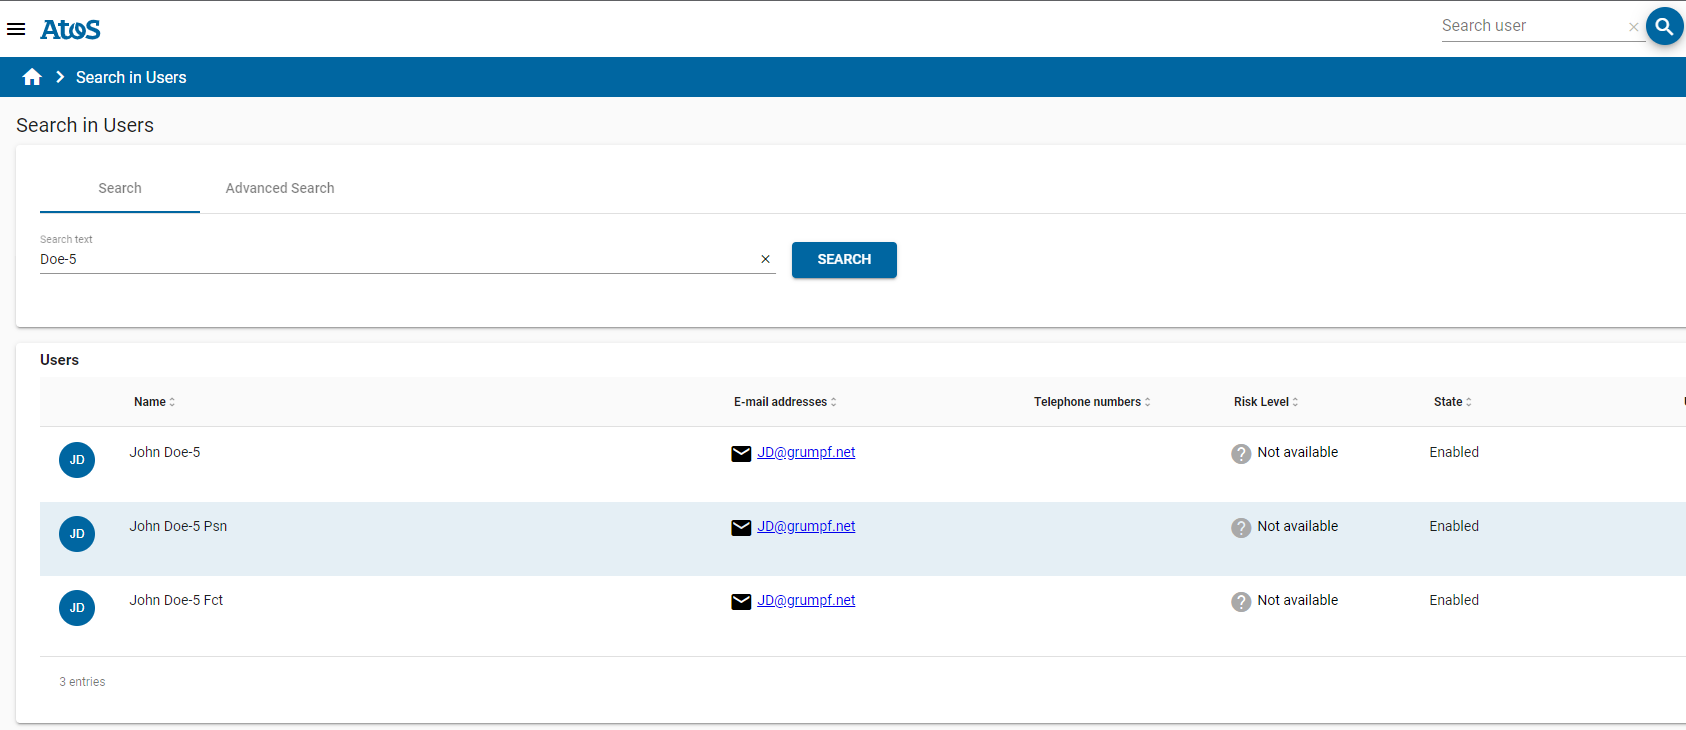 Figure 10. Search in Users Results Page
 -
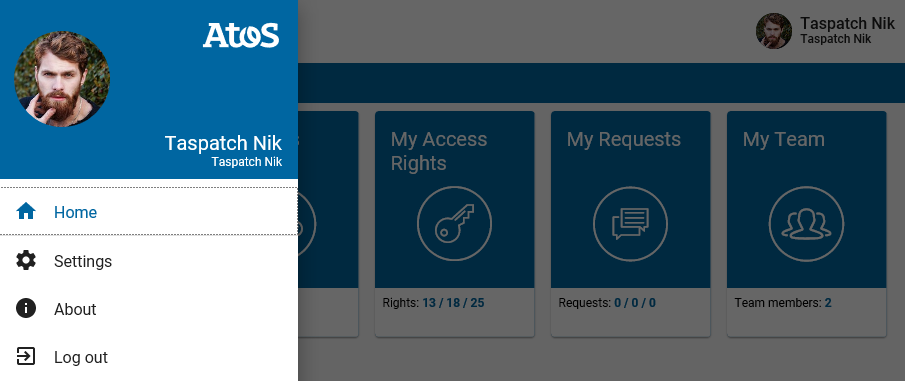
The top left corner (to the left of the company logo) displays a navigation menu that offers some additional options.
The Navigation Menu
This menu allows you to navigate between pages that provide profile data and settings, the home page and logout.
In the navigation menu:
-
Home returns you to the home page.
-
Settings takes you to a page that allows you to switch manually and temporarily the language, color scheme theme used for the Business User Interface, enable or disable accessibility feature and show or hide widgets on user homepage.
-
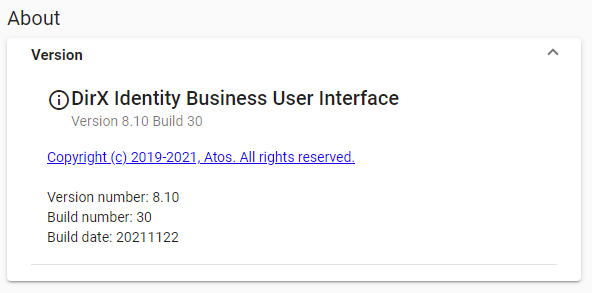
About displays the Business User Interface version.
-
Log out immediately logs you out of the Business User Interface and takes you to the authentication page.
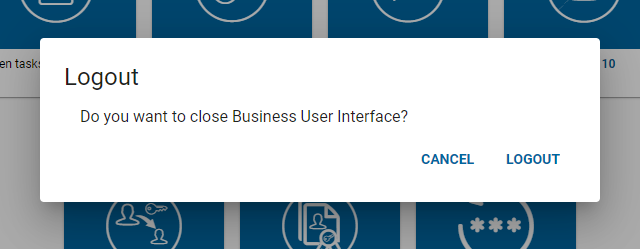
When you log out, a confirmation dialog is displayed:
If there are selected privileges in one of the Privilege Requests pages, the following log out dialog is displayed:
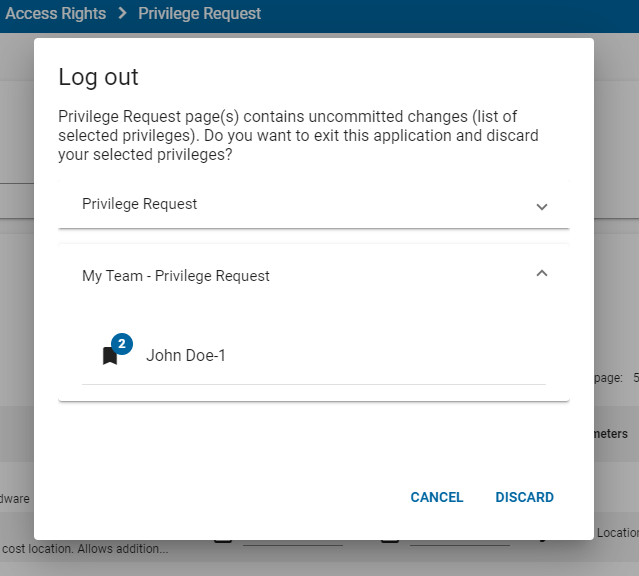
Like the Selected Privileges dialog, you can navigate to a specific user from a list, cancel the log out action by clicking Cancel or continue to log out and discard all selected privileges by clicking Discard (on the next login, these selected privileges will still be there).
-
Previous page: You can return to the previous page by clicking in the grayed-out area on the right.
The header at the top of each page indicates the page you’re currently working on and displays the home page icon, which you can click to return to the home page.
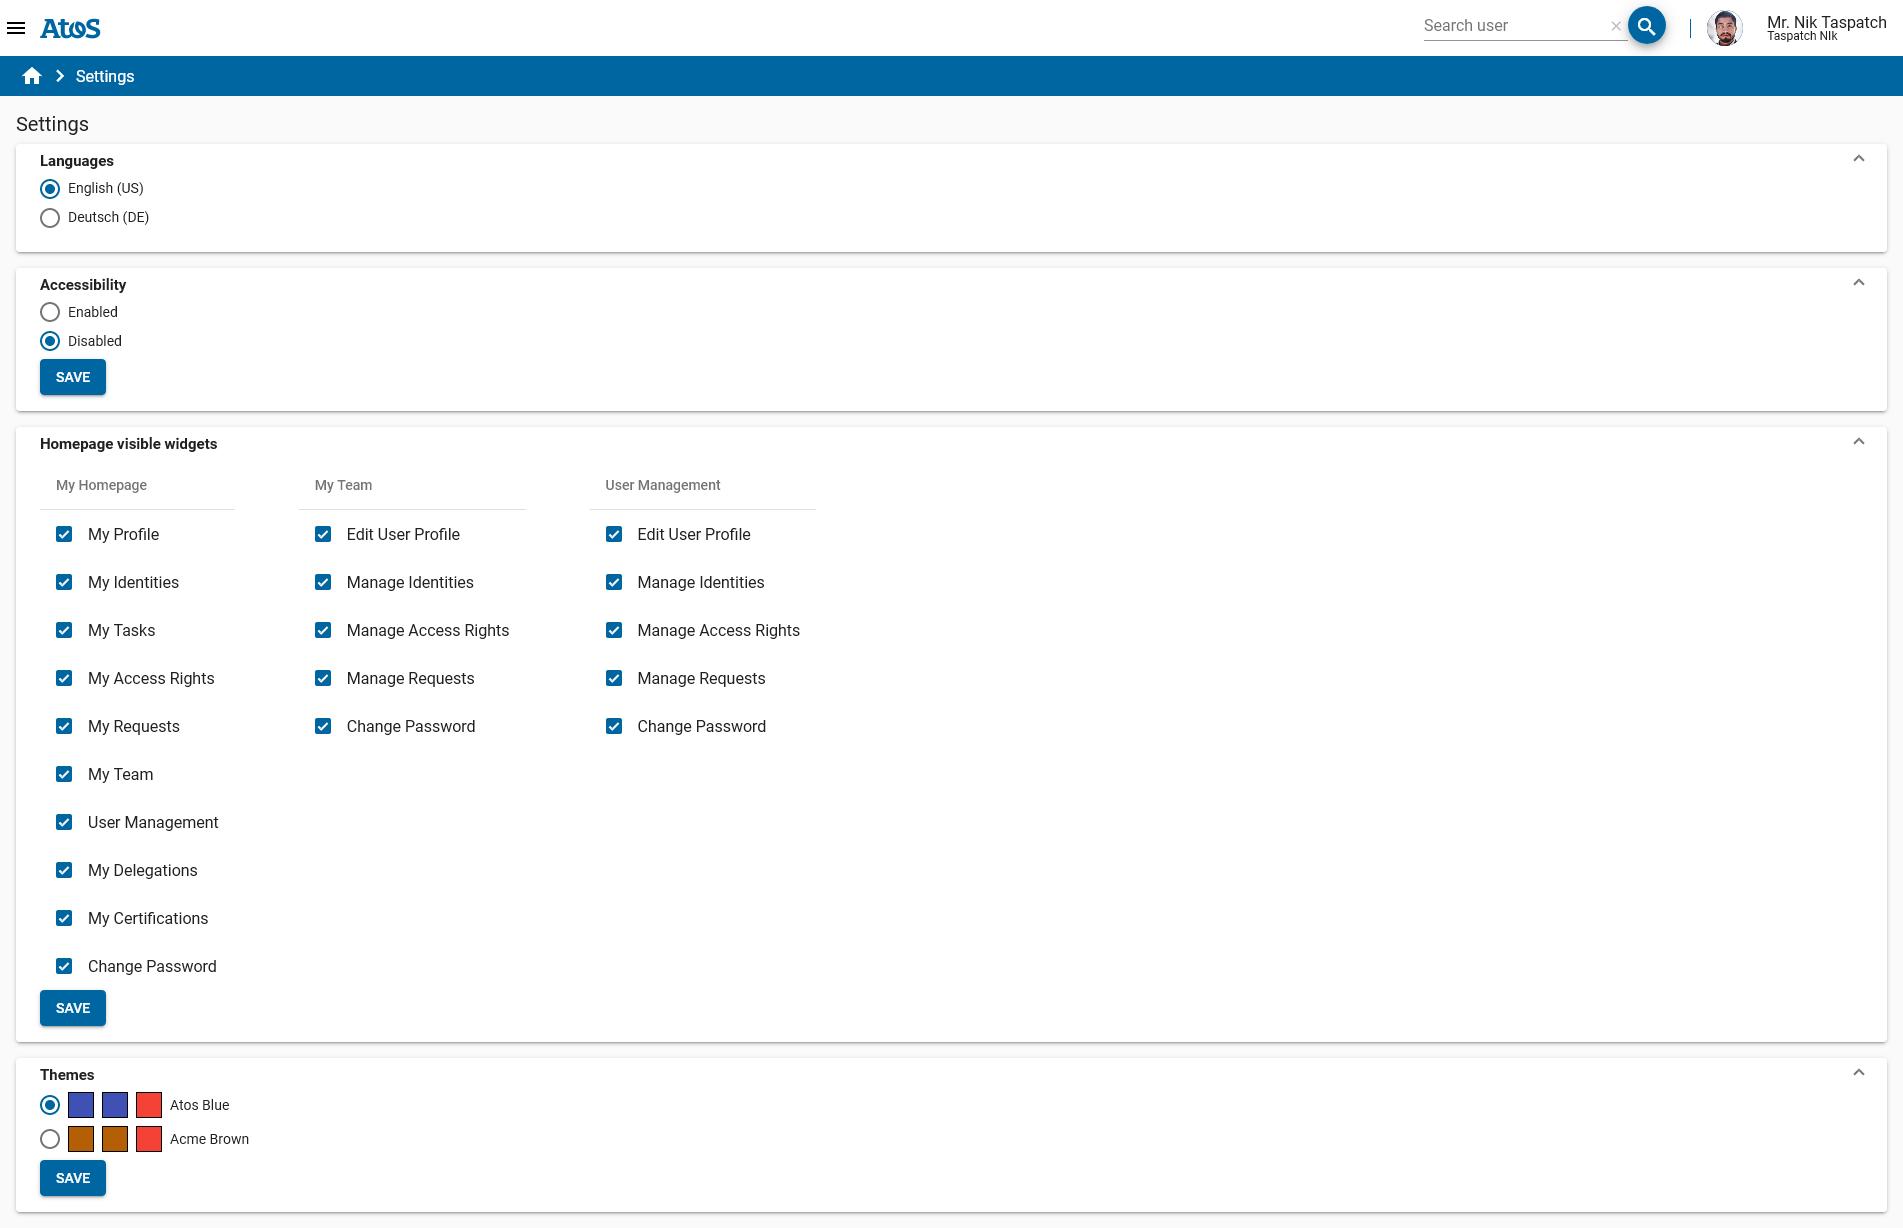
Settings
The Settings page allows you to switch the language, color scheme theme you’re using for the Business User Interface, enable accessibility and show or hide widgets in user homepage (this is not a global setting and can be customized by any authenticated user with his own preferences).
|
The Language change is immediately activated, but only for the current session. If you want to change the language permanently, use the Preferred Language option in the Personal Information area on the My Profile page. If you want to change other settings permanently, click SAVE. |
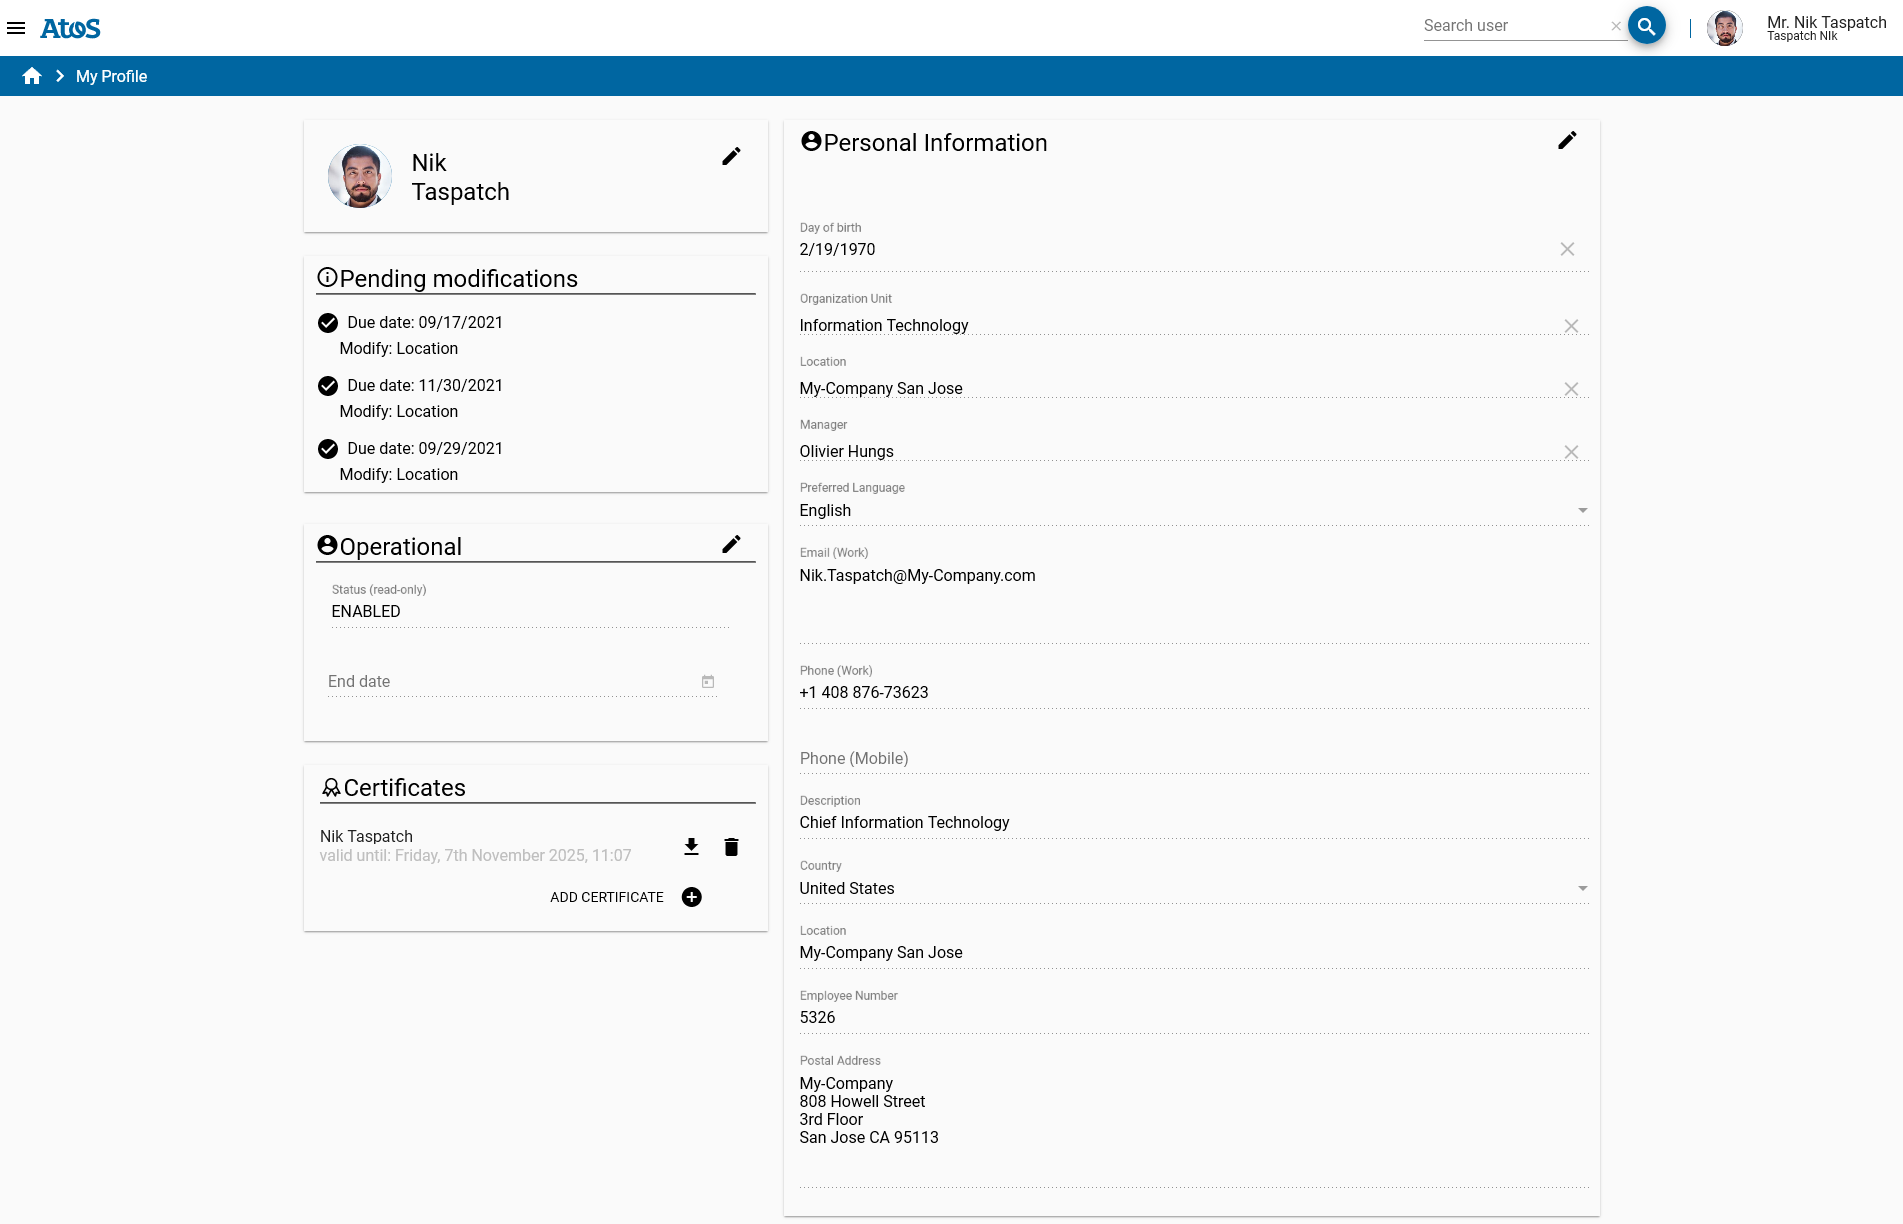
My Profile
This page consists of four areas: your profile picture, pending modifications to your profile (Pending modifications), your identity status (Operational), your certificates, and your personal information.
My Profile Picture
Your profile picture is displayed in the top left corner of the page.Click the pencil icon to edit it.
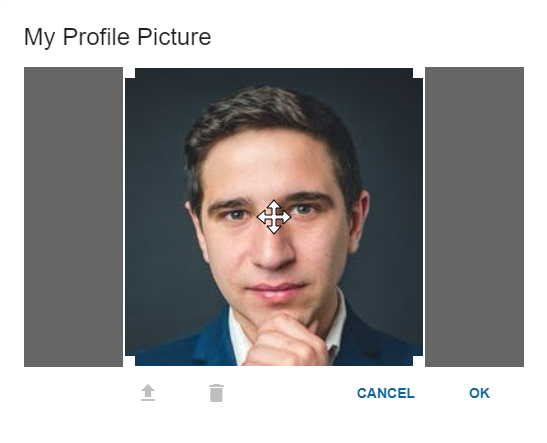
In edit mode, you can upload a new picture with  , delete the current picture with
  and adjust the area of the picture image that is visible as the profile picture. You can use the file types png or jpeg for uploading. We recommend using a picture with a height and width that are less then 1,000 pixels each. Click OK to save your changes or click CANCEL to leave the dialog without recording any changes.
Pending Modifications
The Pending modifications sections display your current pending modifications for your profile. These modifications are in the “in approval” state and are waiting to be approved by one or more participants or changes are assigned to a DirX Identity ticket with a due date set.
My Status (Operational)
The Operational section displays the current status (Enabled/Disabled) of your user entry with an optional time limit on the status, which can be edited if the policies configured on the server side allow you to edit them.
My Certificates
The My Certificates area below the Operational section displays your public certificates. Click  to download a certificate. Click to delete a certificate. Click ADD CERTIFICATE to add a certificate. The certificates are downloaded DER encoded and can be uploaded only DER encoded (binary).
Personal Information
The Personal Information area on the right allows you to view and edit some of your personal data.Click the EDIT icon to see the data that can be changed.The magnifying glass icon allows you to search for another available and valid entry.
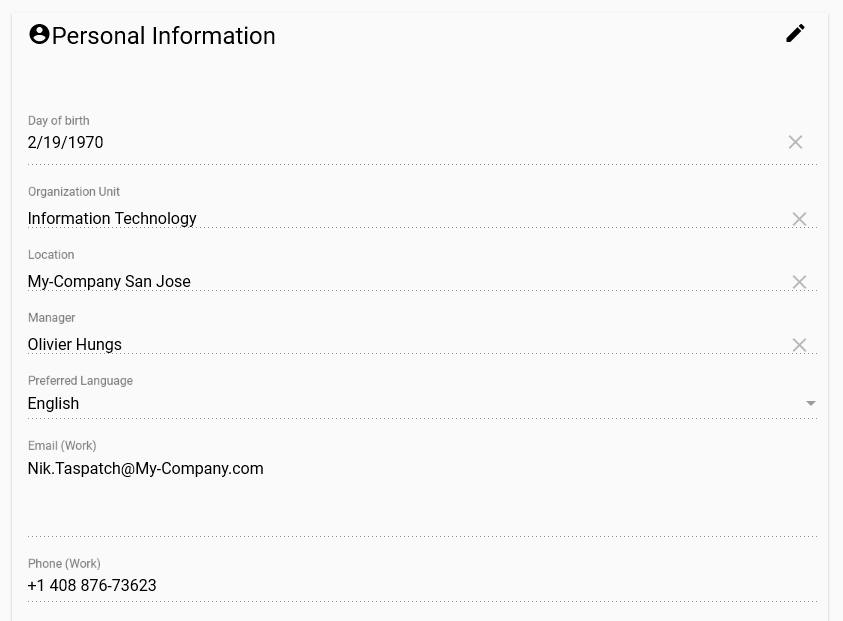
Click the SAVE icon to save your changes.Depending on policies in the DirX Identity domain, an approval workflow may be started.This is the reason why the values sometimes don’t change immediately and seem to remain unchanged.
Click the RESET icon to reject all the changes you’ve made.
My Identities
This page allows you to see your additional identities assigned to your current user.These additional identities can be functional users where you are assigned as sponsor or personas and user facets identities attached to your user as owner.
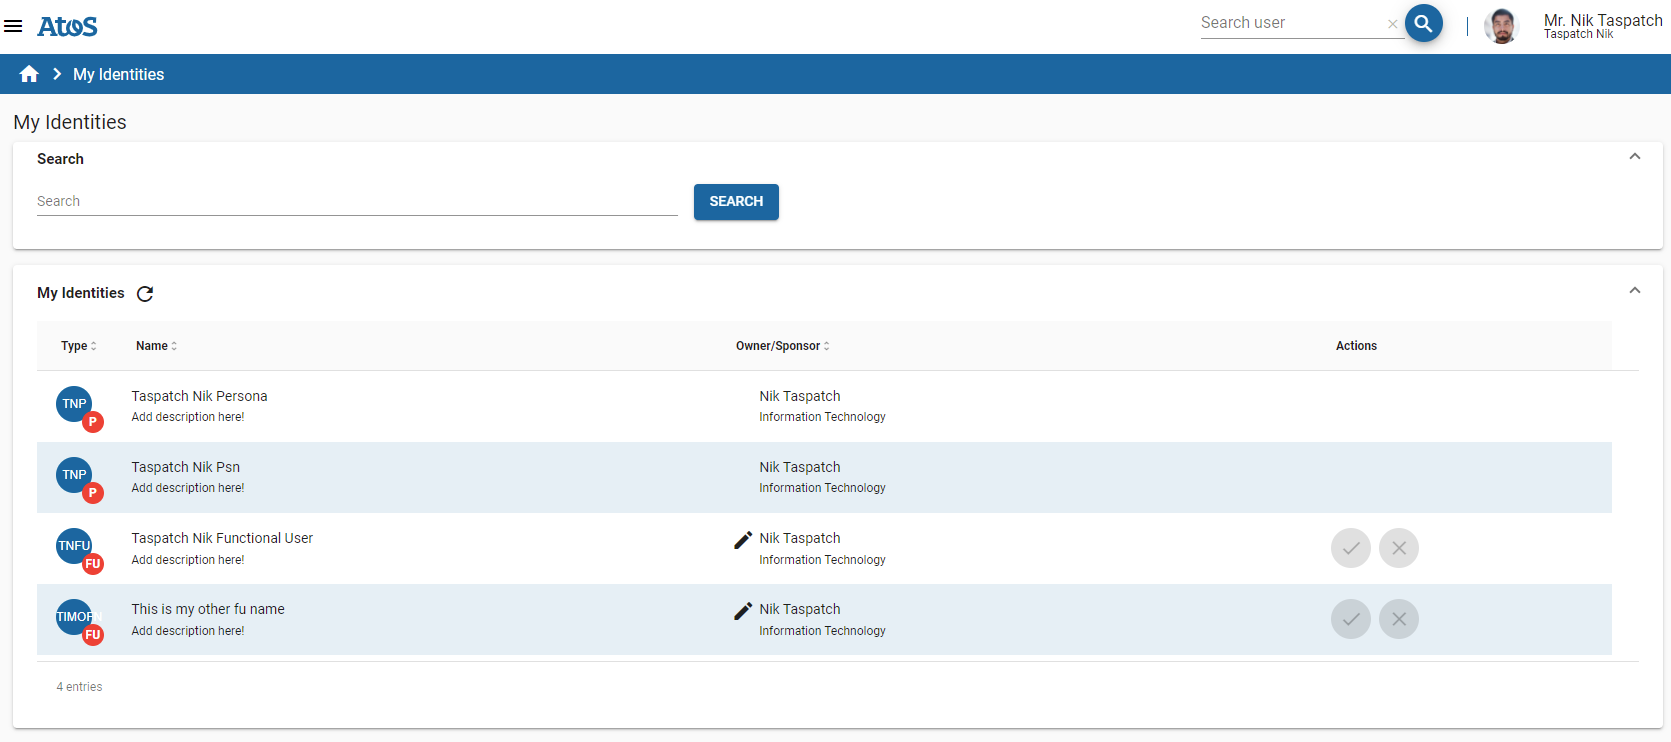
In this page, you can search through your current identities, modify your functional user sponsor attribute to assign a selected functional user to another user, and click  to create new identities.
See the chapter “Creating New Users and New Identities” for more details.
My Tasks
This page allows you to work on approval tasks individually or in bulk and inspect task details for currently active and closed tasks.
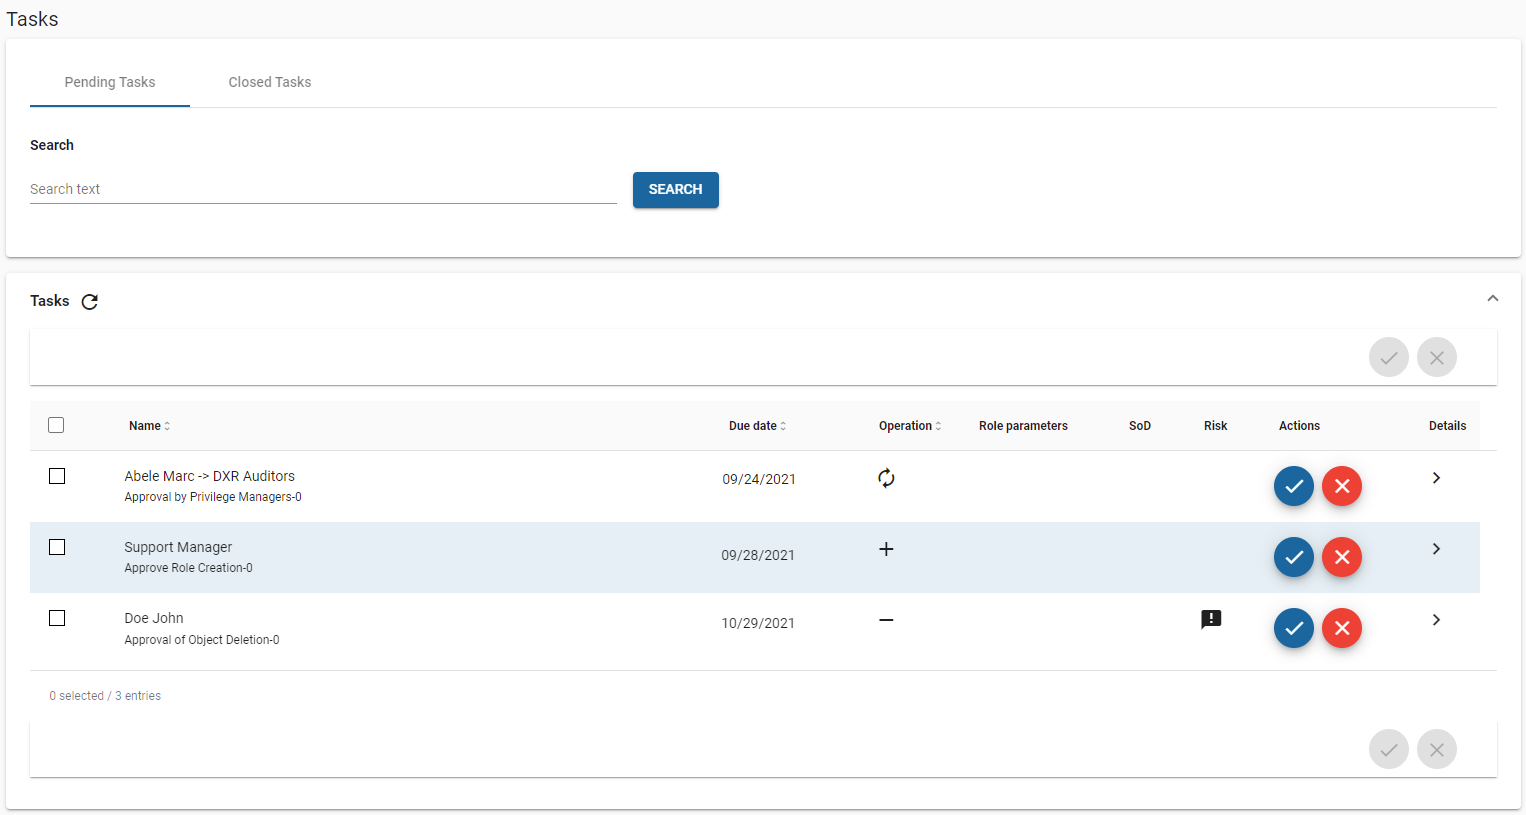
The Operation column contains a symbol for ADD (+), DELETE (-) or MODIFY (rotating arrows).
To work on multiple approval tasks at the same time, check the box to the left of each task.
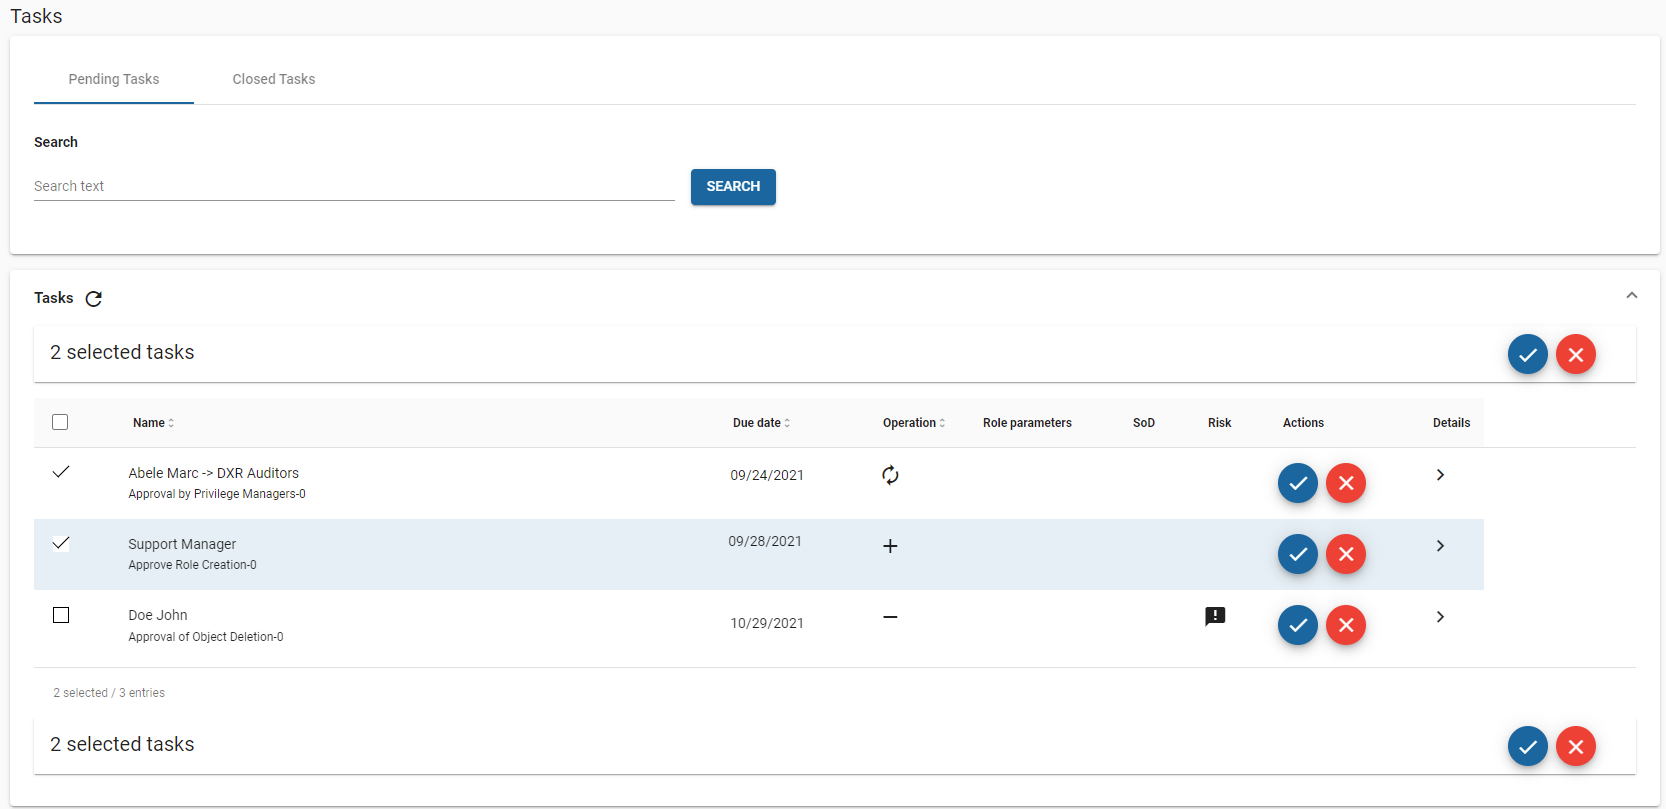
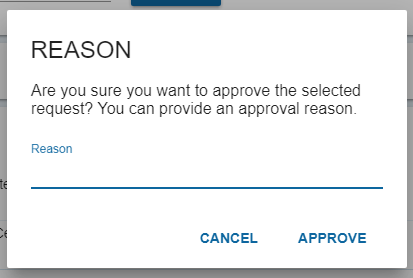
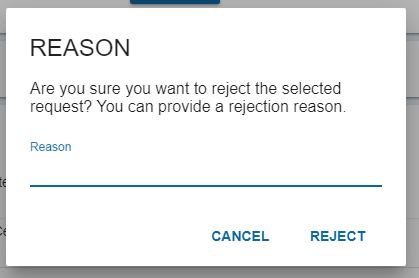
To approve a request, click  . To reject a request, click
  . A dialog is displayed where you can enter the reason (optional) for your action or cancel it.
A segregation of duty (SoD) violation with a role request is indicated with  . For more information about SoD, see the Dirx Identity Provisioning Administration Guide.
In the example dialog shown in the previous figure, the risk feature is enabled but a calculation for the future risk is not available and is indicated by  . In this case, you should look at the details page, which shows you the current risk status as well as the future risk status if this role were to be approved.
An increasing risk level for a request is indicated by  .
.
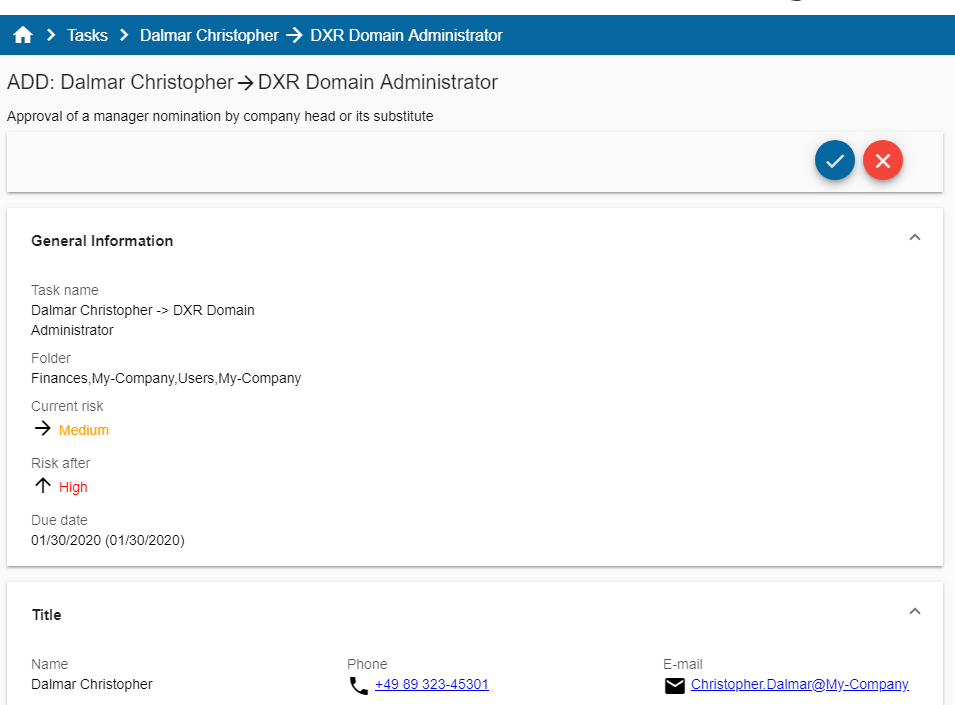
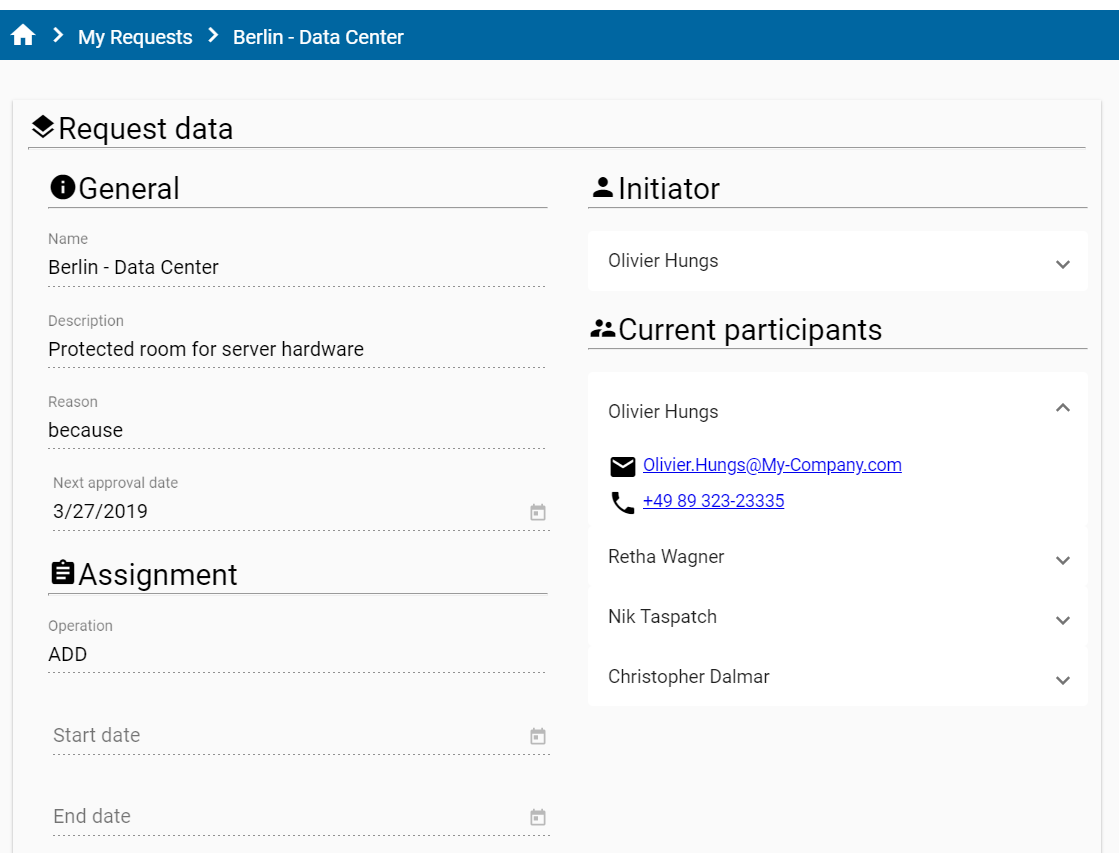
In general, you can also approve or reject requests in the details page.You can call the requestor or the affected user directly from the details page or e-mail them.
The Closed Tasks tab provides a search feature to find and inspect your closed tasks for a specific time interval.
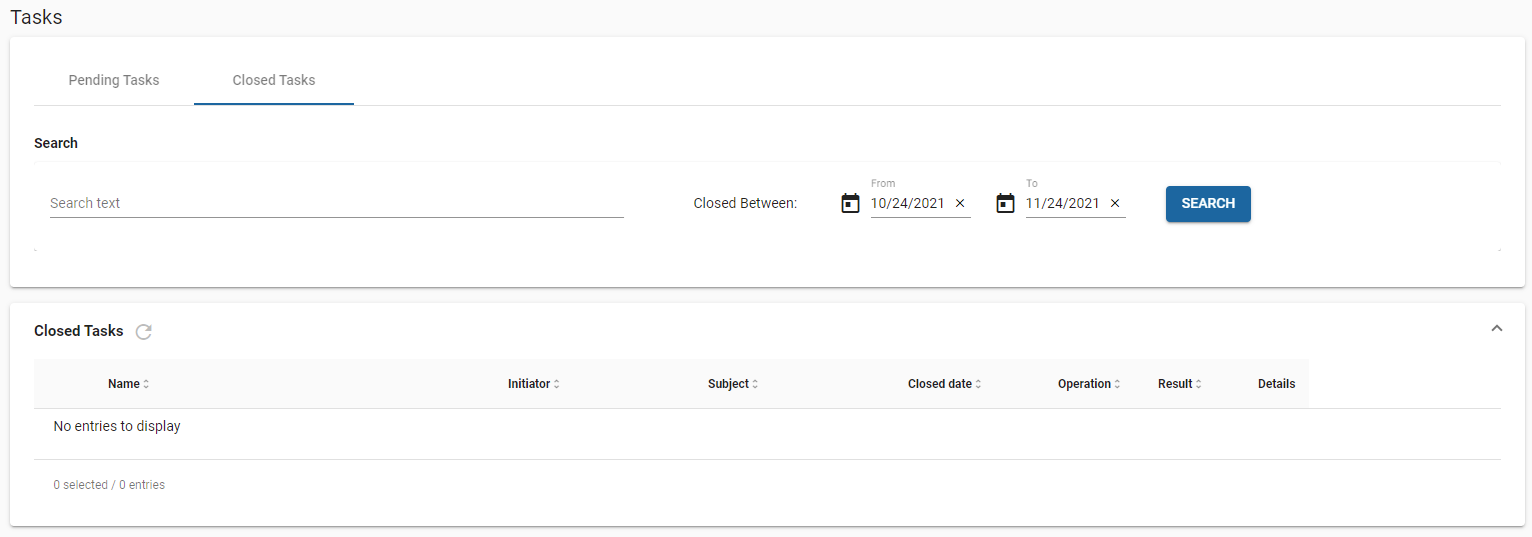
| Results may be limited to specific number from REST configuration.Make sure you provide sufficient information for the search to reduce the number of search results items. |
My Access Rights
This page shows you the list of all privileges currently assigned to you.
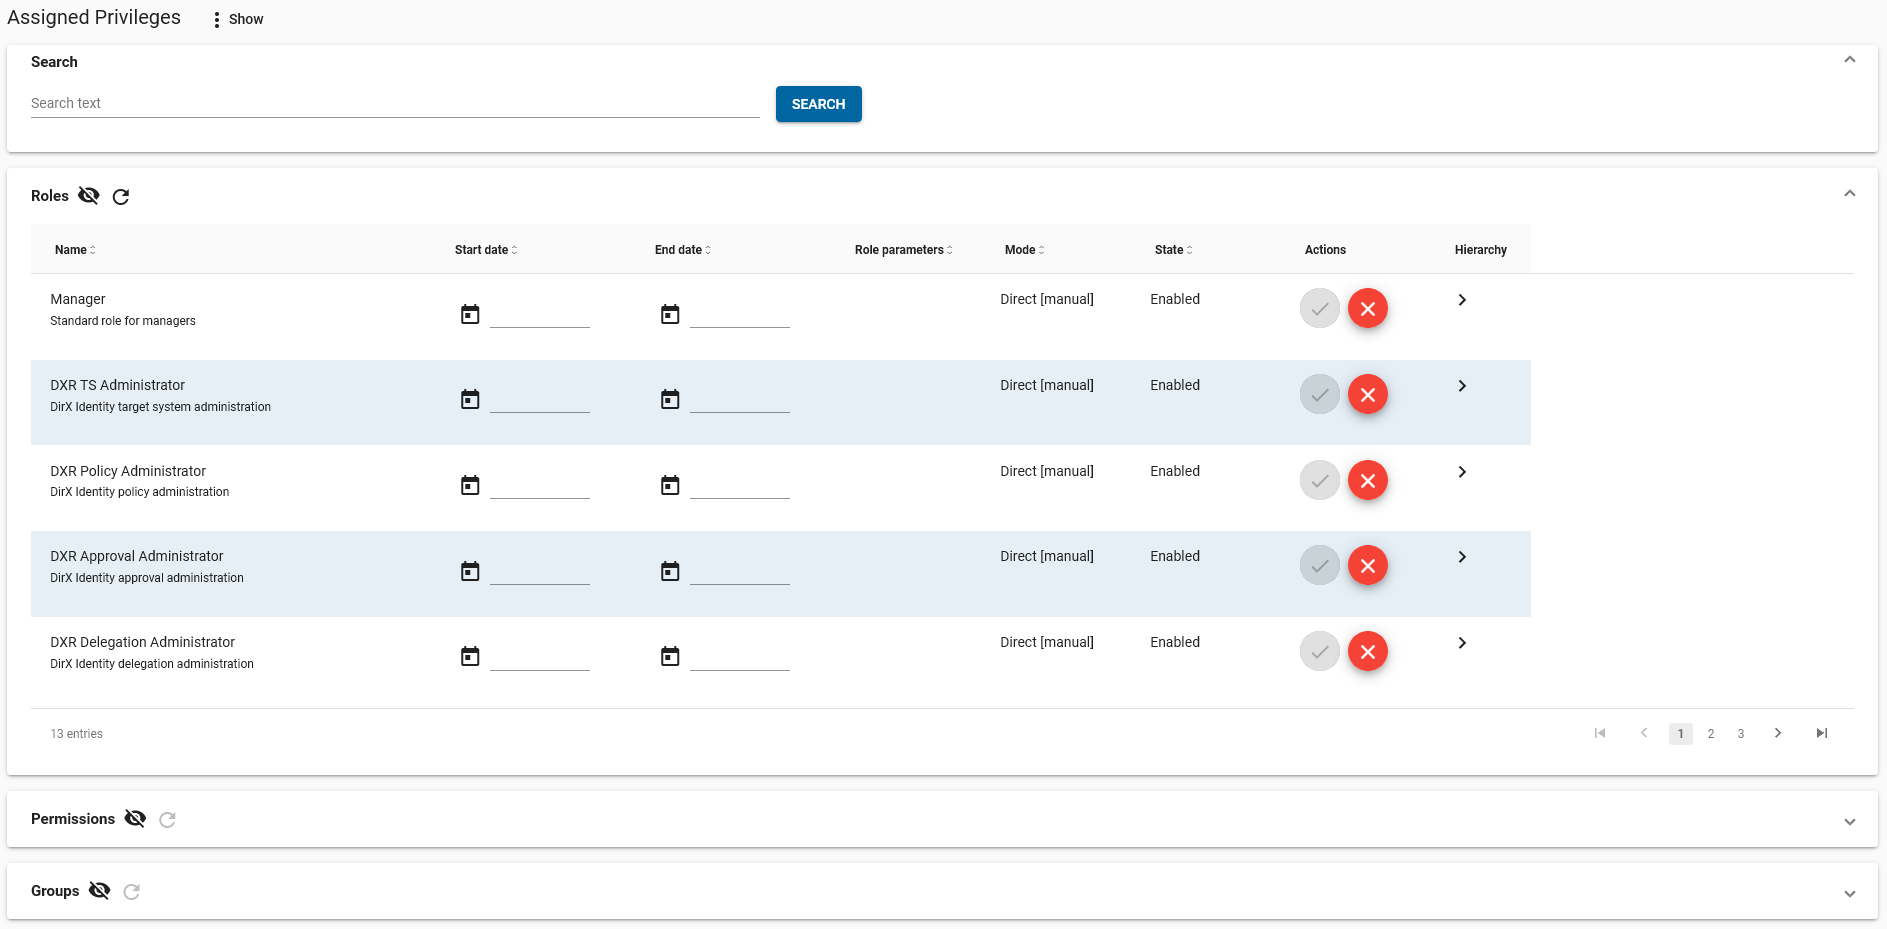
You will see a single pane for each of the configured privilege types (role, permission, group).You may need to scroll down to see the other privileges.
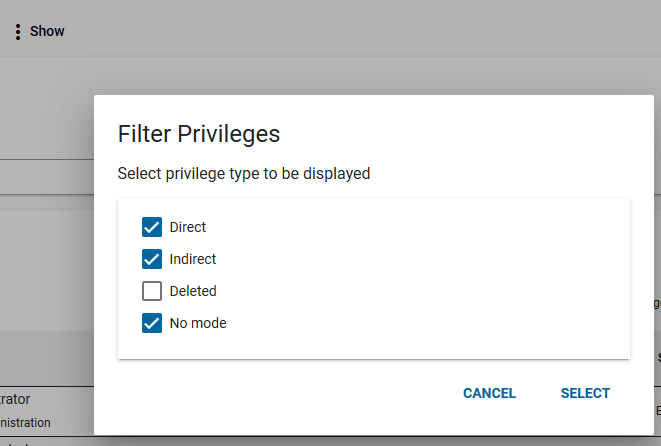
Filtering
The vertical ellipsis to the right of Assigned Privileges (Show) allows you to filter the privileges according to their mode. All available options are initially activated.
Searching / Sorting / Paging
In the Search pane at the top of the page, you can enter a search string to narrow the list of displayed privileges and then click SEARCH. The search considers the name and description fields to be case insensitive and displays the results. If you want reset your search (“search for all”), delete the search text and search again.
Sorting - click on a column header like Name or Start date to sort the results into ascending or descending order or keep them unsorted. The sorting selection is displayed as a small arrow(s) on the right side of the column header; for example this is for an unsorted column Name:

Deleting an Entry
To delete an assigned privilege, click  .
.
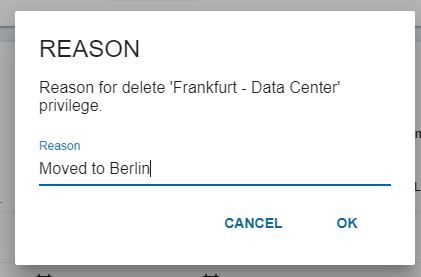
You are prompted to enter a reason for the deletion, which is optional. Click OK to continue with the delete action or click CANCEL to reject the action.
Attention: Your ability to change or delete an entry is governed by your personal privileges and/or the State of the entry. As a result, some entries may display only some of the action icons.
Editing Hierarchical DN Role Parameters
To change a hierarchical DN (HDN) Role parameter, click the pencil symbol and then navigate through the HDN to select or deselect entries in the tree.
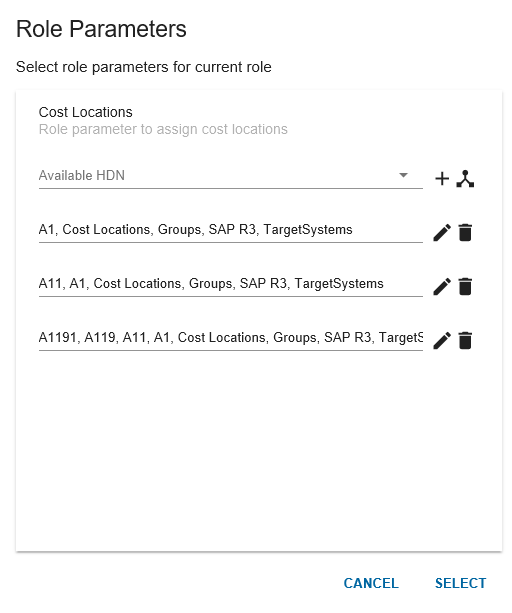
To add one or more new entries, choose the HDN from the Available HDN drop-down menu. Click the  icon to add the root of the tree directly or click the tree icon (
 ) to choose one or more entries inside the tree.
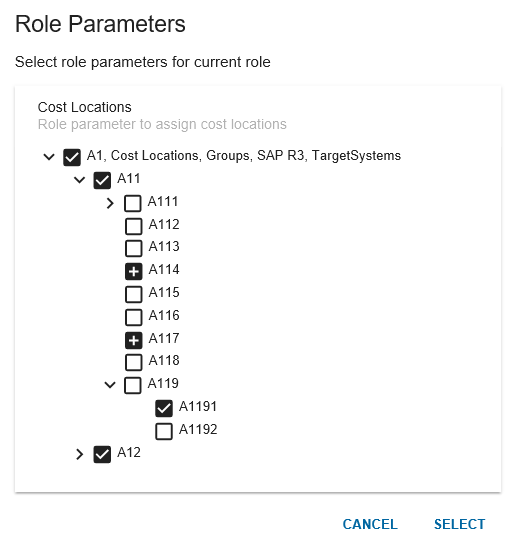
Navigate through the tree and choose one or more entries. Existing entries are marked with a  icon. New entries, to be added if you click SELECT, are marked with a icon.
For each entry, a line will be added to the Role parameters list, which you can delete with the trash can icon or edit with the pencil icon to the right of the entry. To complete the edit procedure, click SELECT to accept the changes or click CANCEL to discard any changes.
Editing Date Fields
To change the date fields, enter the date manually using the national notation for dates (for example, m/d/yyyy for English (US) or d.m.yyyy for German (DE)) or click  to open a calendar dialog where you can choose the desired date.

If you have changed the Start date, End date or the Role parameters, the  icon changes to
  and you can click it to accept the changes for the privilege. You are then prompted to enter a reason for your modification.
Requesting a New Privilege
Click  to switch to a new page with the available privileges you can request.
Attention: It doesn’t matter whether the icon covers the small  sign of the lowest pane because you can click anywhere in the top row of this pane to expand it. You don’t have to use the sign.
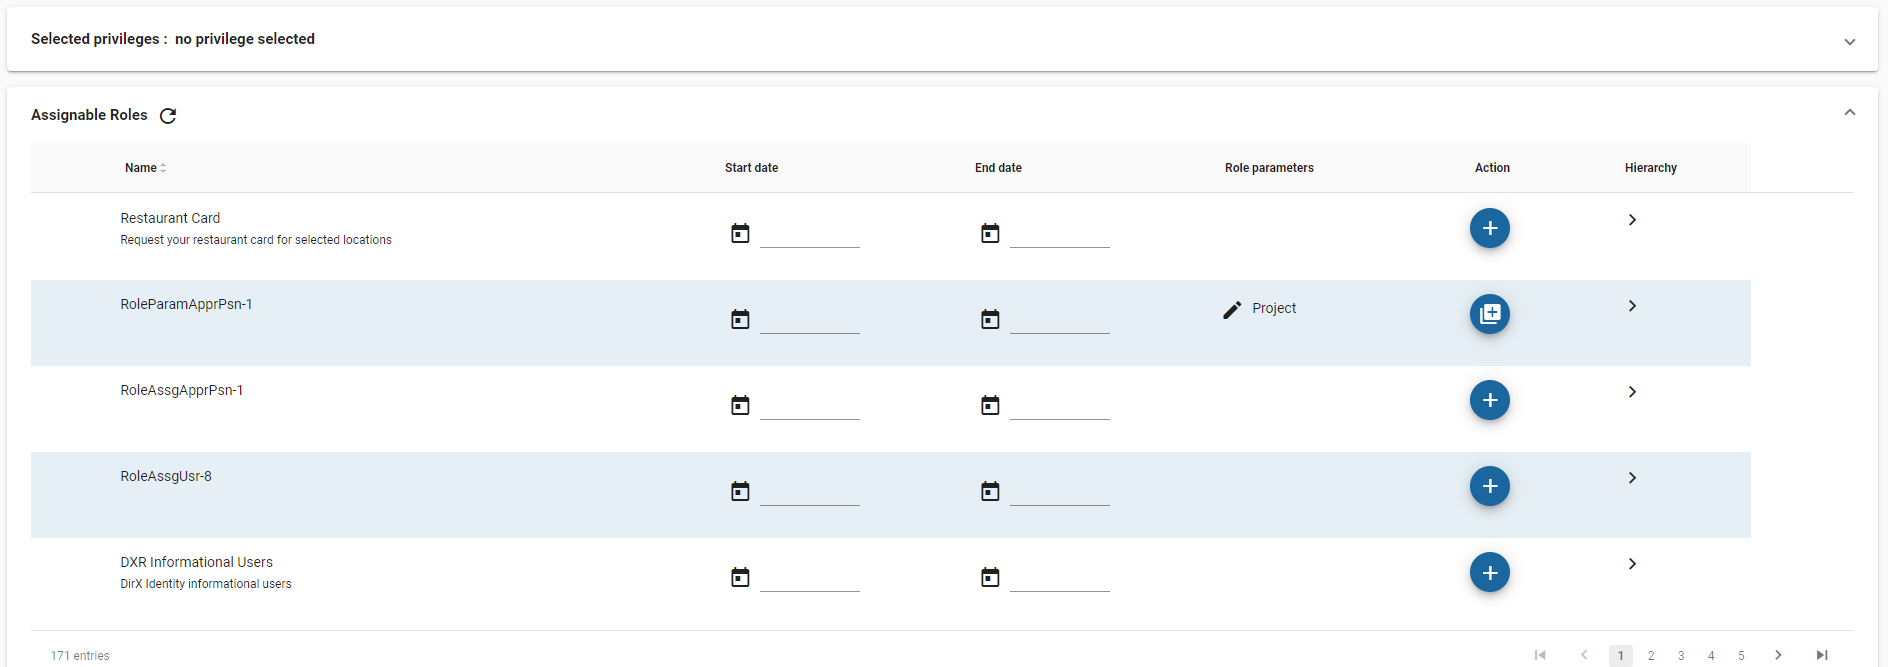
You can change the Start date, the End date or - if available - the Role parameters for a role. Click  to add the current privilege to the selected privileges list. If the current privilege allows multiple assignments, the icon looks like this:
  and does not change after the privilege is selected. To add the privilege to selected list this again, click the icon again.
To remove a privilege from the list, click  in the selected privileges list or in the original table where the privilege was selected. If the privilege is selected, the first column of the table displays
  , and if it is selected multiple times, a badge displays the number of selections for the current privilege.
After the selection is finished, the current privilege selection is disabled and you cannot modify Start date, End date or – if available – the Role parameters. To modify these attributes, you need to modify them in the selected privileges list.
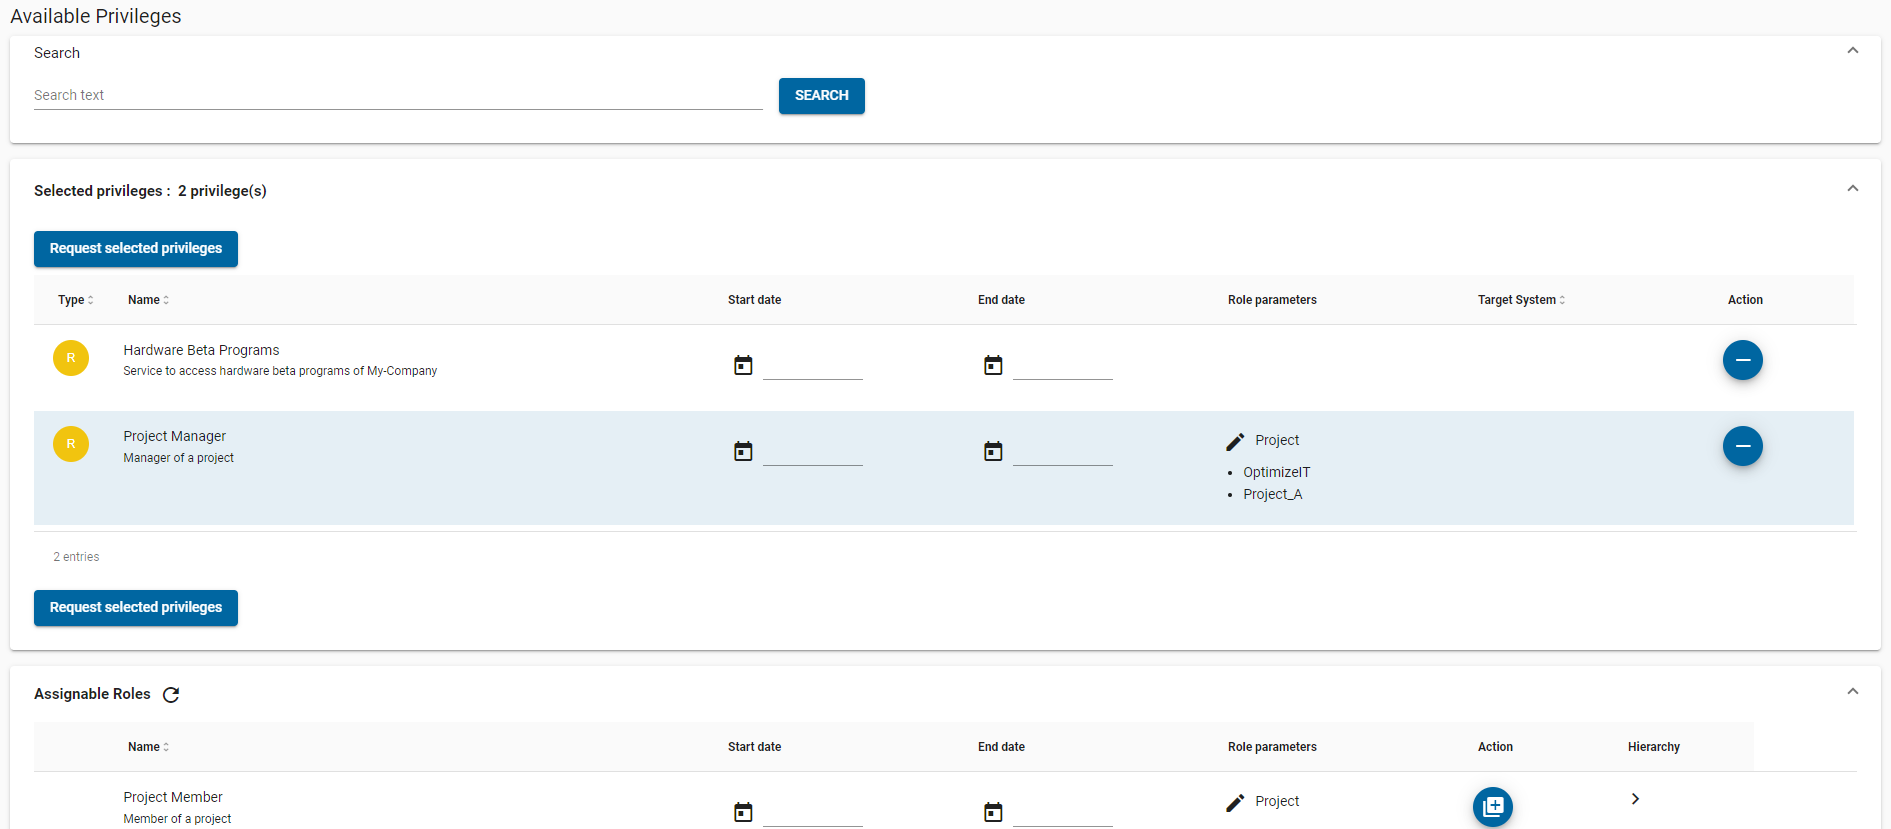
Before requesting privileges, you can modify the Start date, End date or – if available – the Role parameters in the selected privileges list and then click “Requests selected privileges” to request them. The content of the list is evaluated (checked for errors) and privileges requests are sent to the DirX Identity REST services. If the list contains errors (invalid Start date, invalid Role parameters), no privilege is requested.
Details: To display the details of a role, click on the role name or on the arrow (>) to the right.If you have made changes to dates or role parameters, you are warned that you will lose the changes if you leave the current page.
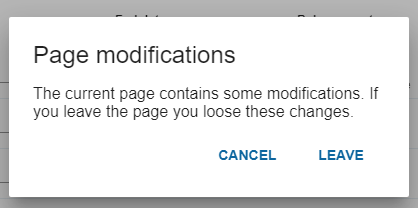
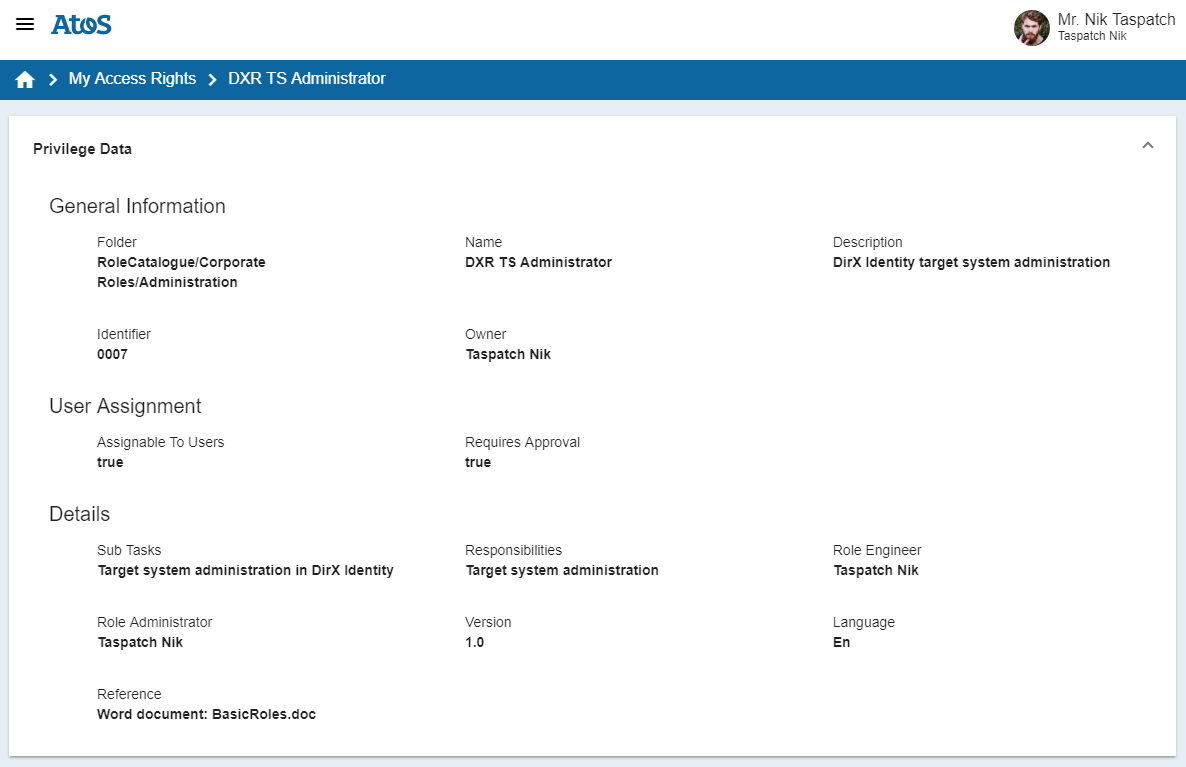
Click My Access Rights in the navigation header to return to that page from the privilege details.
My Requests
This page allows you to manage the requests that are currently in approval for you.These requests are for roles, permissions, groups, and profile changes.
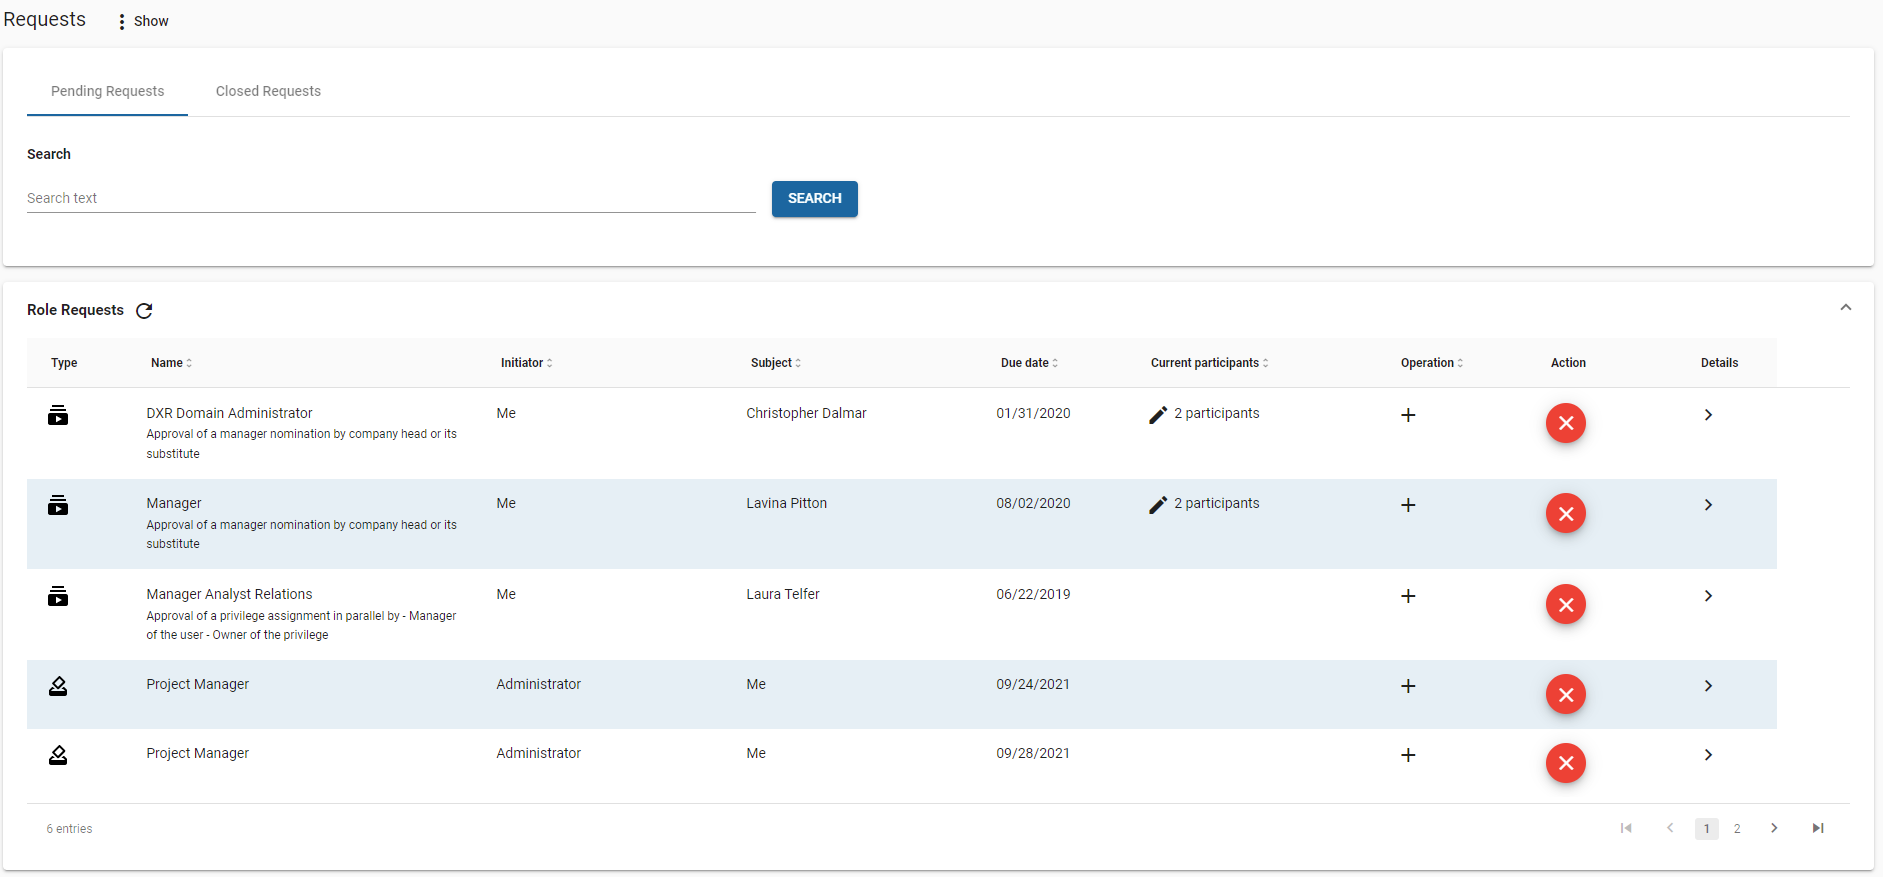
The Initiator column displays the user who initiated the request.For your own initiated request, the initiator is displayed as “Me”; otherwise, the initiator’s full name is displayed.
The Subject column contains the affected user of the request.
The Due Date column displays the due date of the request.
The Current participants column displays the number of approvers for current requests. Details about the participants are available on the Details page.
If the access policy allows it, you can change one or more participants in a request:
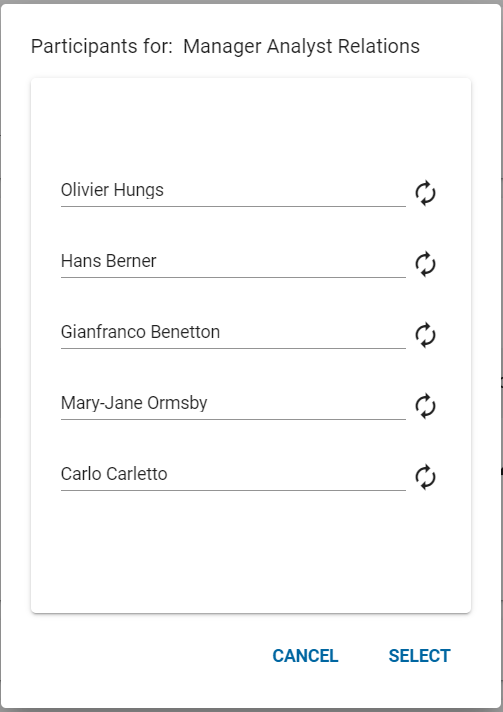
| You cannot add, edit or remove a participant. You can only replace a participant. |
The Operation column contains an icon for ADD (+), DELETE (-) or MODIFY (rotating arrows).
If there is a segregation of duty violation with this role, is displayed in the last column.
The Action column contains a cancel request action button that allows you to cancel your own requests (requests where you are the initiator).
The Details column contains a link to a Details page that provides more information about request. This option may not be available for some requests.
Filtering - the vertical ellipsis to the right of Requests (Show) allows you to filter the requests according to their type: Requests for me and Requests as intiator. All options are initially activated.
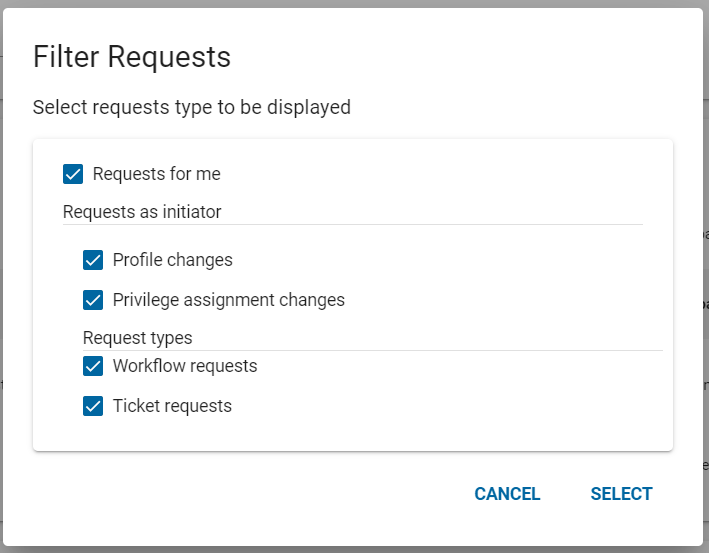
Requests for me – shows requests where the current user is the subject.
Requests as initiator – shows requests where the current user is the initiator.These requests can be Profile changes or Privilege assignment changes. Workflow requests or Ticket requests can also be filtered.
The tab Closed Requests provides a search function through your closed requests.You can provide a search text and a time interval from the past.
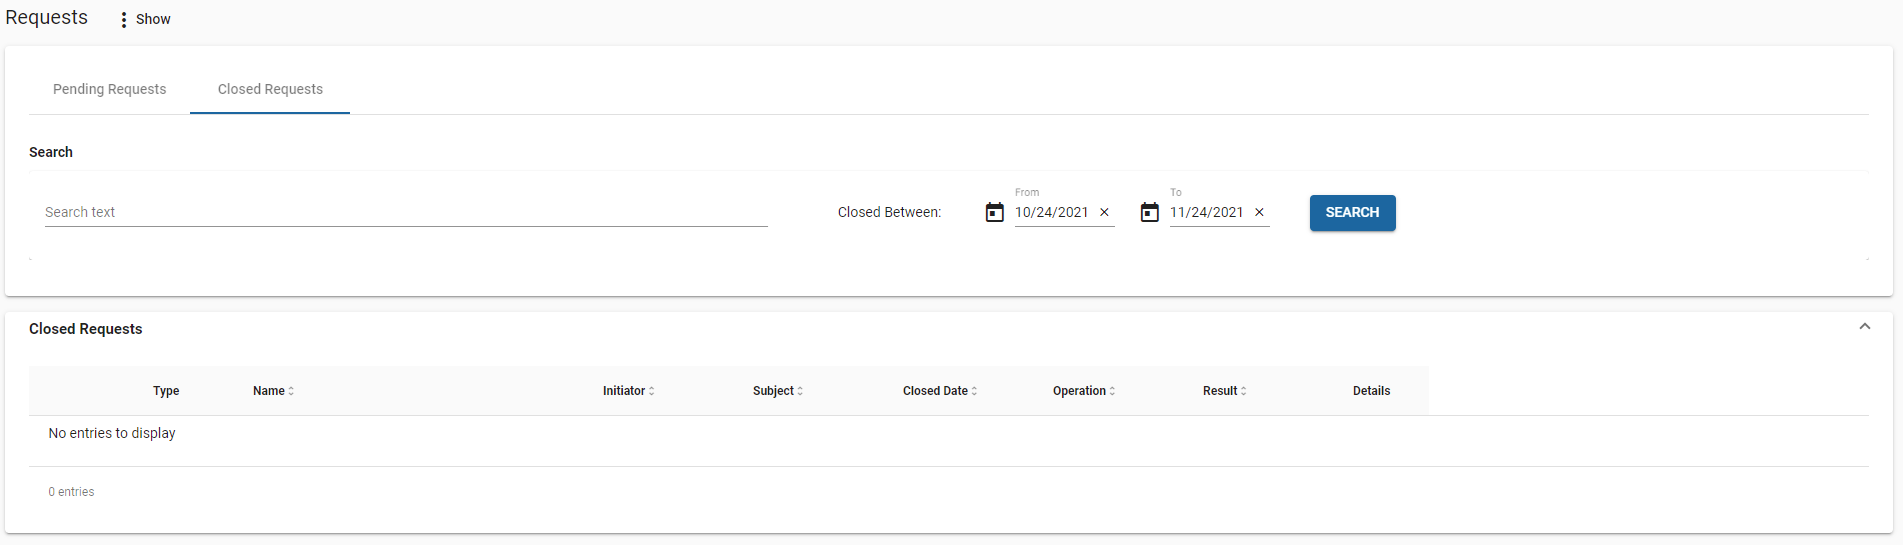
My Team
This page allows you to view and manage your team members.It displays a list of all your team members.
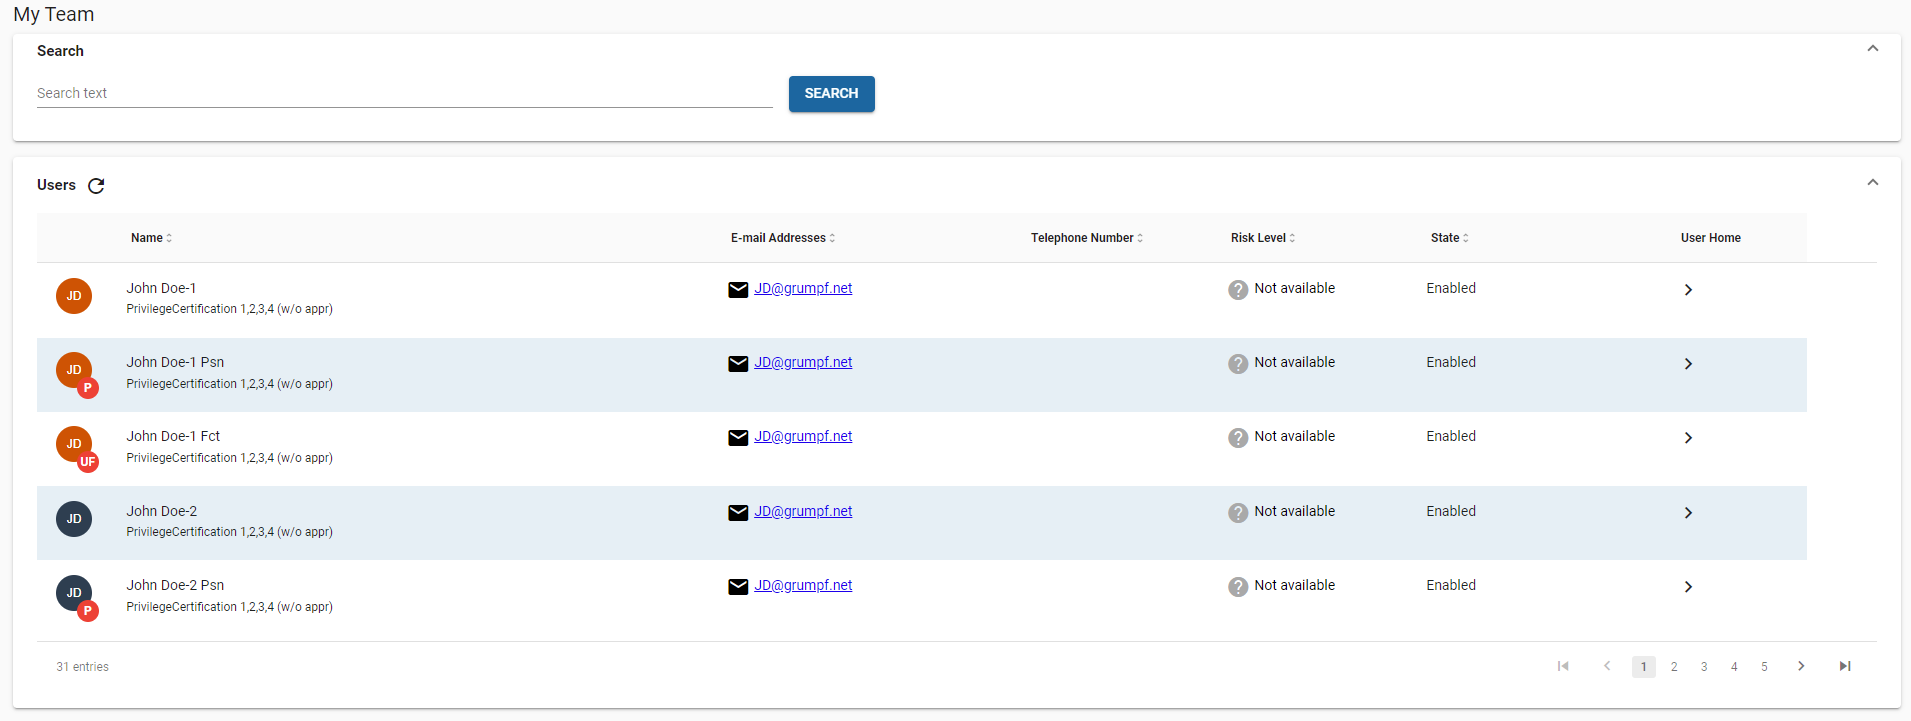
To switch to the user’s home page, click the circle that contains the user’s initials, the user’s name, or the arrow on the right.
User Home Page
From the user home page, you can edit the user profiles, manage the access rights of the user, or manage the requests of the user, depending on your personal privileges.
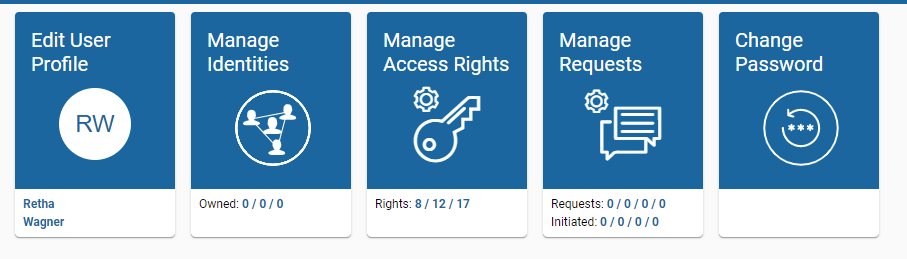
The user’s name is displayed in the blue ribbon at the top of the page. You can always click on the user’s name in the My Team section to go back to this user’s home page.
Edit User Profile allows you to edit some of the user’s personal data.See the section “My Profile” for a detailed description of all the options.
Manage Identities allows you to view available identities assigned to current user such as functional users where selected user is sponsor and personas and user facets where the selected user is assigned as owner.
Manage Access Rights allows you to view, add and modify access rights of the user.See the section “My Access Rights” for a detailed description of all the options.
Manage Requests allows you to view the currently running requests for the user.See the section “My Requests” for a detailed description of all the options.
Change Password allows you to change the password for the user.See the section “Change Password” for a detailed description of this option.
My Delegations
This page allows you to manage your current delegations and to view the delegations assigned to you.
Note: Delegations from the Business User Interface are not compatible with delegations available in DirX Identity Web Center.These delegations are visible only in Business User Interface and DirX Identity Manager.
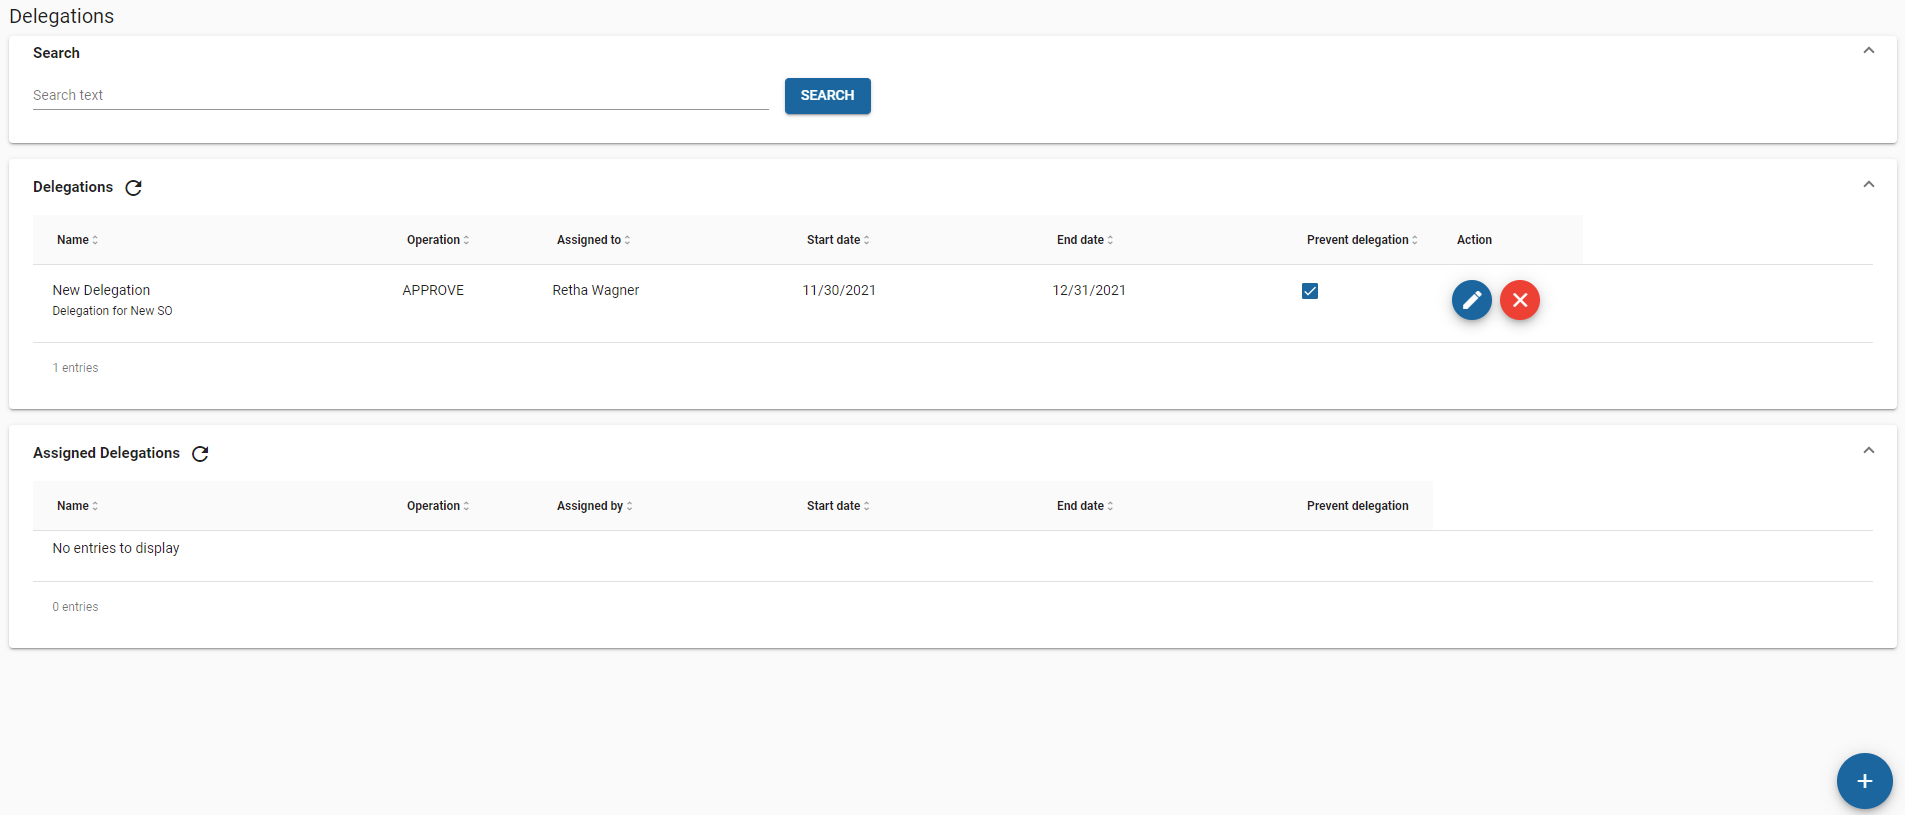
You can edit the delegation parameters of delegations assigned to other users and delete the delegation.
Click to create a new delegation.
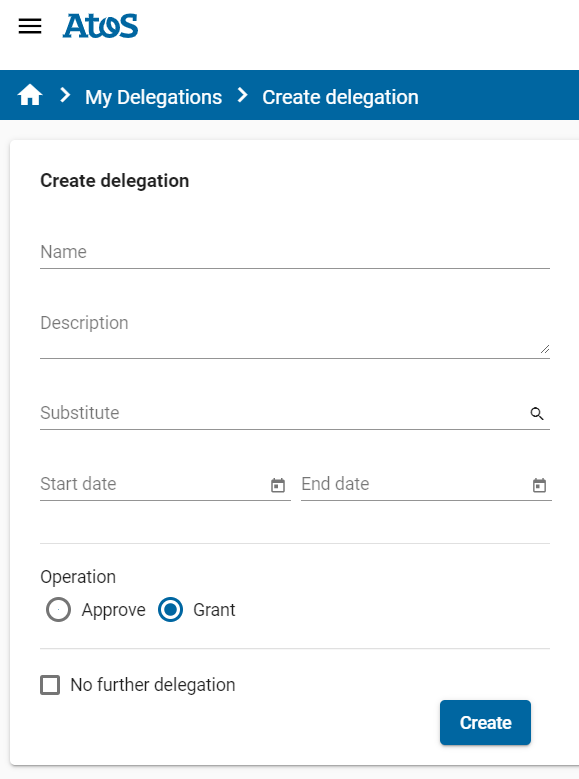
When creating a new delegation, the following fields are available:
-
Name – mandatory - name of the delegation.
-
Description – optional – description of the current delegation.
-
Substitute – mandatory – user to assign the current delegation.
-
Start date, End date – optional – delegation duration.
-
Operation – mandatory – delegation type:
-
Approve – delegate approve rights
-
Grant – delegate all rights
-
-
No further delegation – optional – the current delegation cannot be further delegated.
Click Create to save current values and create a new delegation.
| In some situations, the error Error: Circular delegation” can occur when the delegation is created.This error indicates that an existing delegation is already assigned to you by substitute, and you cannot delegate back this delegation. |
Change Password
This page allows you to change your current password with a new password.The new password must comply with DirX Identity Password Policy.
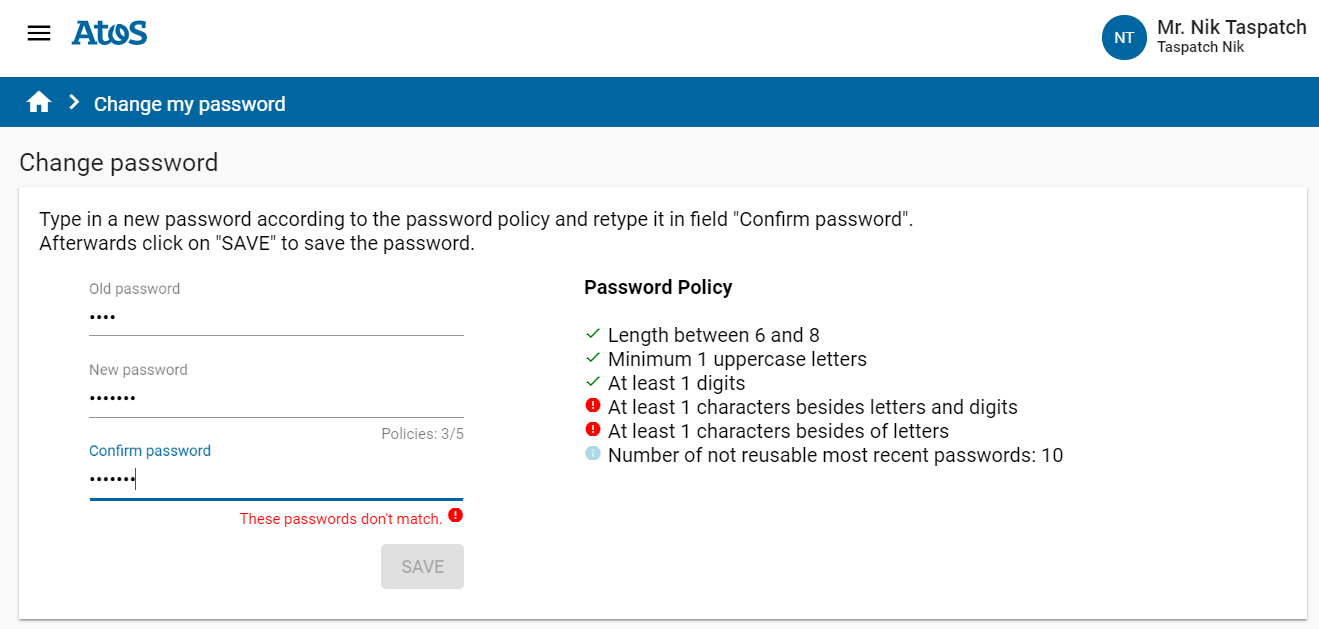
The current user must provide the old password followed by the new password and a confirmation of it.
The password policy compliance list available to DirX Identity is displayed on the right side of the page.Some password policies are evaluated by the application (for example, “Length between 6 and 8”) and some policies are evaluated by the REST service (for example, “Number of not reusable most recent passwords”).If the new password complies with application password policy checks and the confirmation of the new password matches, the user can change the password.
If Windows Password Complexity is enabled in Active Directory, an extra policy will be added to the BUI list.
The validation on the client side consists of three parts that need to be met:
Password length – this value integrated with the “custom” length policies. If there are any other policies set, the most restrictive are imposed.
For example, a Windows password policy has a minimum length of 8 characters while a custom policy requires a minimum length of 5 characters. Only the 8-character requirement will be active.
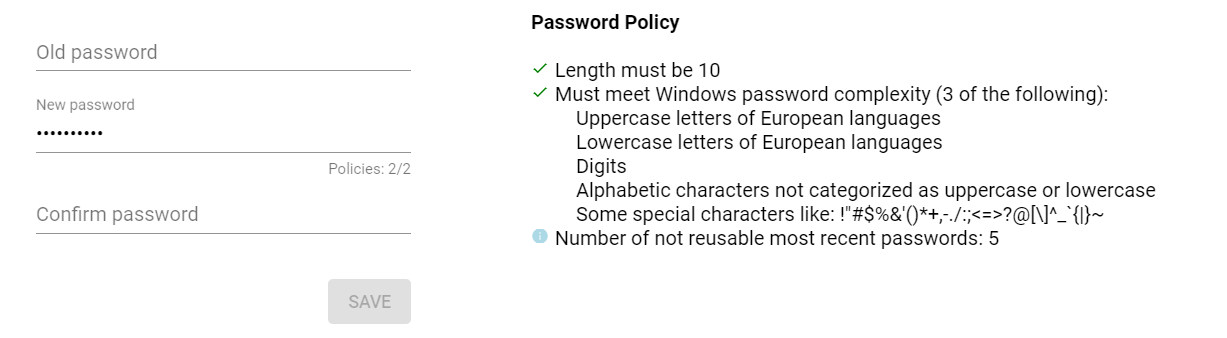
Restricted strings – a password cannot contain certain texts like the username or user ID.If these texts are entered, the Windows password policy is invalidated.
The password must meet three of the following conditions:
-
Contains an uppercase letter
-
Contains a lowercase letter
-
Contains at least one-digit character
-
Contains at least one special character: !"#$%&'()*+,-./:;<=>?@[\]^_`\{|}~
-
Contains at least one other alpha-numeric character
Certification Campaigns
This feature allows you to execute tasks in a running Certification Campaign.The application displays all running Certification Campaigns where current user has tasks (approve or reject) and DirX Identity Access Policy allows to view and modify running campaigns tasks.
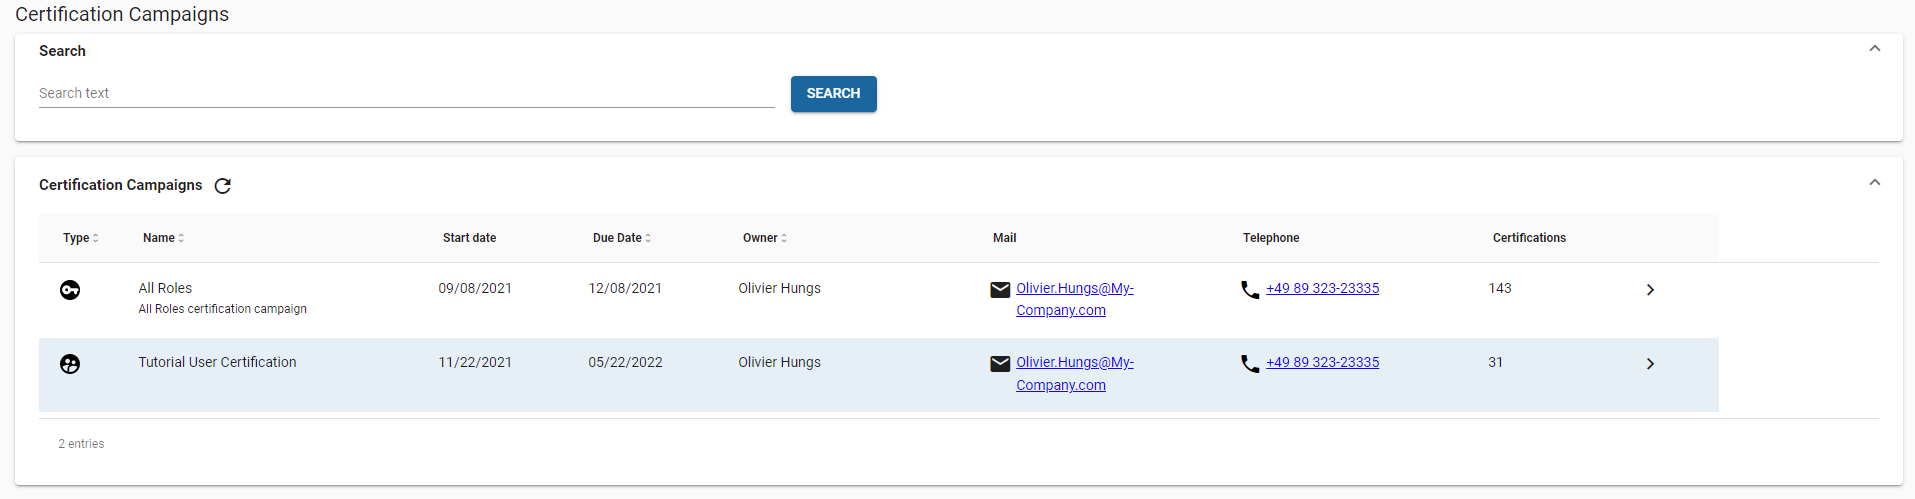
The campaign table shows the following information:
-
Type – the campaign type: User Certification or Privilege Certification.
-
Name – the name and description of the campaign.
-
Start date – the start date of the campaign.
-
Due date – the due date of the campaign: when the campaign ends and changes are applied.
-
Owner – the name of the campaign owner.
-
Mail – the mail of the campaign owner.
-
Telephone – the phone number of the campaign owner.
To navigate to a campaign, click a campaign name or the arrow from the last column.
A Certification Campaign page displays all subjects of the campaign where the current user has tasks. The campaign table shows following information:
-
Name – the name of the subject (privilege name or username).
-
Folder – the location of the subject (for Privilege Certification Campaigns).
-
Department – the department of the subject (for User Certification Campaigns).
-
Due Date – the date at which the subject must be certified.
-
Completed – the number of completed tasks and total number of tasks.
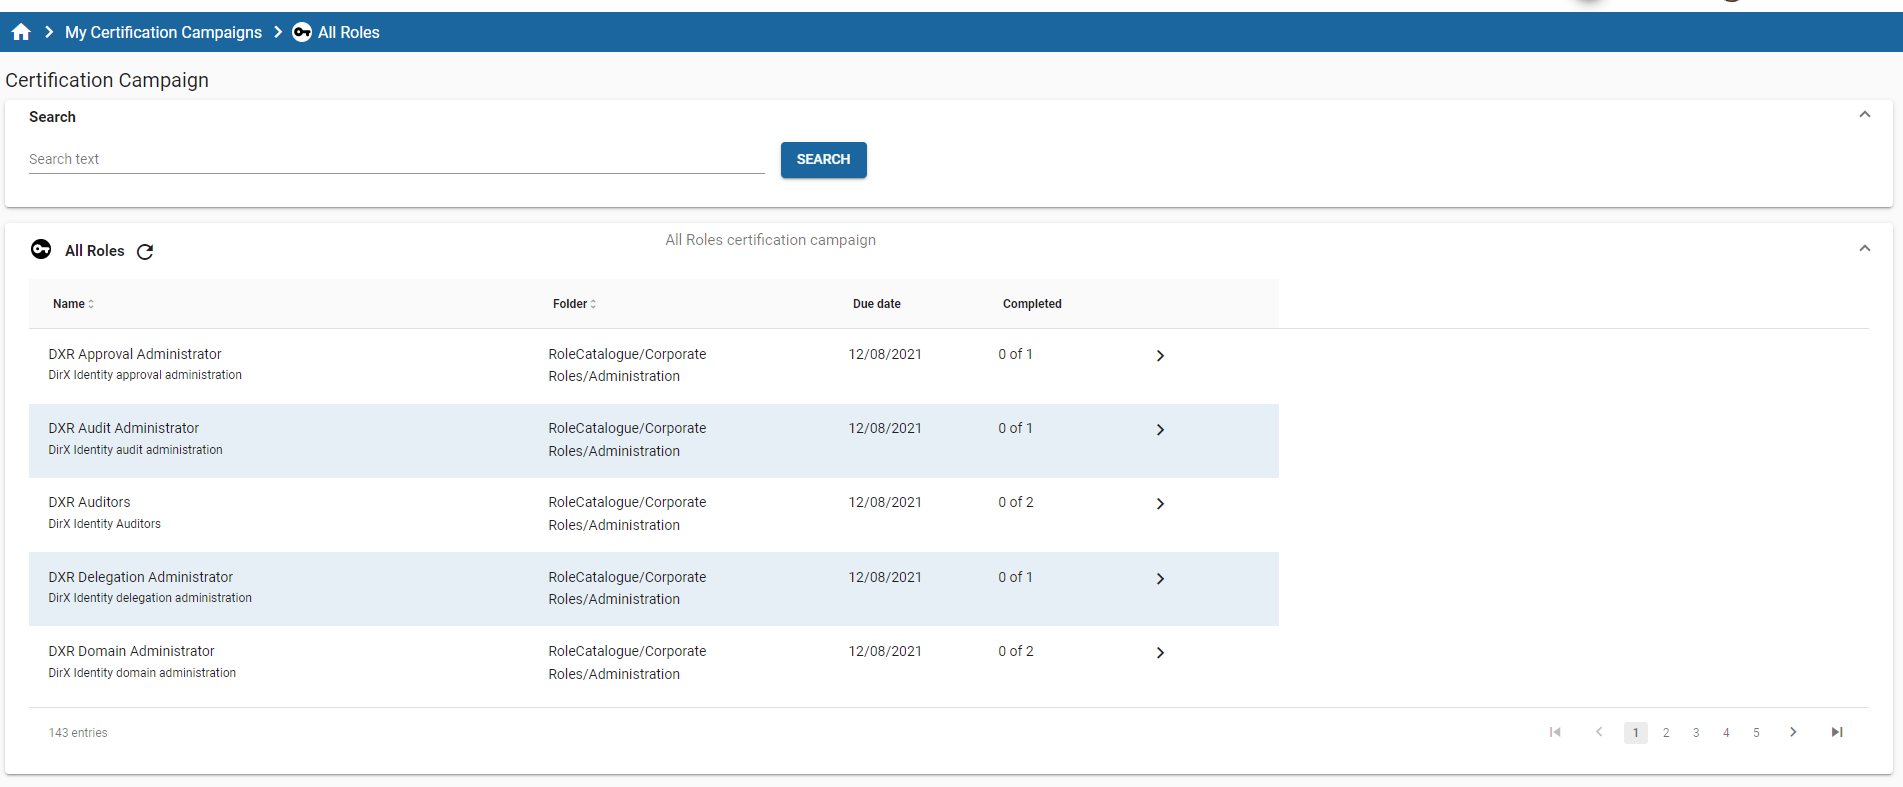
To navigate to the certify page, click the subject name or the arrow from the last column.
The Certify page displays different content based on the campaign type:
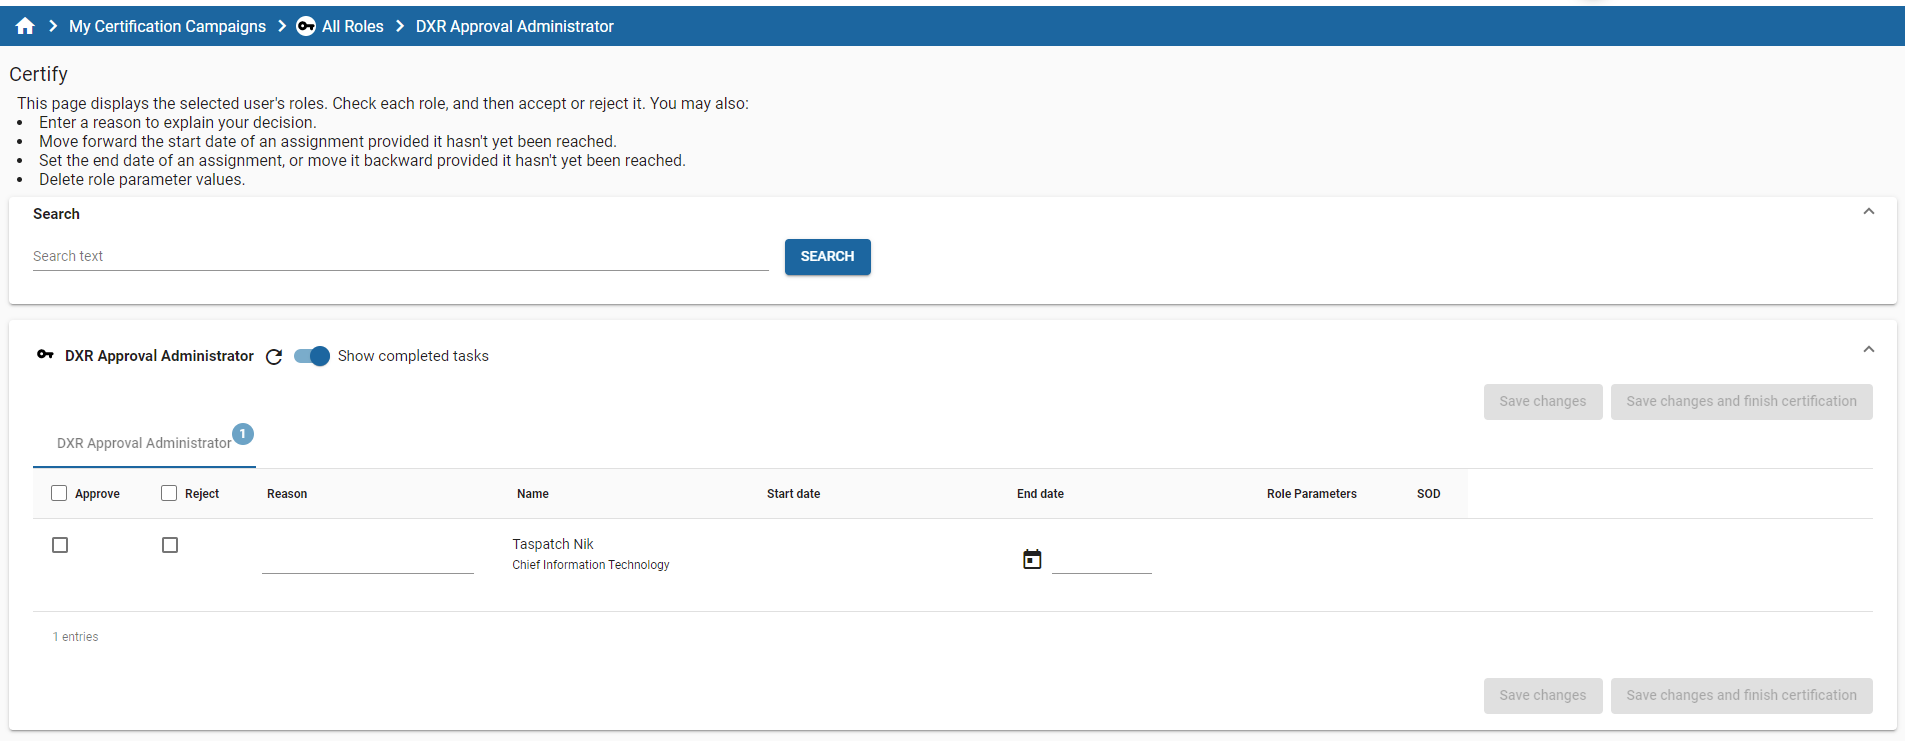
For Privilege Certification Campaign, the certify page contains a list of all users with current privilege.
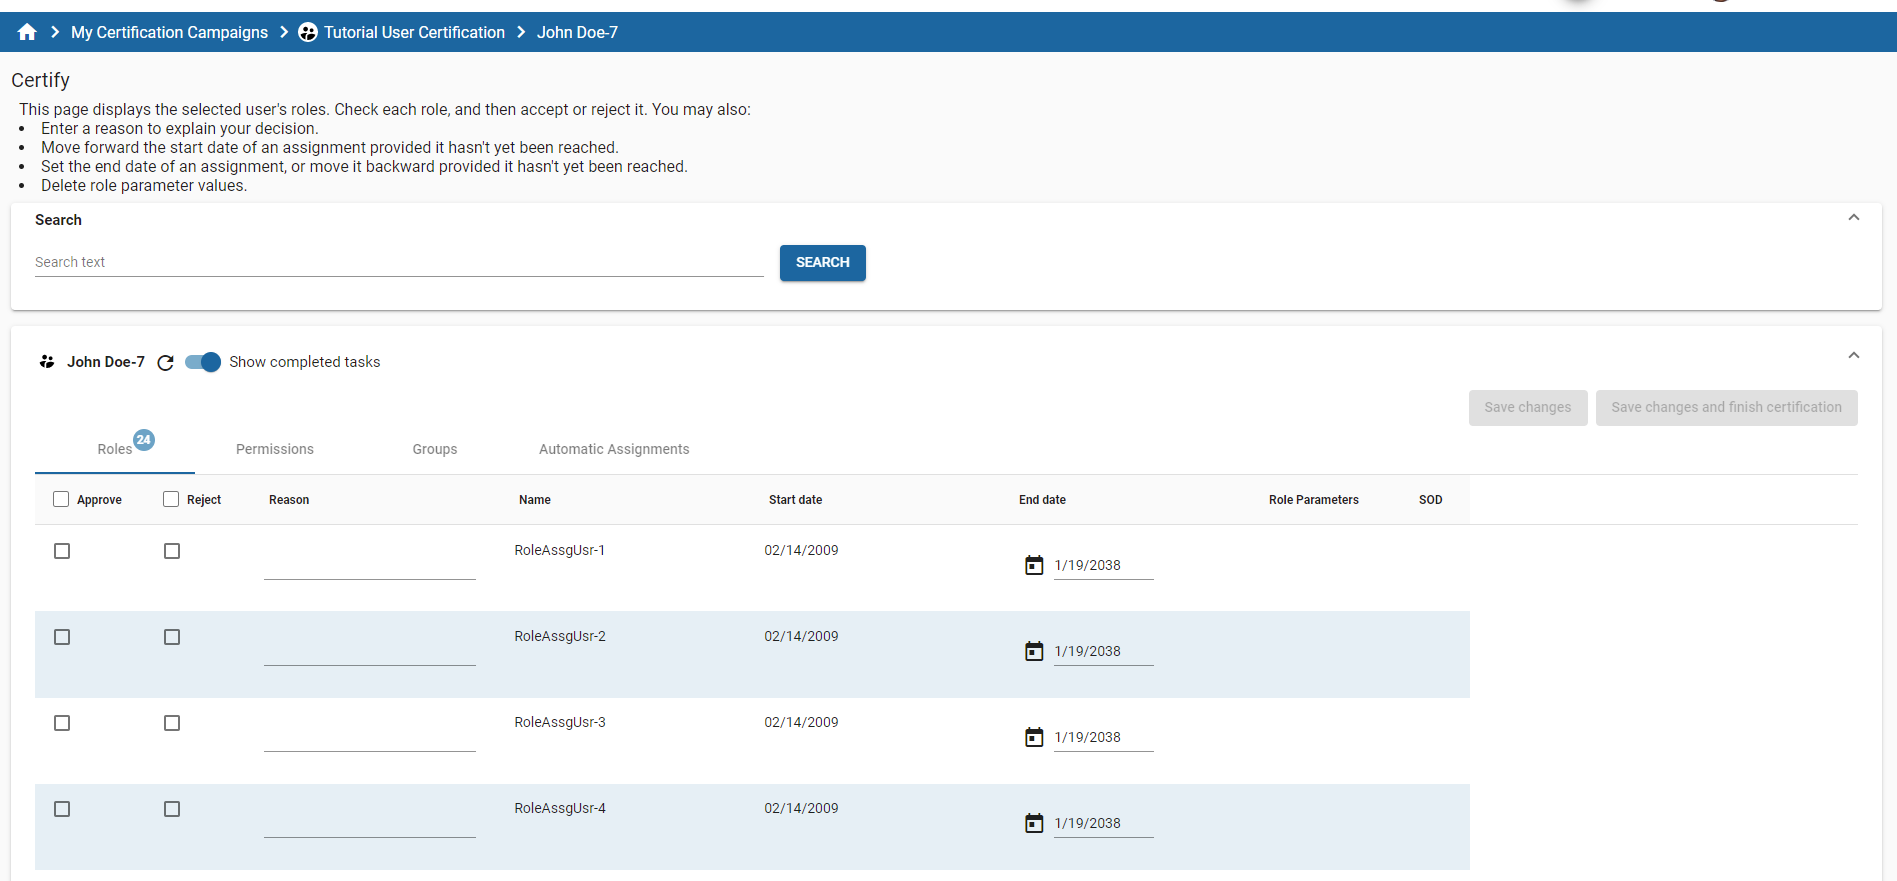
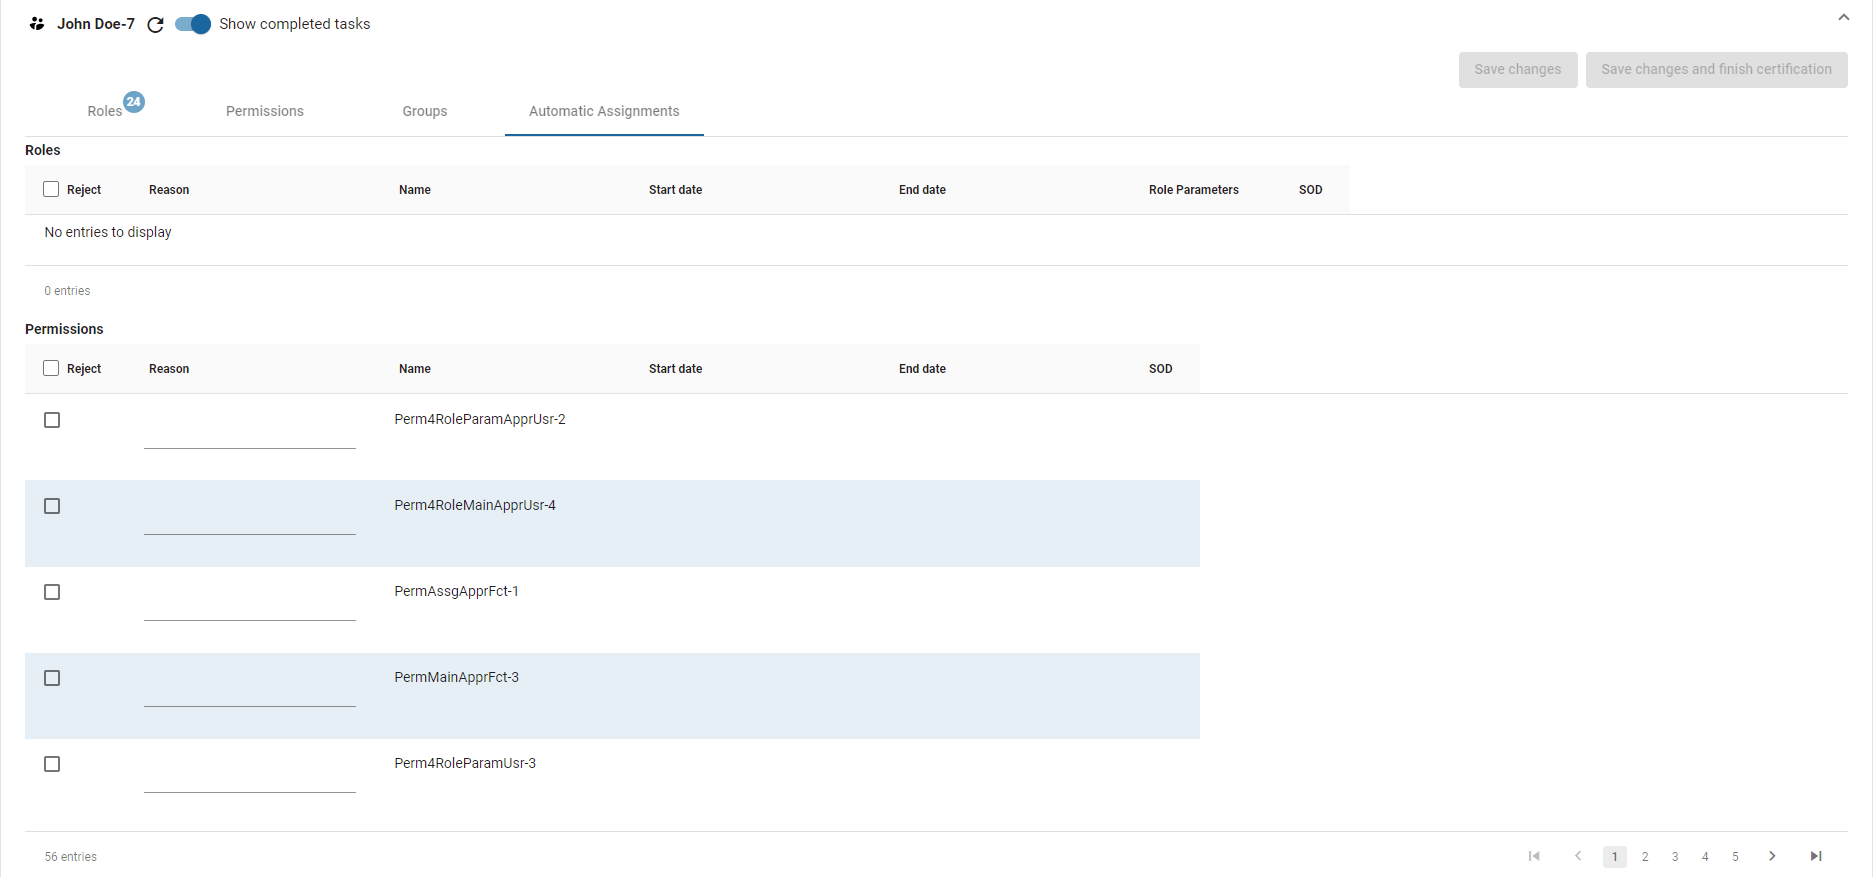
For User Certification Campaign, the certify page contains multiple lists of all privileges assigned to current user and are part of the campaign. The page contains tabs for each privilege type: roles, permissions and groups and privileges which are assigned automatically (by rule, by BO, etc.).
| Automatic Assignments (roles, permissions, and groups) are not directly part of the Certification Campaign. You have the option to propose to remove an automatic assignment. The “reject” option is considered by the Certification Campaign but no executed at the end of the campaign. |
For both campaign type (Privilege or User Certification Campaign) you can certify available entries:
-
You can approve or reject an entry.
-
You can provide a reason for your choice.
-
You can modify an assignment’s parameters, if they are available, under the following conditions:
-
Move forward the start date of an assignment provided it hasn’t yet been reached.
-
Set the end date of an assignment or move it backward provided it hasn’t yet been reached.
-
-
Delete role parameter values.
-
You can approve or reject all visible entries with a click on the check box from approve or reject column.
-
You can your Save changes.Certify one or more entries for tables and click Save changes button to commit your changes to server.
-
You can finish a subject certification by completing all the tasks.You cannot finish a certification until all entries are certified (approved or rejected).The badge on the header tab displays how many tasks are still open.
| automatic assignments are not part of the subject certification.You do not need to certify automatic assignments. |
| A highlighted entry (in a light blue color) shows that the entry was modified and the changes are not committed to DirX Identity. |
When certification successfully finishes, the application is redirected to the subjects list, or if no subjects are available, to the campaigns list.
User Management
This module offers a way to view and access all the people connected to the DirX database, including members, suppliers, and customers.
There are two search dialogs available to filter the lists: simple and advanced.The following figure shows the simple search dialog:
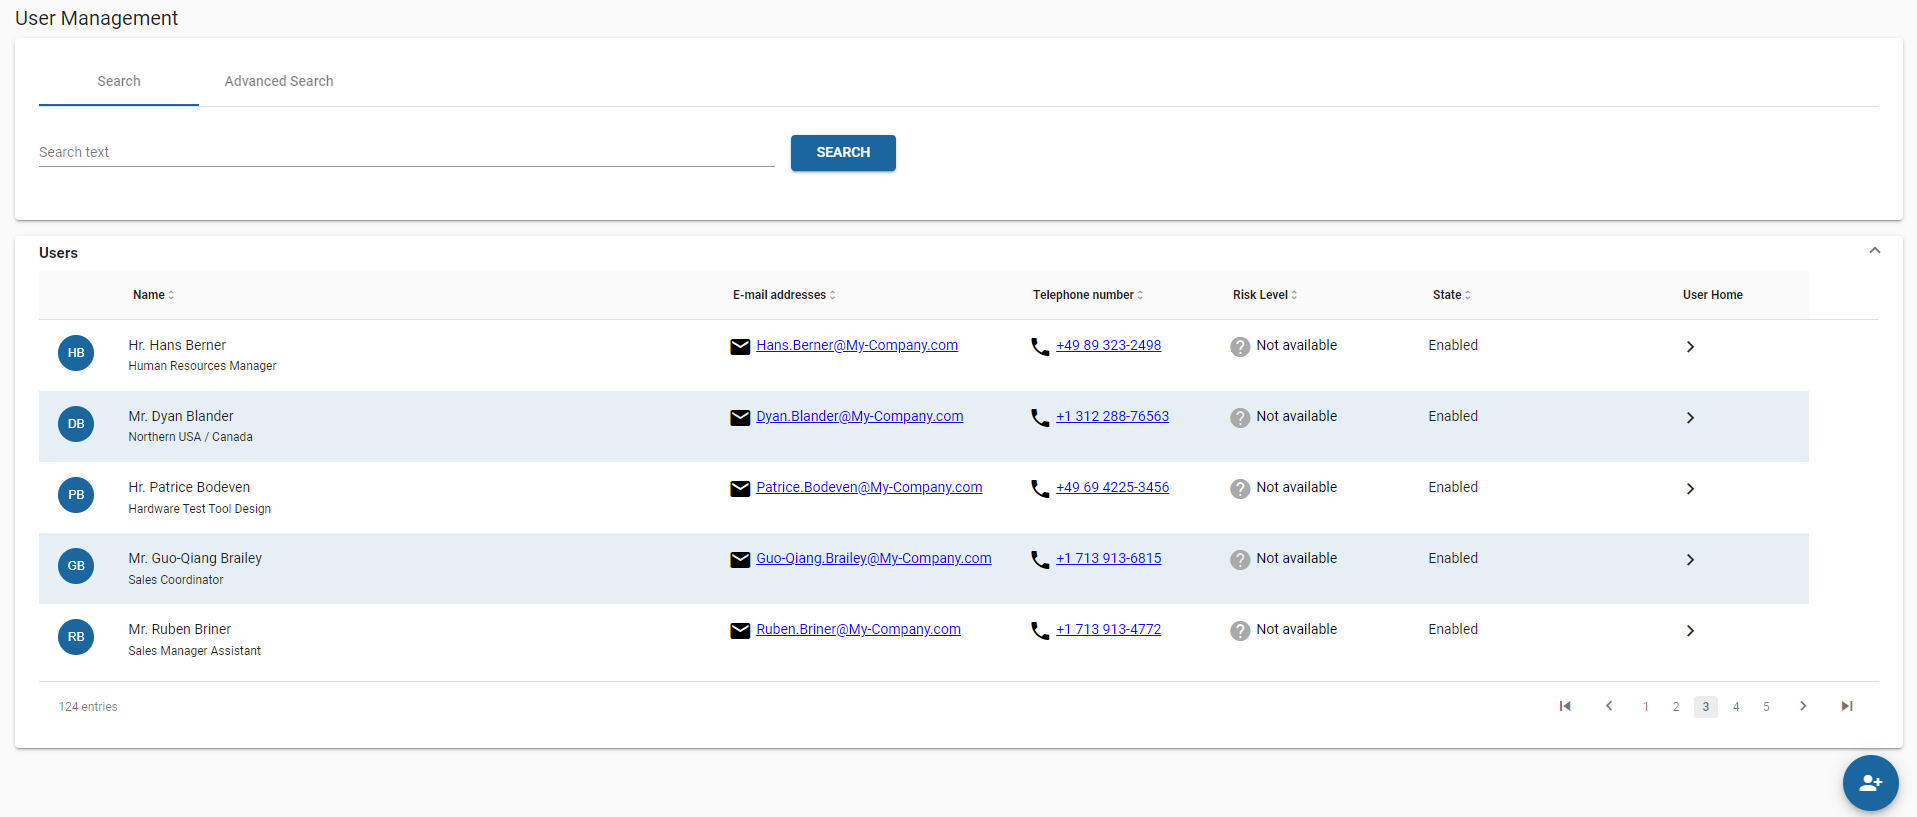
In the simple search, the resulting list is filtered on all criteria based on the input.
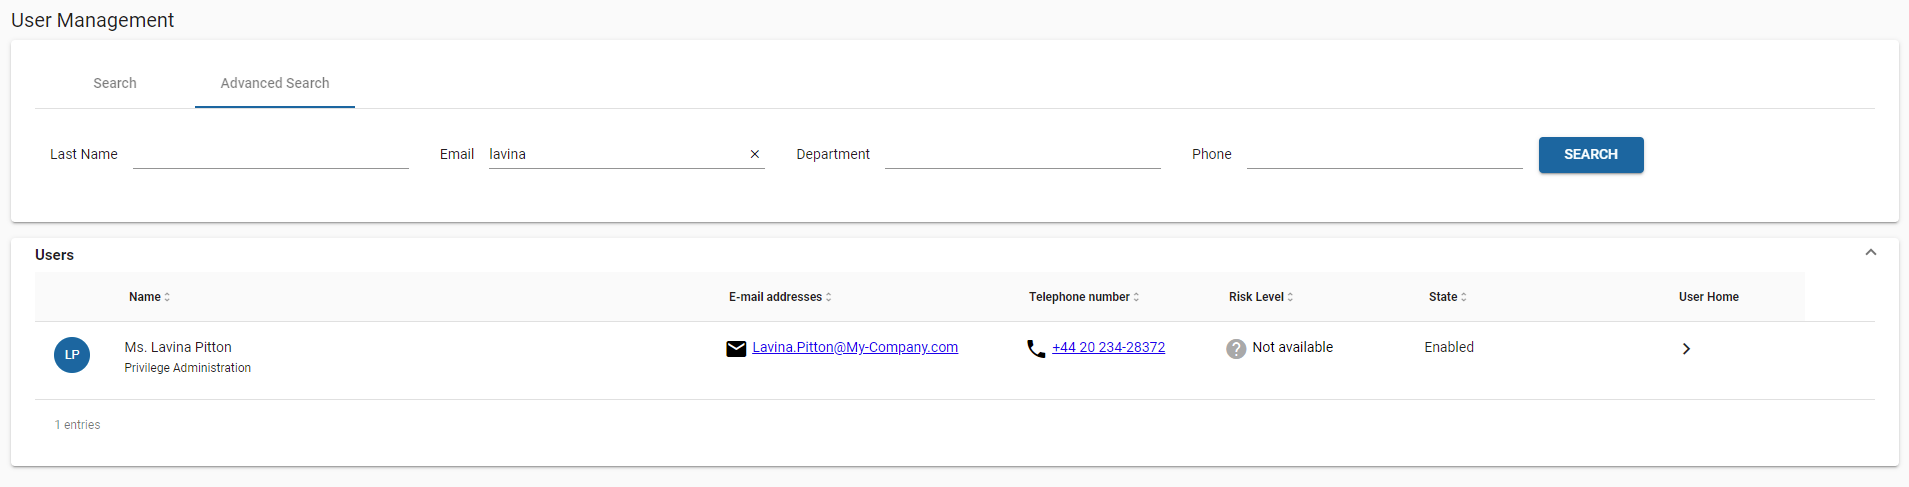
The Advanced Search dialog offers more control over the filtered criteria. The input fields are also configurable from a file so that the system administrator can add or remove them as needed.
Just like in the My Team module, you have access to a user’s home page. To do this, you can click the circle that contains the user’s initials, the user’s name, or the arrow on the right.
Creating New Users and New Identities
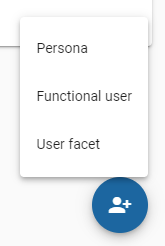
From the User Management page, you can create new identities: users, functional users, personas, and user facets.
Click  . A new page is displayed with all available DirX Identity “create user” workflows.
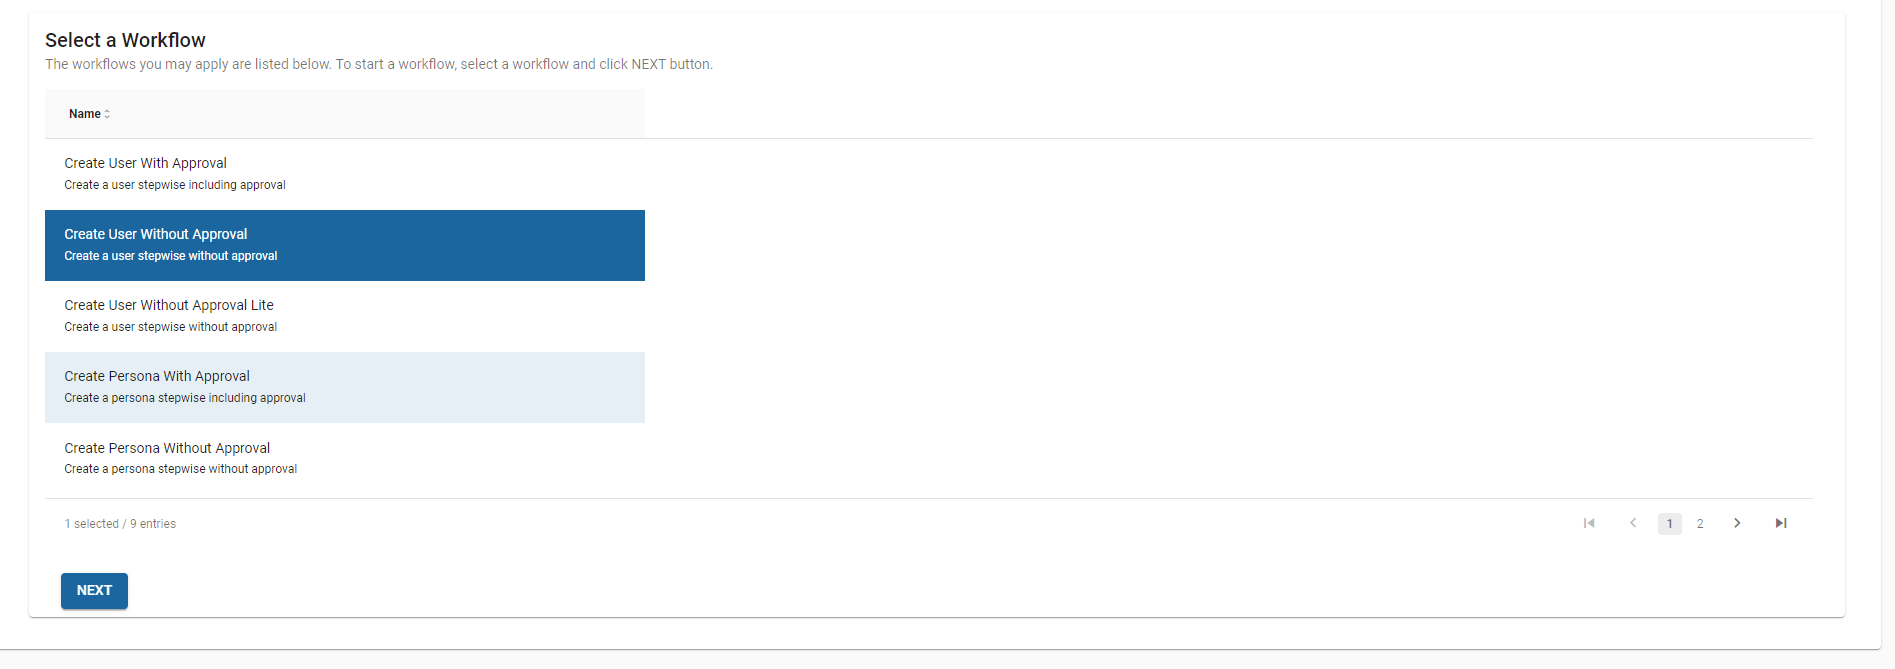
Select a workflow and click Next. Based on the type of workflow (functional user, personas, and user facets) you may be asked to provide the sponsor or the owner for the new user.
| Activities are then presented for a default create user workflow. Some custom implementations may contain additional steps (for example, a set password activity) or have fewer steps (for example, no request privileges activity). The available activities and execution order are defined in the DirX Identity workflow definition. |
On the next page, enter the attributes for new user as they are defined in the DirX Identity workflow.
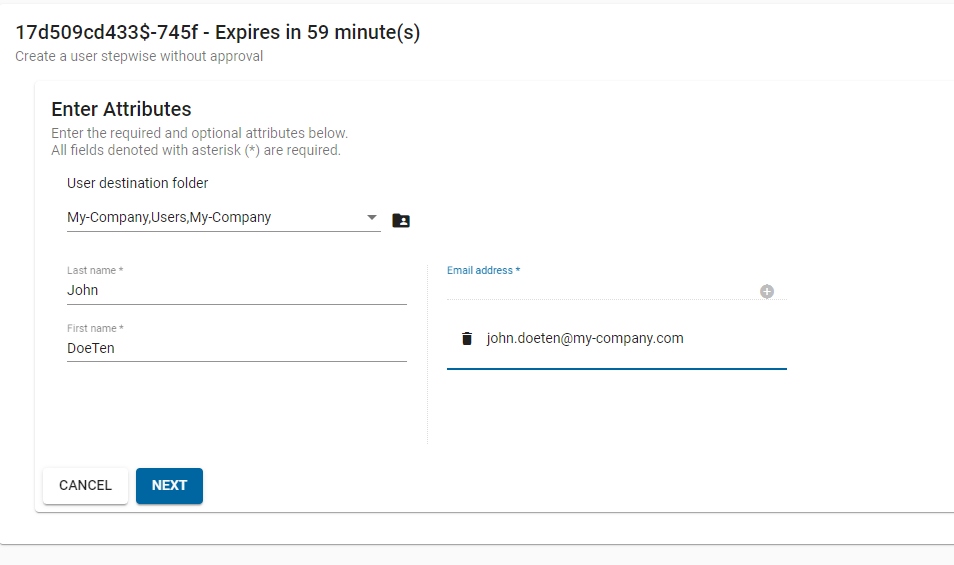
In the Enter Attributes activity page, select a folder for the new user (if this field is not available, you are not allowed to change the destination folder for the new user), enter the attributes for new user (mandatory attributes are indicated with an asterisk in the label). When all mandatory attributes are filled with values, the Next button is enabled.
To cancel a workflow, you can click Cancel. You are asked to confirm the cancel workflow action. If you accept, the workflow is deleted, and you are redirected to the Select Create User Workflows page.
Click Next to continue with the next activity.
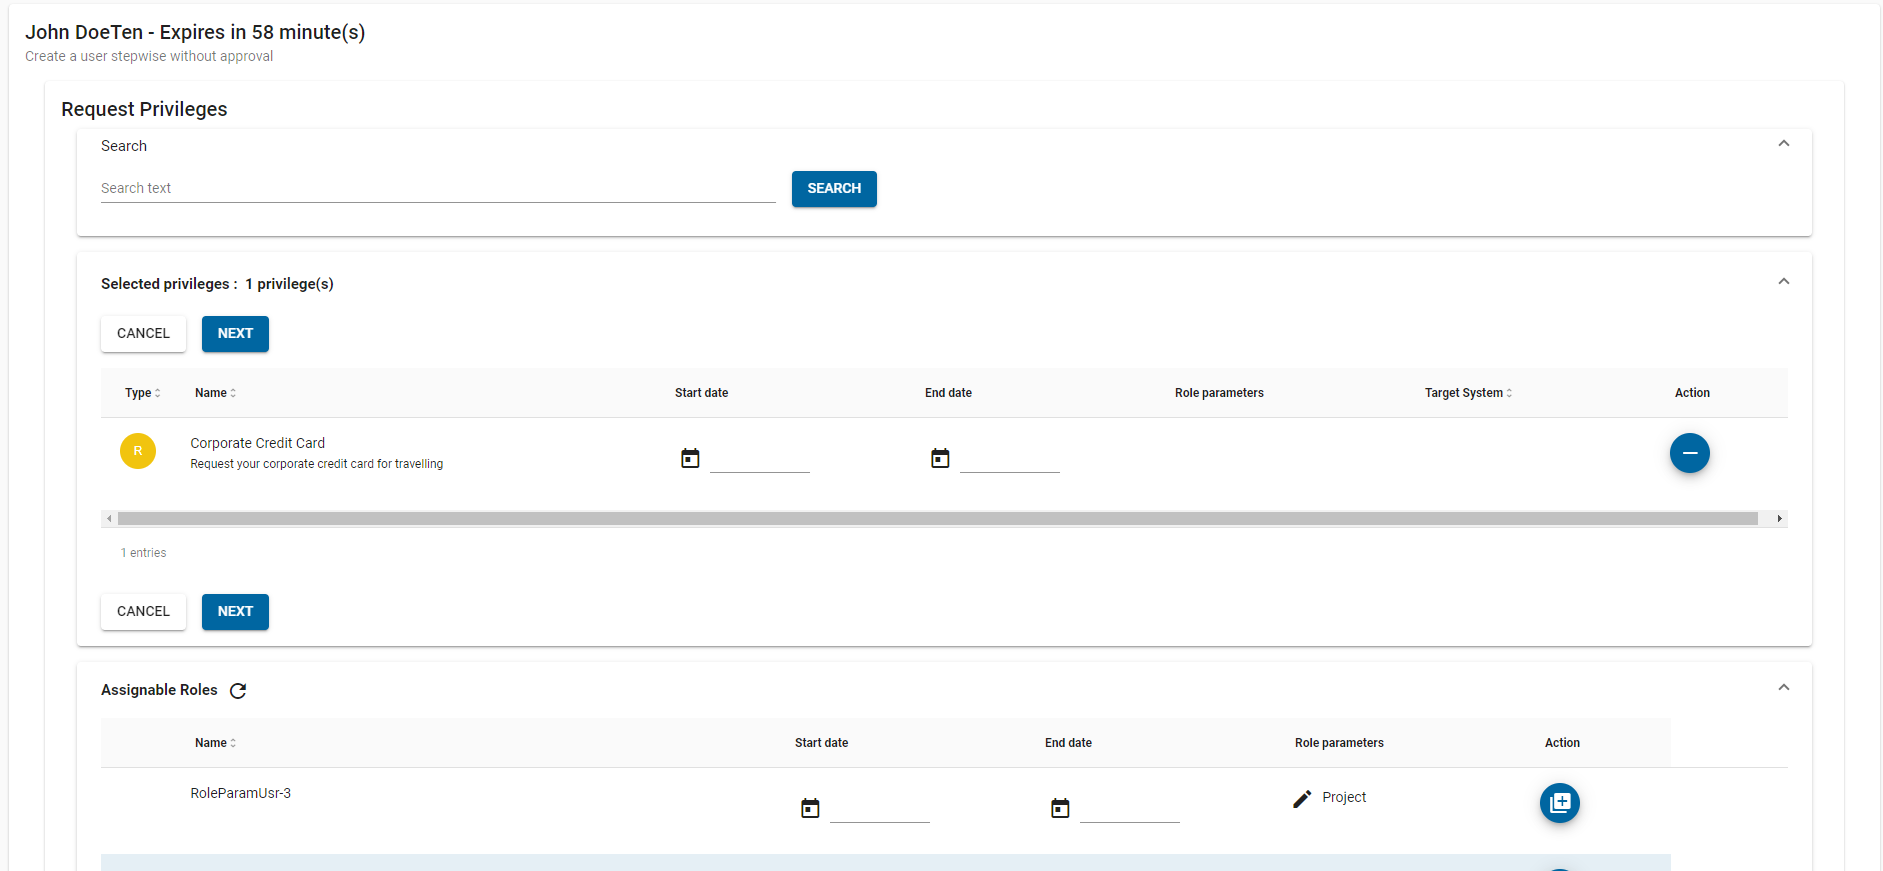
This activity is same as the Request Privileges page in the My Access Rights/Manage Access Rights pages.
Select the privileges for the new user or leave the privileges list empty and then click Next to continue.
You are asked for a Reason for this request.
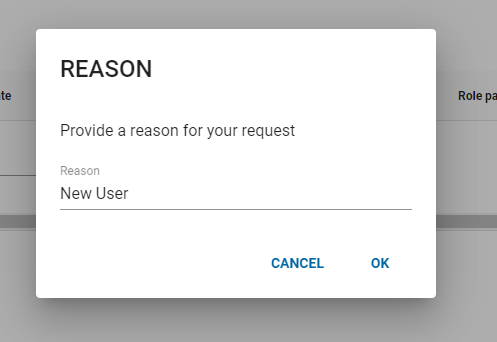
Click OK to continue.
Next, based on the workflow definition, the workflow may continue with other activities (for example, enter password) or start to create a new user.
The following message signals the end of the workflow, at which time you are redirected to the selected create user workflows page:

User Home Page
From the user home page, you can edit the user profiles, manage the access rights of the user, or manage the requests of the user, depending on your personal privileges.
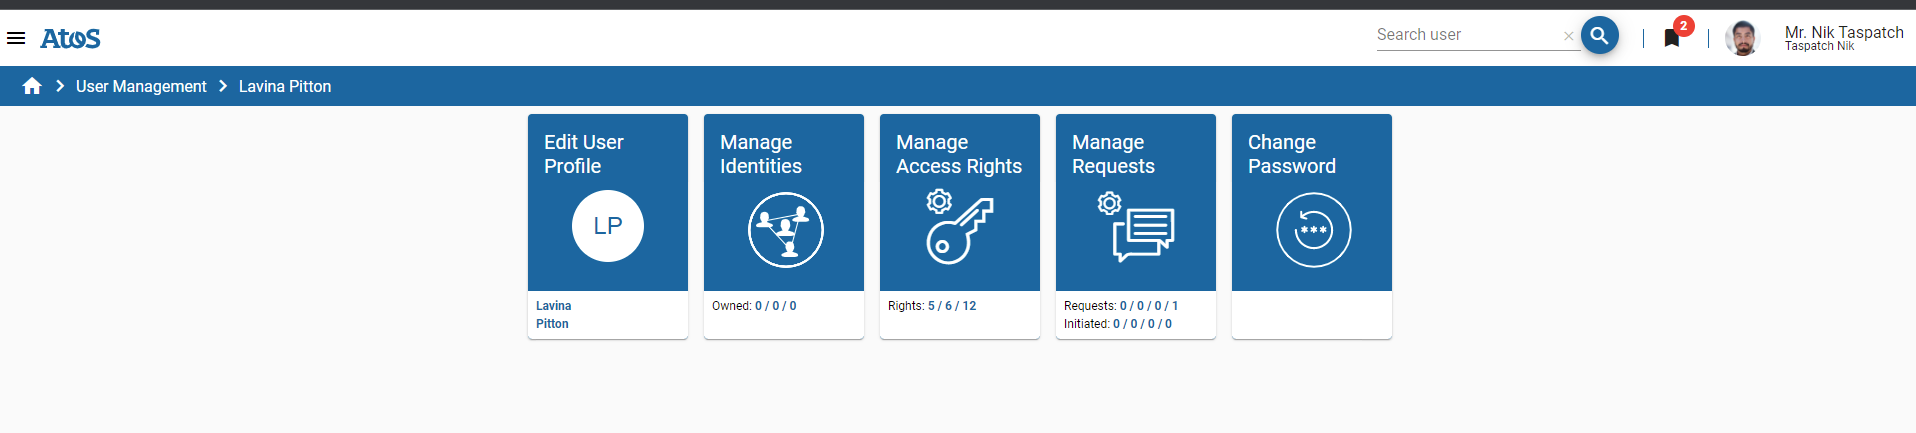
The user’s name is displayed in the blue ribbon at the top of the page. You can always click on the user’s name in the User Management section to go back to this user’s home page.
Edit User Profile allows you to edit some of the user’s personal data.See the section “My Profile” for a detailed description of all the options.
Manage Identities allows you to view available identities assigned to the current user, such as functional users, where the selected user is a sponsor, and personas and user facets, where the selected user is assigned as the owner.
Manage Access Rights allows you to view, add, and modify access rights of the user.See the section “My Access Rights” for a detailed description of all the options.
Manage Requests allows you to view the currently running requests for the user.See the section “My Requests” for a detailed description of all the options.
Change Password allows you to change the password for the user.See the section “Change Password” for a detailed description of this option.
Login Information Dialog
At login, users can be prompted by an administrator-defined message, such as a scheduled maintenance or other system-relevant information.
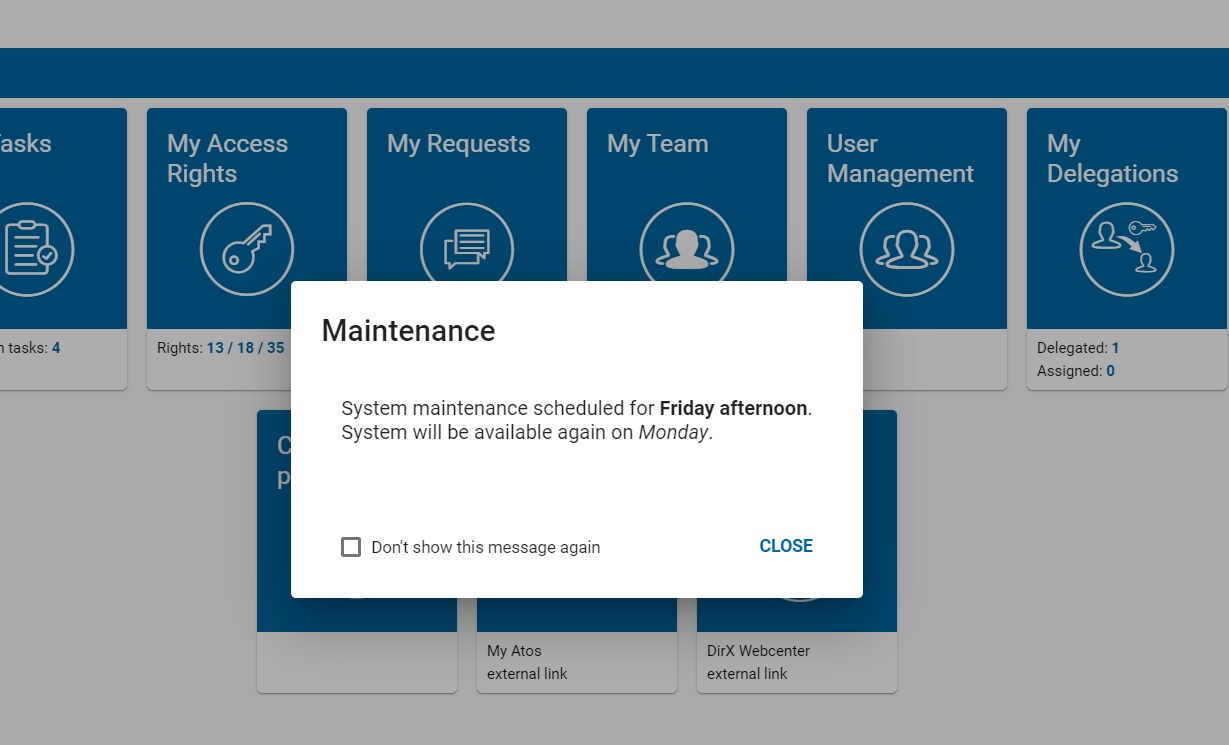
This dialog is visible once per session when the user enters the home page.It can be dismissed by clicking CLOSE or by clicking anywhere outside the dialog.Navigating away and then back to the home page will not trigger the message again.
Users have the option to turn off the notification for the remainder of the message validity period by clicking on the bottom-left checkbox and then closing the window.
The login information is available only in an administrator-defined period. When the message is changed, all users are notified and the option to hide for future logins is reset.