Password Reset Procedure
The reset procedure depends on the set option mode of the DPRC.
Multiple Options
If multiple options are configured the user has to choose which option he will use to reset her or his password.
Windows login screen
-
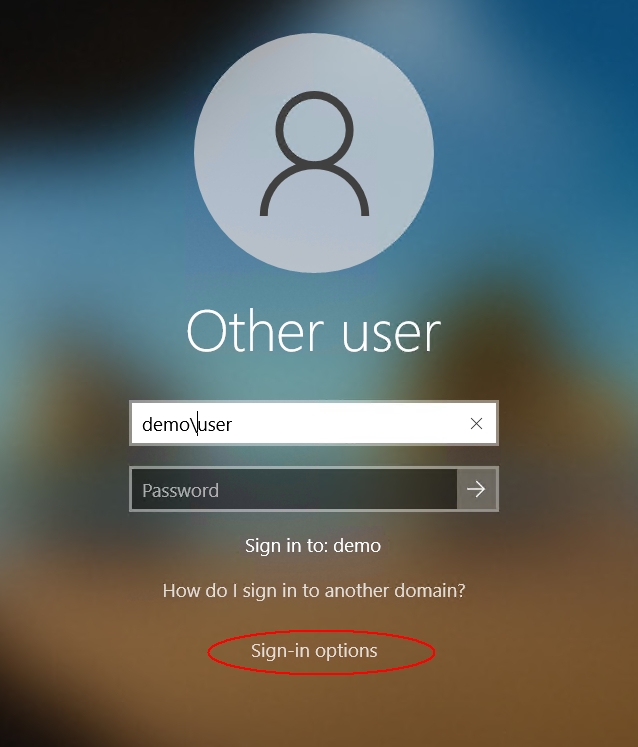
The user starts the PC and gets the Windows login screen.Here the user has first to switch to “Sign-in options":
-
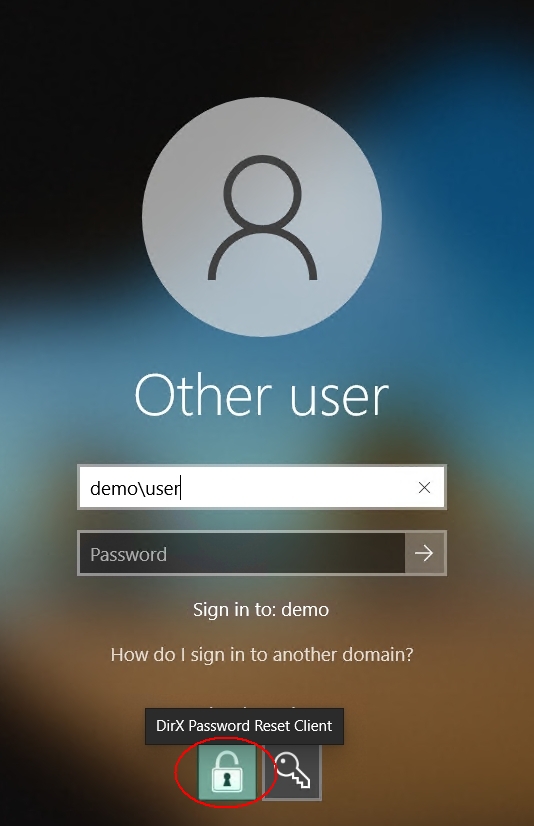
Now the user will see the “DirX Password Reset Client” tile.
-
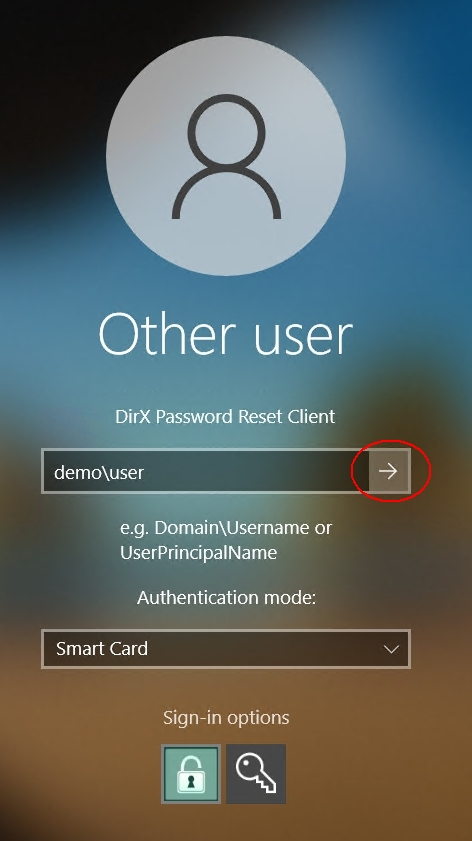
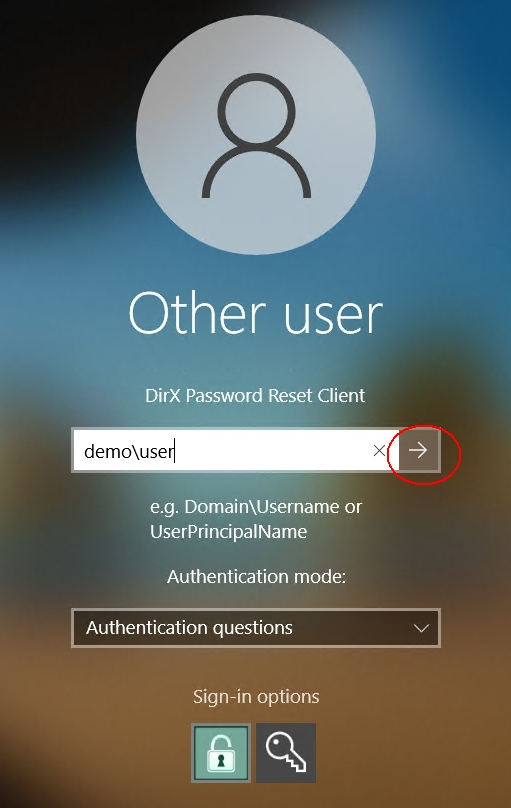
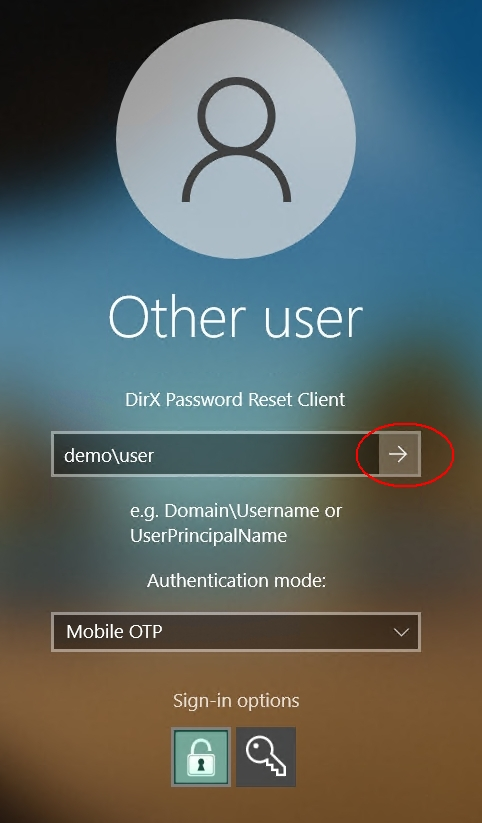
If the user clicks on the tile “DirX Password Reset Client” he gets the following tile with an input field which must be filled with the correct domain and account name and a drop-down list to choose the authentication mode.
The drop-down list contains the configured options (in the picture three options):

-
The user chooses his/her mode to reset and clicks on the submit button (the arrow right to Domain/Username)
The subsequent procedure is described in the chapter for smart card option, in the chapter for authentication questions option or the chapter for mobile OTP option.
Smart Card Option
Domain and account name
-
The user is asked to enter the account name and domain name for the password reset
-
The user must press the “right arrow” (submit) button to finish the domain\account input
Smart Card validation
-
The password reset client now looks up the smart card for suitable certificates.(An animation is shown as the access can take a while)
-
In general, the client will show a list of suitable certificates (also from multiple smart cards )
-
When the certificate is selected the user is asked to enter the smart card PIN
-
If the user clicks on the more information link an additional dialog box is presented:
-
The password reset client validates the smart card PIN.In case of an invalid PIN the user is asked to try again from step 3 after clicking ok
The subsequent procedure is described in the chapter Set New Password Step.
Authentication Questions Option
Domain and account name
-
The user is asked to enter the account name and domain name for the password reset:
The user has to click the “right arrow” Submit button to finish the domain\account input
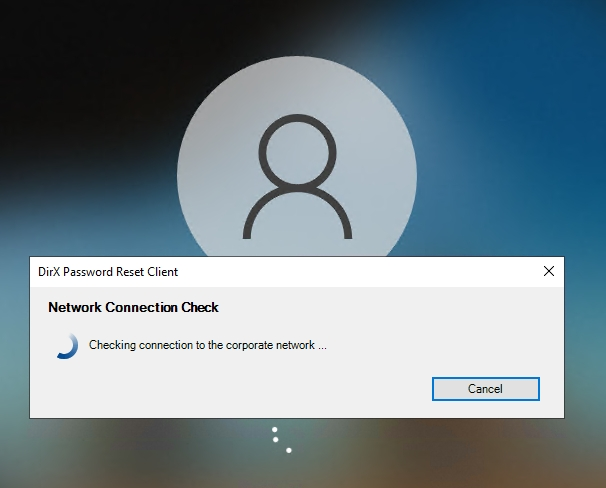
Network Connection Check
-
The password reset client now checks the network connection of the PC to check if in corporate or Internet environment.
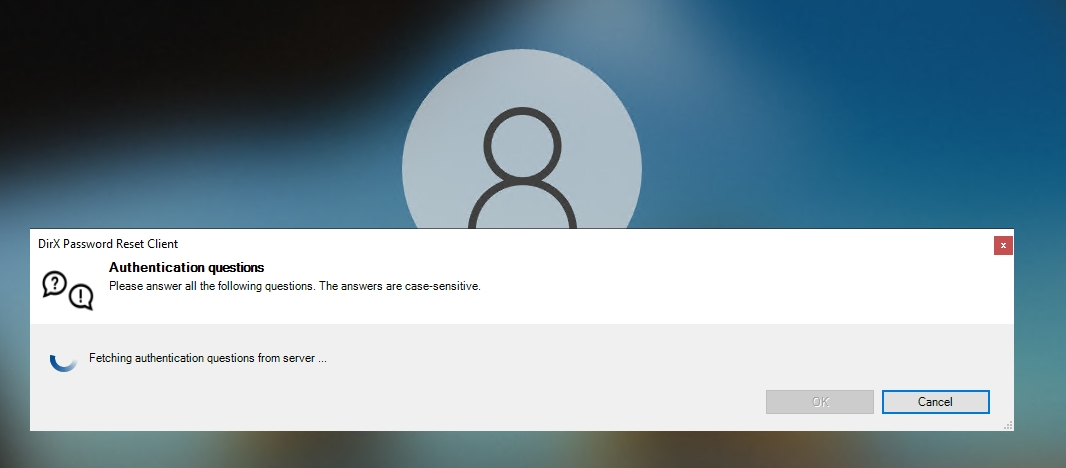
Fetching authentication questions
-
It then looks up the authentication questions for the given account. (An animation with different messages is shown as the network check and access can take a while)
-
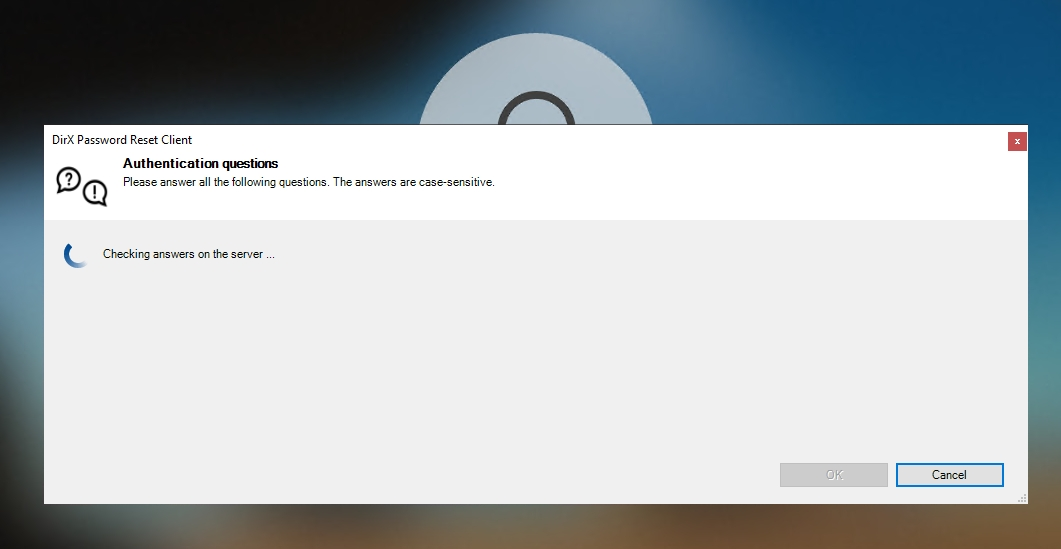
The password reset client then shows a randomized set of the authentication questions for the given account
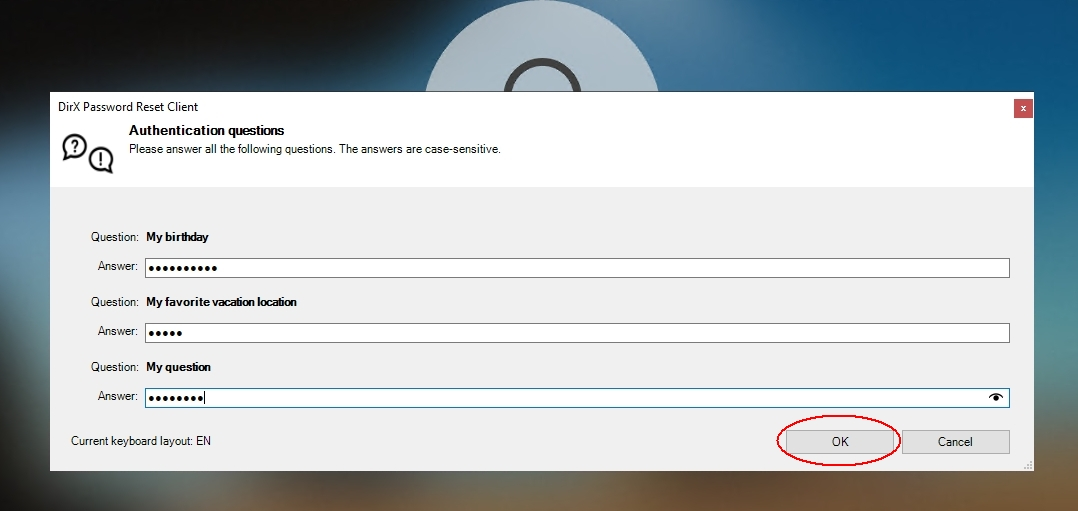
As long as an input box has the focus a so-called Password Reveal "Eye" button is visible in the right corner of the input box.This eye allows the user to see the password characters as he or she types them in.If the user moves the mouse pointer over the Password Reveal button then presses and holds down the left button of his mouse, the password (or anything that has typed in so far in the box) will be displayed.As soon as the user releases the mouse button, the password characters will go back to being “blobbed out” with asterisks again.
Note that the questions are displayed as defined in the Web Center (that is in the same language and in the same spelling as defined).The user can now put his answers to the questions in:
The OK button will be enabled if all answers are typed in. -
The answers are then checked on the server.If the answers are correct, then the subsequent procedure is described in the chapter Set New Password Step.If at least one of the answers is incorrect then the following dialog is shown:
The user can click on the Try again button to get a new randomized set of his authentication questions.To cancel the whole reset procedure the user can click on the Cancel button.
Mobile OTP Option
The login screen is the same as for Authentication Questions Option.The user has to give his domain and account name (steps 1. and 2.).
+
Sending text message
-
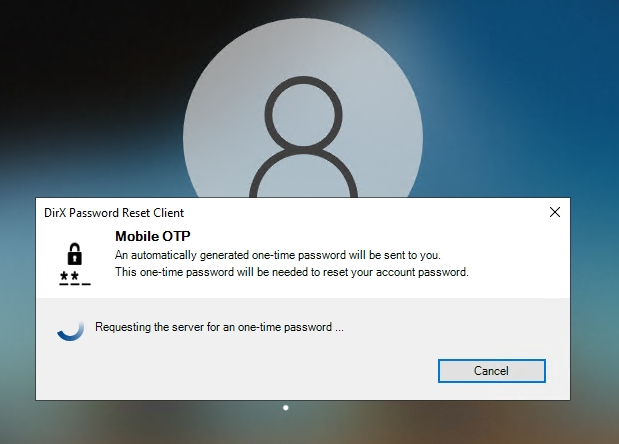
The password reset client now checks the network connection of the PC to check if in corporate or Internet environment.It then sends a request to the reset service to send a text message to the configured mobile phone number of the user.(An animation with different messages is shown as the network check and access can take a while)
-
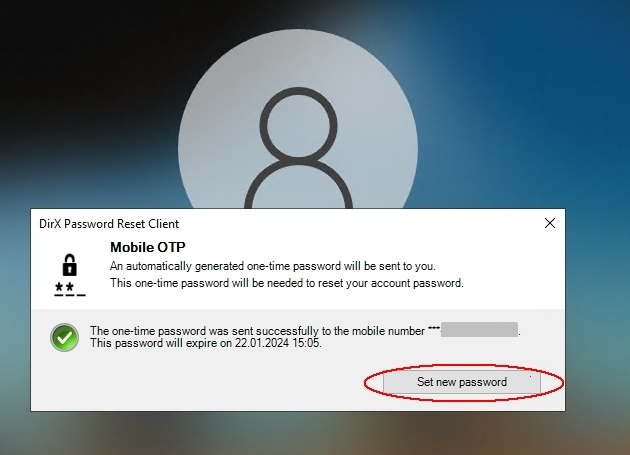
The response (in an okay case) will give a hint to which number the message was sent (last 4 digits are given) and how long the generated one-time password is valid. If the user receives the one-time password on his or her phone, he can click Set new password button to continue.
-
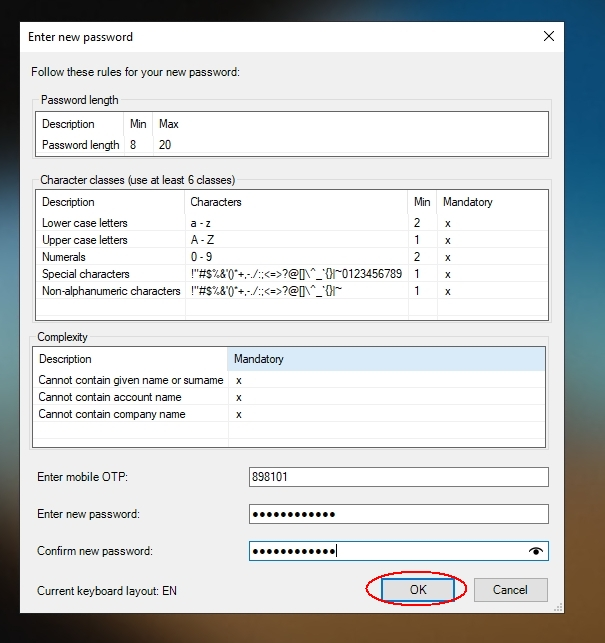
In the following Set New Password step the dialog box is slightly different.A further input field labeled "Enter mobile OTP" for the one-time password is shown:
Otherwise, the behavior is identical to chapter "Set New Password Step".
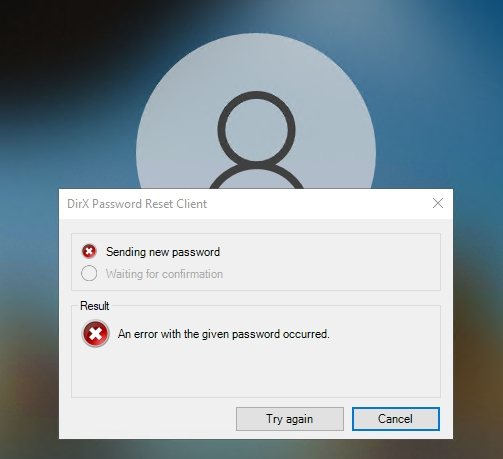
Note: The one-time password is valid only for one time.So if the new password is not compliant with the password history the user has to start over again so that he gets another one-time password.
In case of a wrong OTP, the user will see a failure:
+
Set New Password Step
-
The password reset dialog is opened
-
The password policy is displayed and
-
Two input boxes are given to enter the password two times
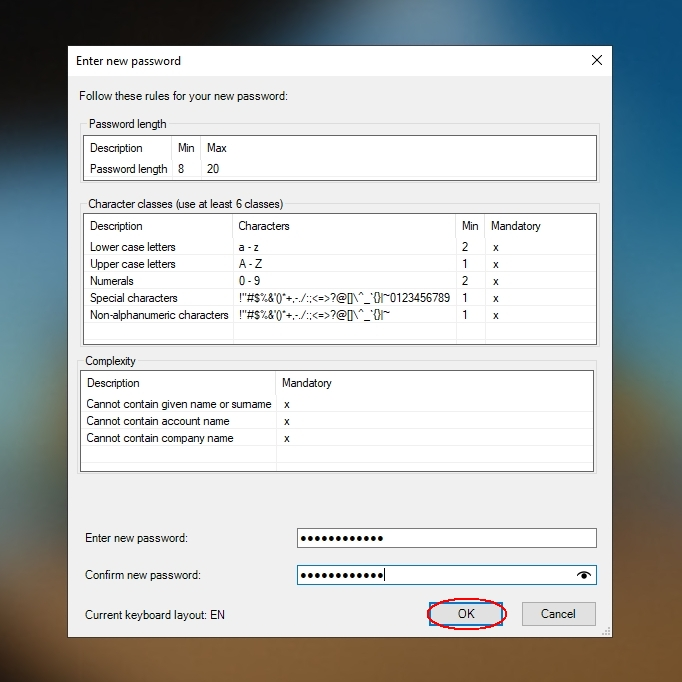
Note that these boxes also have a password reveal eye button.Additionally, the current keyboard layout is shown (current abbreviation of the user’s/system’s language setting).
-
-
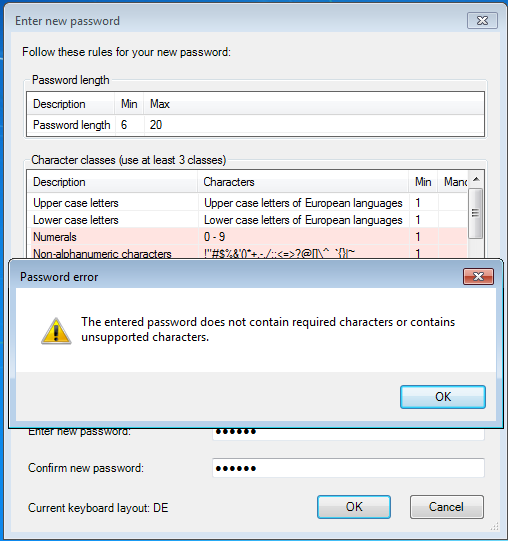
The user’s password input is validated based on the password policy.If the password policy criteria are not met (shown with red background), an error message is shown and the user is asked to try again from step 1
Get Status Step
On successful validation of the password, the request is sent to the DPRS.
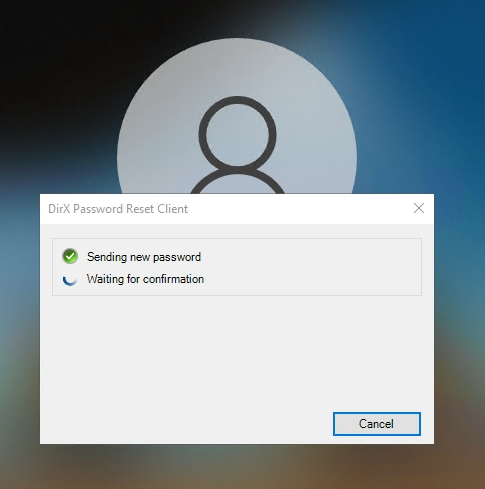
Status feedback
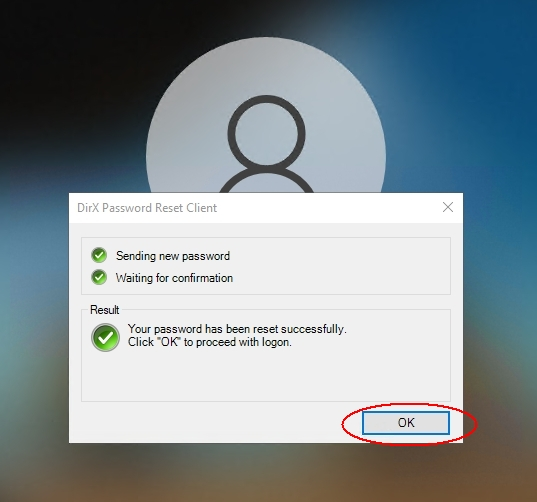
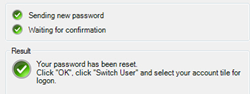
The server sends back the status on the password change request.
Success
in corporate network or
in Internet network
or failure:
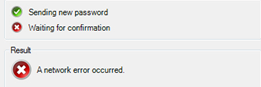
If the new password is not in accordance with the password policy of the Active Directory then a corresponding error message is shown. In both cases, with a click on the Try again button the user can repeat to enter a new password and to try over again.
Success means that the password has been set successfully in the connected Active Directory.
Corporate network: The user is directly logged in by clicking OK on the status box.
Internet network: The user is then directed back to the Windows 10 login screen by clicking OK on the status box. In the okay case the user must click “Switch User” to select the (domain account) password credential provider tile.