Running the Installer
This article describes the very beginning of the setup process execution. It describes _installation (unzipping) of all DirX Access component sources and deployment of the DirX Access Server instance.
|
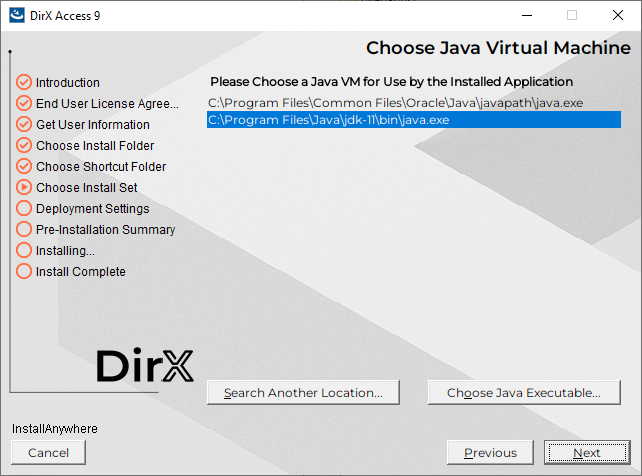
An installed Java VM Version 11 or newer is required to start the DirX Access installer.
A Java VM does not have to be explicitly selected if an installation is set in your Path environment variable.
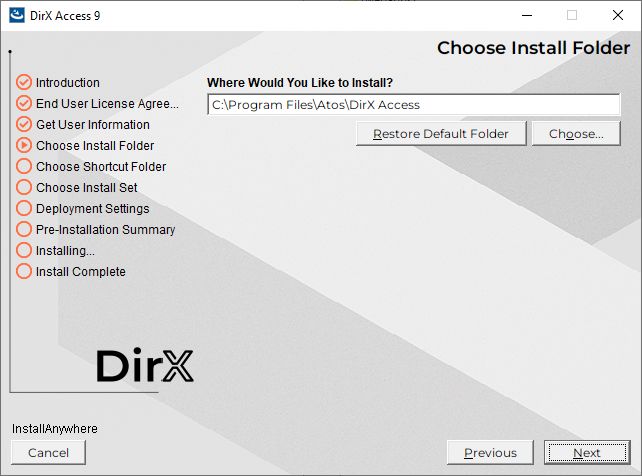
It is recommended to use default installation folder.
There is possibility to explicitly select a JAVA VM via the |
Installer Modes
The installer can run in three different modes that can be selected either via the -i command-line argument or the choice refers to the
INSTALLER_UI installation property.
Please follow the
InstallAnywhere
documentation for more information about all command-line arguments.
Please follow next chapter for information about installation properties.
Silent
The silent mode runs an installation and deployment that does not interact with end user.
dirxaccess.exe -i silentSilent installations are suitable for deployments where all properties are already known and provided via the properties file.Please follow next chapter for information about possibility to create and use properties file with installation properties.
Graphical User Interface (GUI)
The GUI mode runs the installer with wizard panels and dialog boxes.
dirxaccess.exe -i swingThis is the default mode for Windows. Please have in mind that only crucial properties are visible in this GUI mode.
Installation Procedure
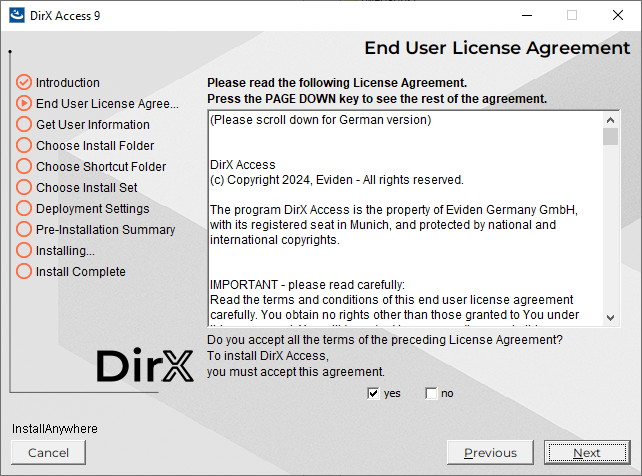
This chapter describes all steps of the installation procedure that are relevant to the GUI mode.
-
Accepting the licence agreement .HLA Bridge Architecture .DirX
-
Selection of the
{installation_folder}-
The choice refers to the
PROP_USER_INSTALL_DIRinstallation property
-
-
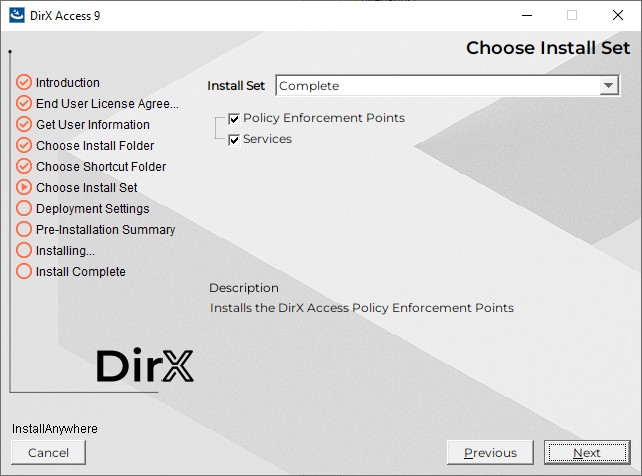
Selection of the components to install/unzip
-
For a scenario including deployment of a DirX Access Server instance, it is necessary to check both options (
Policy Enforcement PointsandServices) as any DirX Access Server instance contains embedded policy enforcement point.
-
|
By default, the silent mode installs/unzips all components. |
-
Selection of the Java executable
-
The selected Java VM runtime is used for running the DirX Access Server instance. After the deployment, the runtime is specified in the property
wrapper.java.commandof the{installation_folder}\Services\instances\{instance_name}\etc\wrapper.confconfiguration file.
-
|
By default, the silent mode selects the same Java VM runtime as is used for the installer startup. |
Console
The console mode runs a command-line interface.
dirxaccess.exe -i consoleThis is the default mode for Linux. Please have in mind that only crucial properties are visible in this Console mode.
Installation Properties
For all modes, a properties file can be used to preset values of all installation properties.
For an inspiration, the
{patch|dvd}/Installation/{[Linux|Windows]}/dirxaccess.properties
file can be taken because the file contains list of all possible properties and their descriptions.
The file can be either inserted to the same folder with the same name as the DirX Access Installer or applied via the -f command-line argument.
dirxaccess.exe -f "{installation_properties_path_and_file_name}"Custom installation properties file can be generated running the DirX Access Installer in GUI or Console mode with the -r command-line argument.
dirxaccess.exe -r "{installation_properties_path_and_file_name}"Initial Deployment
This chapter describes the steps necessary to deploy initial DirX Access Server instance.
These steps are optional and does not have to be performed in case of unzipping the DirX Access component sources (Policy Enforcement Points and Services) is enough.
Unselecting the
"`Deploy DirX Access Server instance`" checkbox completely disables the following deployment approaches.

Deployment Approaches
There are several deployment approaches according to the Initial Configuration documentation. This chapter describes ways to achieve them.
Business-service-only Server Approach
The deployment prepares the file system and the Windows Service for the first startup of the Business-service-only Server.
The choice refers to:
-
"Deploy DirX Access Server instance" checkbox (GUI mode) or
-
deploy.services.instanceinstallation property
The following (mandatory) installation properties have to be set.
Their description can be found in the dirxaccess.properties file.
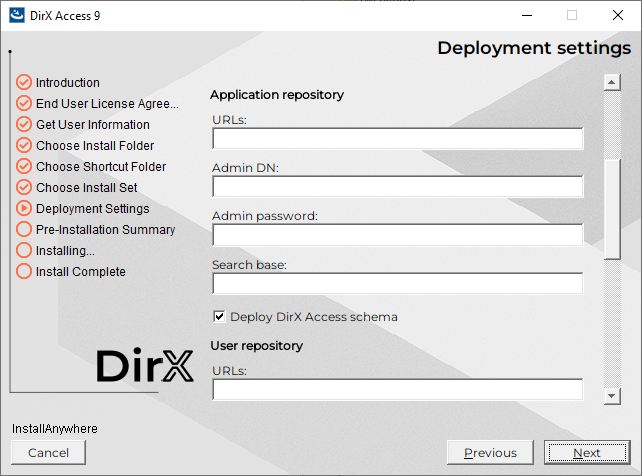
DirX Access Server and Application Repository Properties
| GUI mode names | Installation properties |
|---|---|
Instance name |
|
Server hostname |
|
Server initial HTTPS port |
|
Application repository - URLs |
|
Application repository - Admin DN |
|
Application repository - Admin password |
|
Application repository - Search base |
|
Application repository - Deploy DirX Access schema |
|
Deployment of DirX Access Application Repository Schema Option
The deployment extends the LDAP server schema for DirX Access application data and configuration. The deployment populates the LDAP directory with the specific object classes and attributes required by DirX Access.
The choice refers to the "`Deploy application repository schema`"
checkbox and the deploy.application.repository installation property.
|
Prerequisities to Deploy Application Repository
DirX Access Schema Option Administrator access to a LDAP repository to store application data and configuration (DirX Access Application repository). The repository should be already running and accessible from the machine running the DirX Access Installer. |
|
Additional steps are required if you want to configure LDAP server secure connection. For details, refer to the Setting up LDAP over SSL/TLS section. |
User Repository Properties
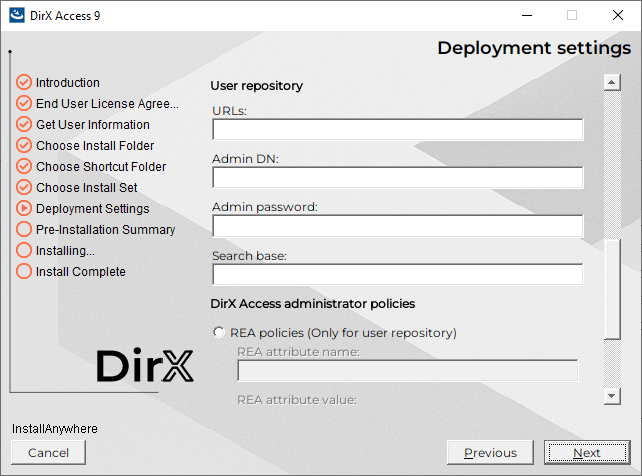
The user repository installation properties are optional and relevant to non User-repository-less Deployment. In case of empty properties related to user repository configuration, the DirX Access Server instance is deployed without any User Repository and Subject Template configuration object.
| GUI mode names | Installation properties |
|---|---|
User repository - URLs |
|
User repository - Admin DN |
|
User repository - Admin password |
|
User repository - Search base |
|
DirX Access Administrator Policies Properties
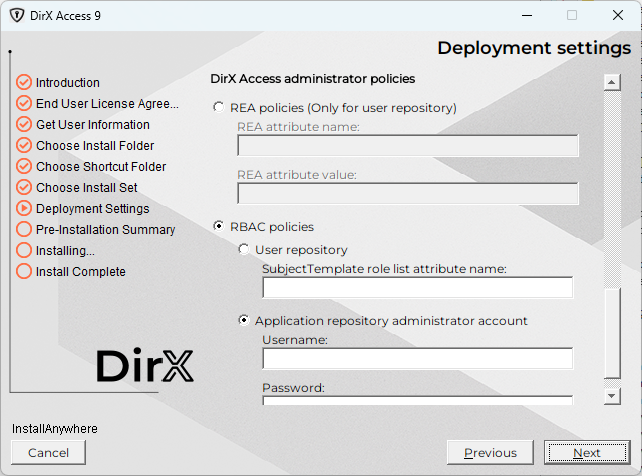
The last section refers to the DirX Access administrator policies. The initial DirX Access Administrator can refer to:
-
User or group within the user repository (role resolution is based on REA administration policies)
|
Please use this option if there is need to generally select a user or group from the user repository based on REA policies. REA policies can map any value of any attribute to the role names in RBAC configuration. |
|
Please be careful. By default, each authorization request contains a request to the LDAP user repository. |
| GUI mode names (REA policies/User repository only) | Installation properties |
|---|---|
REA attribute name |
administration.role.attribute.name |
REA attribute value |
administration.role.attribute.value |
-
Role list attribute within the user repository (role resolution is based on RBAC administration policies)
|
A role can be selected based on role list attribute name (of the DirX Access SubjectTemplate configuration object). The attribute must exist in the user repository and must contain values that match the role names in RBAC configuration. |
| GUI mode names (RBAC policies/User repository) | Installation properties |
|---|---|
SubjectTemplate role list attribute name |
administration.role.subject.template.attribute.name |
-
DirX Access Administrator account within the application repository (role resolution is based on RBAC administration policies).
|
A user cannot be created or matched in the user repository. An administrator account is created in the application repository with appropriate roles. |
| GUI mode names (Application repository administrator account) | Installation properties |
|---|---|
Username |
|
Password |
|
Basic UI-configurable Server
The deployment prepares the file system and the Windows Service for the first startup of the UI Configurable Server
The choice refers to:
-
"Deploy DirX Access Manager" checkbox (GUI mode) or
-
deploy.services.access.managerinstallation property
In this case, DirX Access Manager is deployed out of the box and is available within the configured server hostname and initial HTTPS port at https://{services.native.hostname}:{services.http.port.ssl}/spa/ address after the DirX Access Server startup.
There are no additional installation properties to be set but:
-
"Deploy DirX Access Server instance" checkbox must be checked or
-
deploy.services.instanceinstallation property must be set totrue.
Additionally, DirX Access Credentials Manager can be deployed out of the box via:
-
"Deploy DirX Access Credentials Manager" checkbox or
-
deploy.services.access.credentials.managerinstallation property
In this case, DirX Access Credentials Manager is deployed out of the box and is available at the same address after the DirX Access Server startup.
Removing DirX Access
This section describes how to remove (uninstall) DirX Access components from Windows and Linux platforms.
|
By default, the same Java VM is used for uninstallation as for installation.
The Java VM path is defined during installation and is part of the |
Windows
To uninstall the DirX Access components on Windows, run the uninstaller by running the command:
{installation_folder}\UninstallerData\Uninstall DirX Access.exeRemoving the Server Windows Service
To uninstall the DirX Access Server Windows service, execute the following command from {installation_folder}/Services folder.
wrapper -r instances/{instance_name}/etc/wrapper.confA successful removal of the service is indicated in the console by the text: DirX Access Service uninstalled.
The list of the Windows services should no longer display DirX Access Services.
Linux
To uninstall the DirX Access components on Linux, run the uninstaller by running the command:
{installation_folder}/UninstallerData/Uninstall DirX Access|
On Red Hat Enterprise Linux, the DirX Access Uninstaller sometimes does not completely remove all installed files under the DirX Access installation folder, namely JRE. |
Setting up LDAP over SSL/TLS
Communication between DirX Access in tier-2 and LDAP repositories in tier-3 can be protected using SSL/TLS. This configuration is described in: server/administration-guide/non-functional-topics/ldap.adoc#_setting_up_ldap_over_ssltls.