Creating the Workflow
This chapter describes how to set up the Java-based real-time synchronization workflow that illustrates the use case.
Setup Prerequisites
To implement this use case, you need to have configured at least one conventional Java-based real-time workflow for an LDAP-based target system in your DirX Identity Connectivity domain. This workflow has the correct connected directory type and belongs to the correct domain, and can act as the base for creating the new synchronization workflow. In this sample, a workflow for the testLDAP target system is needed, as shown in the figure in the chapter "Differences from Conventional Workflows".
In many cases, you may already have LDAP-based real-time workflows configured in your domain. If not, just create a dummy LDAP target system with a Java-based real-time workflow. For details, see the DirX Identity Application Development Guide; in particular, the section on Java-based LDAP workflows in the chapter "Using the Target System (Provisioning) Workflows".
Setup Steps
Creating the workflow consists of the following steps:
-
Creating the LDAP synchronization workflow
-
Creating the channel folders in the Identity Store
-
Creating the channels
-
Updating the ports
-
Defining the mapping
-
Updating the workflow object
-
Assigning the new workflow to the scenario (optional)
Create the LDAP Synchronization Workflow
In the Global View, at the workflow line of our prerequisite LDAP target system real-time workflow, create a new synchronization workflow to get the correct workflow, activity, and port structure. You only need to change its name. Keep in mind that channels are reused.
Create the Channel Folders
The next step is to create the channel folders beneath your Identity Store.
For source tree channels:
-
Select the Channels folder of your Identity Store.
-
In the context menu, select new → Realtime Channel Folder.
-
Enter a name (Contract, for example).
For target tree channels:
-
Select the Channels folder of your Identity Store.
-
In the context menu, select new → Realtime Channel Folder.
-
Enter a name (Users, for example).
Create the Channels
Now we create the channels:
-
For the source tree:
-
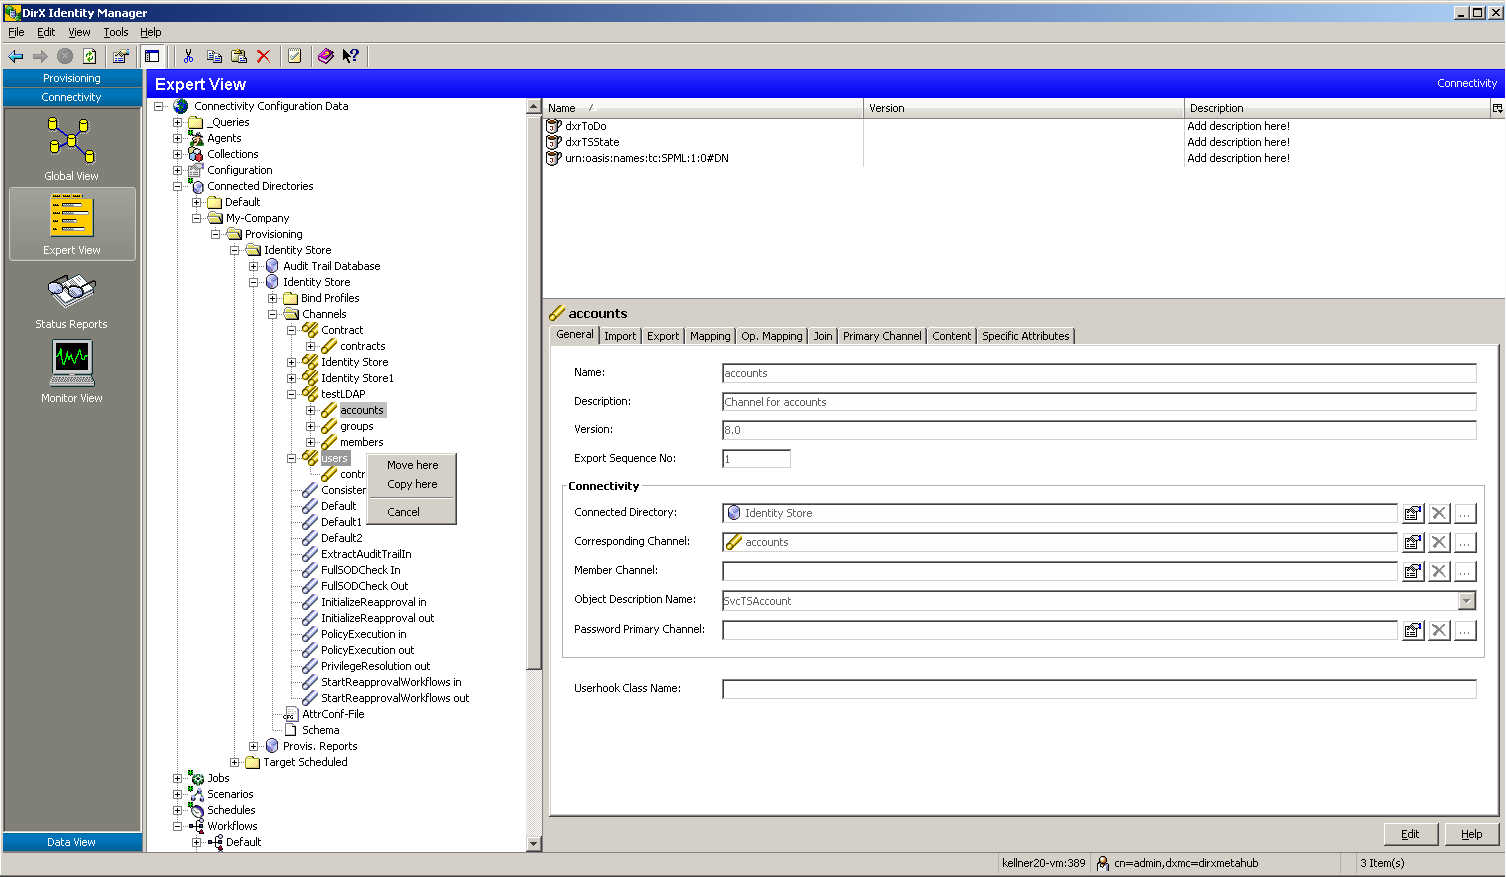
Copy the accounts channel from Identity Store → channels → prerequisite_LDAP_TS_channel_folder_name (in this sample, testLDAP) to the source channel folder you created earlier in this procedure. You can use drag and drop: right click, drag to channel folder drop and then select Copy here. (See the following screenshot for details).
-
For the target tree:
-
Copy the accounts channel from IdentityStore → channels → prerequisite_LDAP_TS_channel_folder_name (in this sample, testLDAP) to the target channel folder you created earlier in this procedure.
-
Optionally rename them; in the sample, to contracts.
-
Delete all the links in these two channels (Corresponding Channel, Member channel, Password primary channel).
-
Link these two channels together by setting the Corresponding Channel.
Configure the IdentityDomain Port
To configure the IdentityDomain port, change the Channel Parent link to the source real-time channel folder you created earlier in this procedure (named Contract in the previous screenshot).
Configure the TS Port
To configure the TS port:
-
Change the Channel Parent link to the target real-time channel folder you created earlier in this procedure (named Users in the previous screenshot).
-
Change the Connected Directory link to your Identity store.
-
Change the Bind Profile link to a bind profile of your Identity Store (in the screenshot, the DomainAdmin bind profile).
Configure the Channels
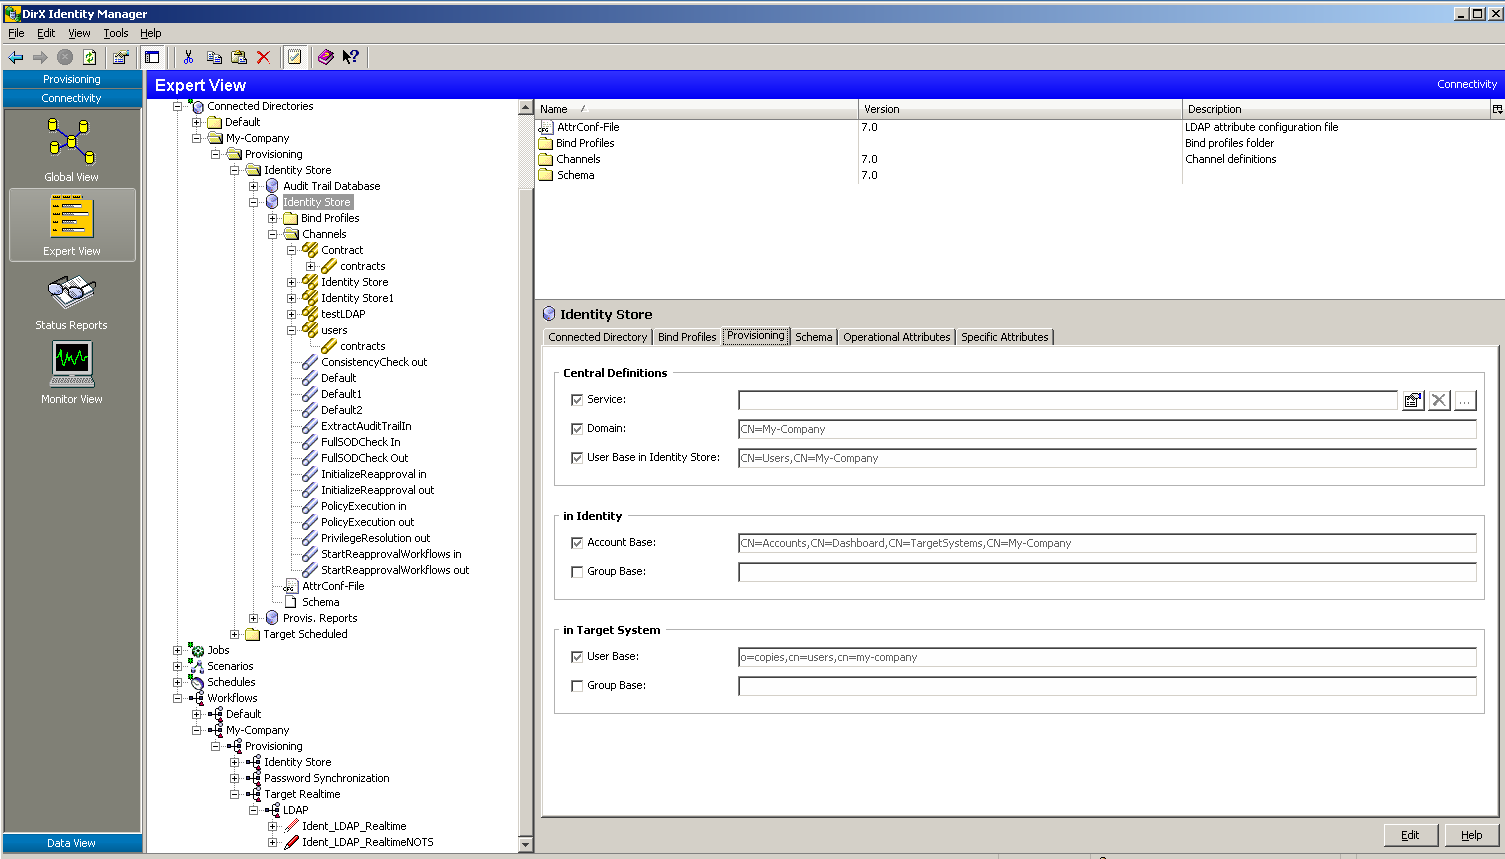
You can adapt the channels to your requirements, defining a complex mapping here. Keep in mind that all environment variables come from the Identity Store, as it is both source and target. You can turn on design mode and then activate properties in the Target system section of the Provisioning tab of your Identity Store object, as shown in the following screenshot.
Configure the Controller
You can optionally change the Join Engine type in the Controller tab of the Join activity.
Configure the Workflow Object
You need to change the Is applicable for value of the new Java-based workflow object to TOPIC_USER_CHANGE:
-
Edit the Workflow object (in this sample, Ident_LDAP_RealTimeNOTS).
-
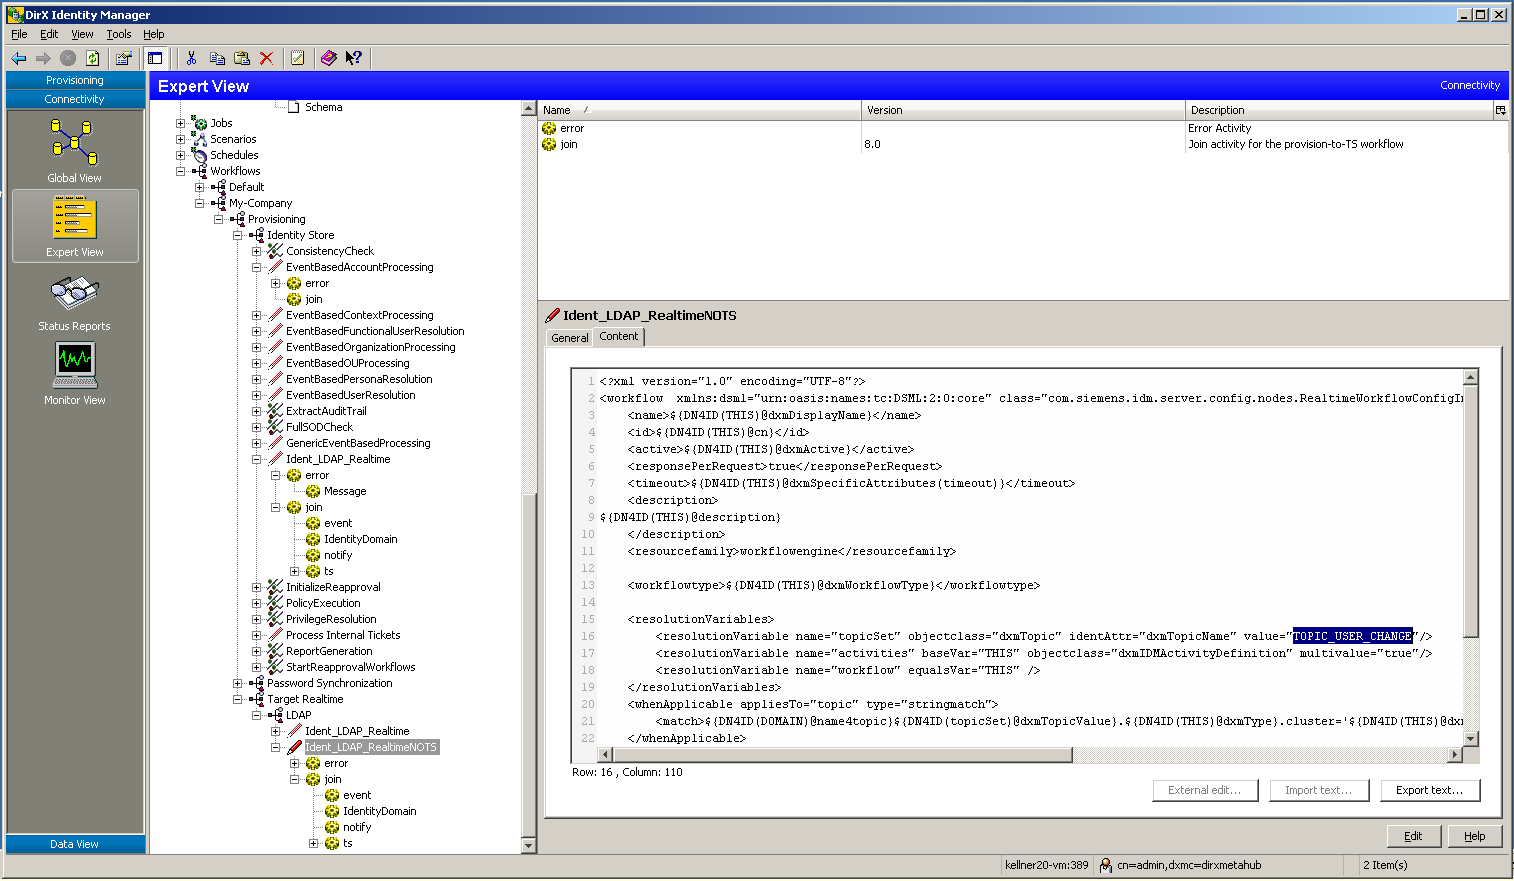
In the Content tab, replace the TOPIC_PROVISION_TO_TS value with TOPIC_USER_CHANGE in the following line:
<resolutionVariable name="topicSet" objectclass="dxmTopic" identAttr="dxmTopicName" value="TOPIC_PROVISION_TO_TS"/>
The following screen shot shows this line in the Content tab:
You can find valid topic prefixes in the folder Configuration → Topics. Topic Value is the real topic value, and Topic Alias is the value to be inserted in the workflow Content tab.
-
In the workflow’s General tab, change the Type, Cluster and Domain fields in the Is applicable for section to your requirements.
Assign the New Workflow to the Global View
You may want to assign the new workflow to your scenario. In the Global View:
-
Select the line between two Identity Store icons.
-
Right-click and then choose Assign.. to assign the workflow.
How to send Provisioning Events
Assume your workflow synchronizes provisioning events with an existing target system. As the objects in the target system are not updated with the dxrServices layer no ProvisionToTS events are generated to trigger a workflow to synchronize the target system. With the following steps you can produce such events so the newly created or updated objects are synchronized immediately:
-
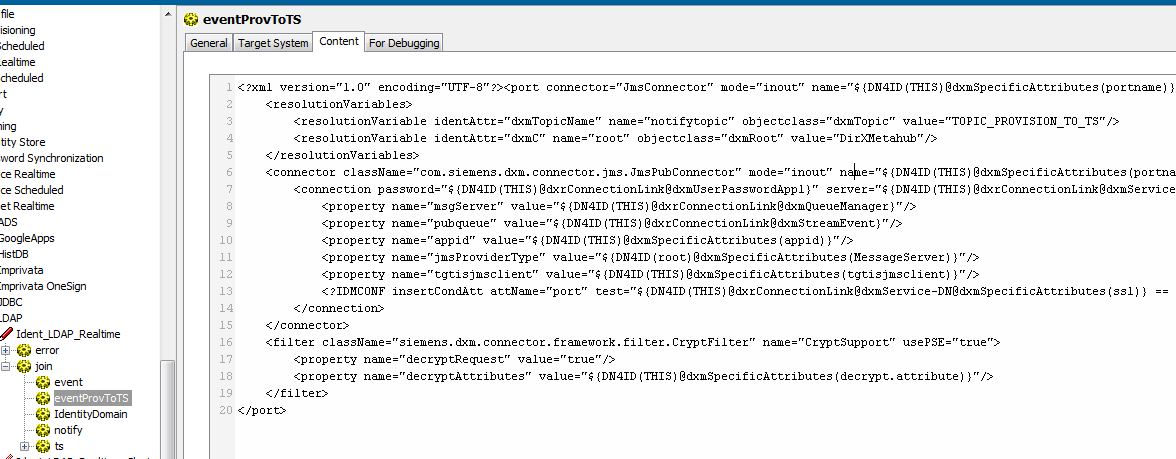
Configure an additional event port for example eventProvToTS. Change the topicValue from TOPIC_USER_CHANG to TOPIC_PROVISION_TO_TS. You can use the edit content from the popup menu at the port if you use DXI Manager. The changed line should look like:
<resolutionVariable identAttr="dxmTopicName" name="notifytopic" objectclass="dxmTopic" value="TOPIC_PROVISION_TO_TS"/>
The following screenshot shows this line in the Content tab:
-
Also set the dxmSpecificAttributes for the portname to:
dxmSpecificAttributes: portname eventProvToTS
The following screenshot shows this value in the All Attributes tab:

In the postUpdate Userhook you can use this port to generate Provisioning events. A sample implementation is provided in MyUserhook.java.