Managing DirX Audit Manager and REST API
This chapter provides information about how to manage DirX Audit Manager. It consists of the following sections:
-
Running the DirX Audit Manager service
-
Configuring LDAP authentication
-
Configuring a secure HTTP connection
-
Configuring a secure LDAP connection
-
Configuring session timeouts
-
Using Swagger user interface
Running the DirX Audit Manager Service
The DirX Audit Manager application is based on the Apache Tomcat technology.
To start and stop DirX Audit Manager, use the service provided by Apache Tomcat. This service must be configured externally.
You can check whether the application is running in your Internet browser. Type the following URL:
http://hostname:port/audit-manager-tenantID
https://hostname:port/audit-manager-tenantID
where hostname specifies the server address, port the server port number and tenantID the identifier of a tenant generated during the tenant configuration process. The default port for HTTP is 8080 and 8443 for HTTPS.
Configuring LDAP Authentication
DirX Audit Manager can authenticate users on an external directory server over the LDAP protocol. The authentication is fully configurable, and you can choose from a broad range of directory services. (See the sections “REST Service Authentication Configuration” in the Tenant Configuration in the chapter “Configuring DirX Audit” in the DirX Audit Installation Guide for details.)
The roles (Auditors, AuditAdmins and RestrictedAuditors) are evaluated in DirX Audit Manager when a user accesses the Dashboard, Audit analysis, Reports and History views. (See the DirX Audit Manager Guide for details.)
Here is a sample configuration for a DirX Identity domain:
Search base for users
cn=Users,cn=My-Company
Search filter for users
(&(objectClass=dxrUser)(%s))
User target
cn
Search base for groups
cn=Groups,cn=DirXmetaRole,cn=TargetSystems,cn=My-Company
Search filter for groups
(&(objectclass=dxrTargetSystemGroup)(uniqueMember=%d))
Group target
cn
List of auditor groups
cn=Auditors,cn=Groups,cn=DirXmetaRole,cn=TargetSystems,cn=My-Company
List of audit administrator groups
cn=AuditAdmins,cn=Groups,cn=DirXmetaRole,cn=TargetSystems,cn=My-Company
List of restricted auditor groups
cn=RestrictedAuditors,cn=Groups,cn=DirXmetaRole,cn=TargetSystems,cn=My-Company
User identification attribute
dxrUID
User mail attribute
mail
Here is a sample configuration for an Active Directory domain:
Search base for users
CN=Users,DC=dxt,DC=my-company,DC=com
Search filter for users
(&(objectClass=user)(%s))
User target
sAMAccountName
Search base for groups
OU=Groups,DC=dxt,DC=my-company,DC=com
Search filter for groups
(&(objectclass=group)(member=%d))
Group target
cn
List of auditor groups
CN=Auditors,OU=Groups,DC=dxt,DC=my-company,DC=com
List of audit administrator groups
CN=AuditAdmins,OU=Groups,DC=dxt,DC=my-company,DC=com
List of restricted auditor groups
CN=RestrictedAuditors,OU=Groups,DC=dxt,DC=my-company,DC=com
User identification attribute
employeeNumber
User mail attribute
mail
Configuring OIDC Authentication
DirX Audit Manager can authenticate users via Authorization server supporting OpenID Connect (OIDC).
Sample configuration for DirX Access authorization server
OpenID Configuration
https://my-server.my-company.example:10115/oauth-provider/.well-known/openid-configuration
Authorization endpoint
https://my-server.my-company.example:10115/oauth-provider/authz
Client ID
MyCompanyOpenIdClientPUBLIC
Redirect URI
https://localhost:30444/web-manager-1c523d49-bcf9-40b7-973d-93894ab0bb24/dirx-dxt-app-manager
List of auditor roles
Intranet Employee,Intranet Manager Accounting
List of restricted auditor roles
Extranet Employee
List of audit administrator roles
Administrator
Roles
roles
ID
sub
Name
name
Email
email
Other
audience:aud
expiration:exp
Mapping of JWT payload claims
Here is a sample of JSON Web Token (JWT) payload issued by DirX Access authorization server:
{
    "sub": "mL0Yf7wkl5e8r9dxf6we5c46sd2r3C5JM.",
    "ou": "Finances",
    "roles": [
        "Intranet Manager Accounting",
        "User"
    ],
    "givenName": "John",
    "iss": "https://my-server.my-company.example:10115/oauth-provider",
    "o": "My-Company",
    "aud": "MyCompanyOpenIdClientPUBLIC",
    "surname": "Cook",
    "auth_time": 1755853458,
    "loginName": "John Cook",
    "name": "John Cook",
    "exp": 1755857059,
    "iat": 1755853459,
    "email": "john_cook@atos.net"
}
Names of claims should correspond with names mapping configured in DirX Audit Configurator in step REST Service Authentication Configuration in section Claims mapping. (See the section “REST Service Authentication Configuration” in the Tenant Configuration in the chapter “Configuring DirX Audit” in the DirX Audit Installation Guide for details.)
Claim can be top-level or nested. For top-level claim the mapping is the name alone. For nested claim all the names in the path to the claim value must be specified using SpEL (Spring Expression Language) expression.
Example of configuration of nested claim using SpEL expression with corresponding claim in JSON web token:
[resource_access][dxt][roles]
"resource_access": {
    "dxt": {
        "roles": [
            "admin",
            "auditor"
        ]
    }
}

Mandatory claims expected by DirX Audit Server:
-
subject- unique identifier of the user (sub in sample JWT payload) -
roles- array of roles assigned to the user (roles in sample JWT payload)
Claims that are not mandatory but are used in DirX Audit Manager UI:
-
name- full name of the user (name in sample JWT payload) -
email- email of the user (email in sample JWT payload)
Following claims are necessary for proper functionality of DirX Audit Reports export. Names of these claims are not configurable:
-
organization- organization of the user (o in sample JWT payload) -
organizational unit- organizational unit of the user (ou in sample JWT payload)
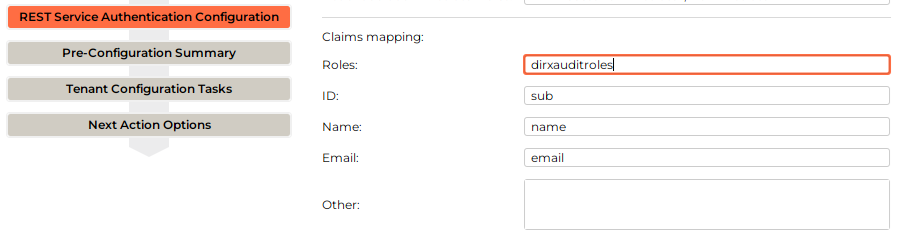
Corresponding configuration of claims mapping in DirX Audit Configurator for the sample JWT payload above would look like following

For example, if the claim containing roles should be called dirxauditroles in the JWT payload, the configuration of claims mapping would look like following
"dirxauditroles": [
    "Intranet Manager Accounting",
    "User"
]
Configuration of scopes in DirX Audit Manager
By default, 3 scopes are supported in OIDC authentication - openid, email and profile. These scopes can be modified in DirX Audit Manager configuration file app-config.json in section authentication - oAuth - scope (install_path\web\audit-manager-<tenantId>\plugins\dirx-dxt-app-manager\assets\config\app-config.json). Custom scopes can be added here manually. Modification and adding of scopes to configuration of Swagger UI is currently not supported (See the sections “Using Swagger UI” in section Login in this guid).
Redirect in DirX Audit Manager and Swagger UI
For OIDC authentication flow to work properly in DirX Audit Manager, make sure that redirect URI in format configured by attribute Redirect URI (See the sections “REST Service Authentication Configuration” in the Tenant Configuration in the chapter “Configuring DirX Audit” in the DirX Audit Installation Guide for details.) is listed in Authorization server in Client metadata (defined by Client ID configured in DirX Audit Configurator).
For OIDC authentication flow to work properly in Swagger UI, make sure that redirect URI in format https://hostname:port/Tenants/tenantID/api/audit/swagger-ui/oauth2-redirect.html is configured in Authorization server Client metadata (defined by Client ID configured in DirX Audit Configurator).
Configuring a Secure HTTP Connection
We strongly recommend that you run the DirX Audit Manager application via the HTTPS protocol. See the Tomcat documentation for details.
For example, http://tomcat.apache.org/tomcat-11.0-doc/ssl-howto.html.
Configuring a Secure LDAP Connection
DirX Audit Manager can authenticate users on an external directory server over the LDAP protocol. We strongly recommend that you secure this connection.
For LDAP to work over an SSL connection, the SSL certificate of the LDAP server must be added to the trusted certificate store (trust store) on the manager container.
See the sections “REST Service Authentication Configuration”,
“Server LDAP Collector for DirX Identity Format” and
“Configuring LDAPS” in the chapter “Configuring DirX Audit” in the
DirX Audit Installation Guide for details.
Configuring Session Timeouts
DirX Audit Manager uses the session timeout settings to manage user sessions effectively. We recommend configuring these settings to balance security and user convenience. Default timeout of session is set to one hour and default maximum age of session cookie is set to 10 hours. For more details, see the section “REST Service Authentication Configuration” in the DirX Audit Installation Guide.
Using Swagger UI
Swagger is tool for accessing and documentation of REST API endpoints. It shows all available endpoints and provides a way to use them outside of Audit Manager web application.
To access REST API use URL: https://hostname:port/Tenants/tenantID/api/audit/swagger-ui/index.html

Under the title DirX Audit RESTful API is link to API documentation in JSON format. To access API docs directly use URL: https://hostname:port/Tenants/tenantID/api/audit/v3/api-docs
Disabling Swagger UI
To disable Swagger UI, set the property enable_swagger to false in the section [server_container.rest] of corresponding tenant configuration.cfg file. This will prevent Swagger UI from being accessible.
This property is set to true by default, which means that Swagger UI is enabled.
The access to the API documentation in JSON format is not affected by this property and remains accessible.
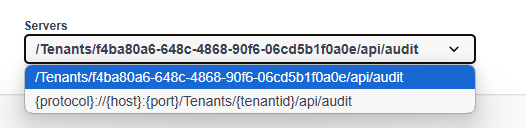
Configuring Execution URL
In section Servers, URL path should be shown with current tenant ID. This path will be used to send requests when using endpoints in Swagger UI. In case of need, the dropbox can be expanded and different URL can be configured with setting of protocol, host, port number and tenant ID.
Login
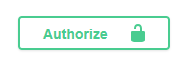
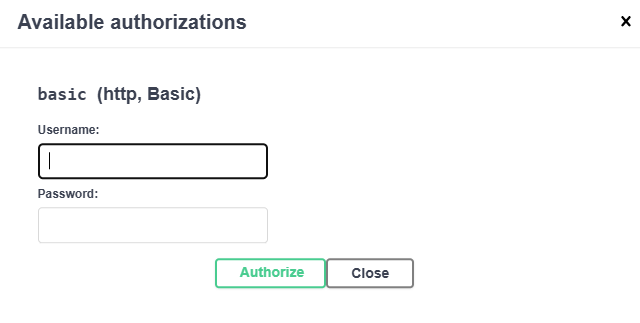
To the right from Servers section is Authorize button. Use this button to authorize user.
-
LDAP authorization
-
LDAP username and password must be filled in
-
-
OIDC authorization
-
token authentication – requires filling in the token value
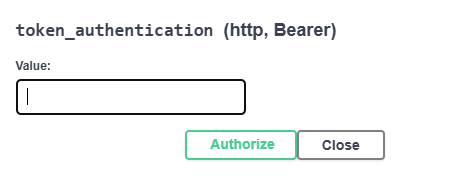 Figure 8. Token authentication
 -
oAuth2 authentication – redirects to authorization server for user to be authorized and redirects back to Swagger UI
For this method to work make sure values are prefilled for Authorization URL, Token URL, Flow and Client ID.
Authorization URL, Token URL and Client ID are configured in tenant Configurator in step “REST Service Authentication Configuration”,
Client secret can stay empty as the method uses authorization code with PKCE. Scopes openid, email and profile should be all selected for proper user management in Audit Manager.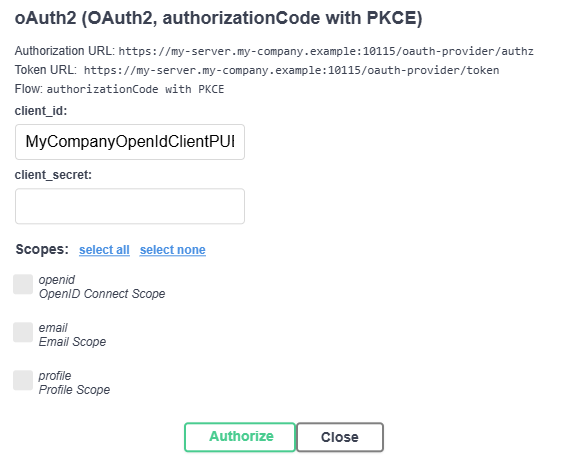 Figure 9. oAuth2 authentication
-
Once authenticated, all REST API endpoints shown in Swagger UI should be usable to the extend of authorized user permissions.
Logout
-
LDAP authentication
-
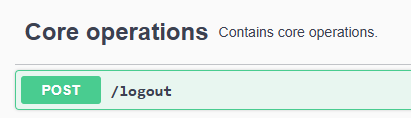
execute /logout endpoint to ensure that security context and authentication object of user are cleaned on server side - without this the previous user will be used even after using Logout button provided by Swagger UI
-
use Logout button provided by Swagger UI to clean the credentials
-
-
OIDC authentication
-
use Logout button provided by Swagger UI
-