Configuring DirX Audit
This chapter describes how to configure DirX Audit with the Configuration Wizard.
You can use this wizard to:
-
Perform a complete initial configuration, which includes the Core configuration and the Tenant configuration.
-
Perform a reconfiguration at any time.
-
Run the silent configuration.
-
Configure LDAP over SSL (LDAPS).
The section “Post-Configuration Tasks” in this chapter provides information about additional post-configuration and preparatory tasks that are not handled by the configuration process. Perform these tasks after the configuration process is finished.
UNIX Instructions:
To run DirX Audit Configuration Wizard, a graphical interface or graphical display must be available either locally or remotely. The Configuration Wizard cannot run in a console mode.
Run the Configuration Wizard under the same user as the installation.
Starting the Configuration Wizard
This section provides information about starting the Configuration Wizard.
| Before beginning the configuration process, ensure that the JDBC driver for Oracle Database is installed, as it is necessary for running the Oracle Database if you intend to use it as the DirX Audit database. |
Initial Configuration
This section describes how to start the installation process on Windows and UNIX systems.
Windows Instructions
On Windows, the installation process starts the Configuration Wizard automatically. If the Configuration Wizard does not start automatically, start it manually with the command:
install_path\configurator\bin\configuration.bat
| You must run the command as Administrator. The command starts the Core Configuration Wizard, after which the Tenant Configuration Wizard follows. You must configure at least one tenant. |
UNIX Instructions
On UNIX, the GUI installation process starts the Configuration Wizard automatically. If the Configuration Wizard does not start automatically or you used the console mode, run the script:
install_path/configurator/bin/configuration.sh
| Make sure you run the command with an account that has sufficient read and write rights for the DirX Audit installation folder. |
Re-configuration
You can start the Configuration Wizard at any time to modify your configuration.
Windows Instructions
To run the Core configuration on Windows, select All Programs →
DirX Audit → Configurator – Core from the Start menu or run the command:
install_path\configurator\bin\configuration.bat
To run the Tenant configuration on Windows, select All Programs →
DirX Audit → Configurator – Tenant from the Start menu or run the command:
install_path\configurator\bin\configuration.bat tenant
| You must run these commands as Administrator. |
UNIX Instructions
To run the Core configuration on UNIX, run the command:
install_path/configurator/bin/configuration.sh
To run the Tenant configuration on UNIX, run the command:
install_path/configurator/bin/configuration.sh tenant
| Make sure that you run these commands with an account that has sufficient read and write rights for the DirX Audit installation folder. |
Using the Configuration Wizard for the Core Configuration
This section provides information about the tasks that the DirX Audit Configuration Wizard performs.
The Configuration Wizard displays the configuration tasks to be performed on the left-hand side of each dialog. The number of tasks displayed depends on the configuration options you select during the process in the wizard.
The Configuration Wizard highlights the current task in orange, completed tasks in blue and outstanding tasks in gray.
It also identifies the current task in a heading on the right-side of the dialog.
The right side of the dialog displays all information and fields for configuration input.
Mandatory input fields are displayed in red.
A label at the bottom indicates the source from which the settings on a page are loaded: Installation, Last saved, or Defaults. When specifying input values, you can use the following buttons (if enabled) to load persistent (saved) values:
-
Installation – Loads the values that the current installation uses.
-
Last saved – Loads the values saved in the last configuration. The Configuration Wizard saves the entered values when you click Cancel and confirm to save the modifications.
-
Defaults – Loads the default values.
The bottom of the dialog provides the following navigation buttons:
-
Previous – Steps backward; for example, to control or correct values that you’ve already specified. The Configuration Wizard checks and saves the specified values in this step. If you have set an incorrect mandatory value, you may need to change it before you can go back.
-
Next – Steps forward. The Configuration Wizard saves the specified values. The Configuration Wizard checks and saves the specified values in this step. If you have set the wrong mandatory value, you may need to change it before you can go forward. When all parameter settings are complete, the Configuration Wizard starts the configuration process.
-
Finish – Exits the configuration process.
-
Cancel – Cancels the Configuration Wizard.
-
Help – Provides additional help information if available. It opens the help section in a web browser, which you can choose from the list accessed by clicking the icon next to the help button.
After startup, the Configuration Wizard displays a welcome dialog.
Welcome to the DirX Audit Configuration Wizard
This page welcomes you to the DirX Audit Configuration Wizard.
Click Next to specify the configuration options.
Configuration Options
In the Configuration Options dialog, you can select the following options:
-
Common Audit Configuration:
-
Common Audit Configuration – Configure common settings for Audit Manager and Audit Server.
-
-
Audit Message Broker:
-
Audit Message Broker Configuration – Configure the JMS message broker (Apache ActiveMQ).
-
-
Audit Manager Configuration:
-
Audit Manager Container Configuration – Configure the application container (Apache Tomcat) for running the DirX Audit Manager application.
-
-
Audit Server:
-
Scheduled Jobs Configuration – Configure the basic options for scheduling the DirX Audit Server jobs.
-
Check the components you want to configure and then click Next. The Configuration Wizard calculates all of the necessary tasks given your selections and then displays them on the left-hand side of the next dialog.
| When you perform the initial configuration, the Configuration Wizard requires that you configure all components. |
Related Topics: “Starting the Configuration Wizard”
Common Configuration
In the Common Configuration dialog, specify the components you want to configure:
-
Persistence configuration – Configure general persistence settings.
-
SMTP configuration – Configure emailing services.
This section allows you to configure common components for all tenants (organizations). Later, you can set up the specific tenant components like databases, authorization, and the server job configuration.
| When you perform the initial configuration, the Configuration Wizard requires that you configure all components. |
Related Topics: “Starting the Configuration Wizard”
Common Persistence Configuration
In the Common Persistence Configuration dialog, specify the following parameters:
-
Folder for persistent files – The full pathname to the folder for storing reports generated by users and user configuration.
Related Topics: “Starting the Configuration Wizard”
Common SMTP Configuration
In the Common SMTP Configuration dialog, specify the email settings:
-
Send emails – Whether (checked) or not (unchecked) the email notifications and scheduled reports are provided.
-
SMTP Server host – The host name of the SMTP server.
-
Secure connection – The cryptographic protocol for the connection. Use the drop-down list to make your selection.
-
SMTP Server port – The port of the SMTP server.
-
Default from email address – The email address from which the email will be sent by default.
-
Show server detail in email body – Whether (checked) or not (unchecked) the generated email body contains information about server (host, tenant).
-
-
Authenticate – Whether (checked) or not (unchecked) the email sender is authenticated.
-
Authentication type – The authentication type, if Authenticate is checked. Use the drop-down list to make your selection.
-
Authentication username – The user name.
-
Authentication user password – The user’s password. The password is saved in the configuration file and is encrypted using an installation-specific master encryption key. This master key is randomly generated during the first installation on a given host and is different on each installed host. Click the button at the end of the password field to view the password.
-
-
Test connection – Click to test the SMTP server connection. If the connection fails, an error message is displayed. In this case, you can continue with the configuration, but it is your responsibility to correct your settings later on.
Related Topics: “Starting the Configuration Wizard”
Message Broker
In the Message Broker dialog, specify the components you want to configure:
-
Message Broker connectivity configuration – Configure the message broker connectivity.
-
Message Broker system service configuration – Configure the message broker system service.
-
Message Broker administrative credentials configuration – Configure the message broker internal technical accounts.
Note that when you perform the initial configuration, the Configuration Wizard requires that you configure all components.
Related Topics: “Starting the Configuration Wizard”
Message Broker Connectivity
Use this dialog to specify the message broker connectors. We recommend communicating over secure channels between components and services. The message broker console is provided only over a secure channel and you must supply cryptographic material stored in Java keystores and truststores for this communication. The recommended location for all keystores and truststores is the folder install_path/conf/crypto/stores.
In the Message Broker Connectivity dialog, specify the following parameters:
-
Enable SSL – Whether (checked) or not (unchecked) to enable using secure (SSL) connection globally. Includes secure connection to ActiveMQ console and JMS message broker. Communication over secure channels between components and services is recommended.
-
Enable OpenWire connector – The default transport for receiving audit messages over JMS. This field must be enabled if you don’t use SSL so that the OpenWire connector is used for local client connection.
-
OpenWire connector URI – The JMS message broker listen URI, in the format tcp://host:port, where host specifies the server name or IP address of the interfaces to which the server is to bind (listen on) and port specifies the server port number. The default host value is 0.0.0.0, which configures the server to listen on all available network interfaces. Be careful when setting specific IP addresses or host names; for example, remember that the locally-installed Audit Server JMS collector will most likely use the loop-back interface. The default port value is 30666.
-
Enable SSL connector – Whether (checked) or not (unchecked) to enable the connector using secured (SSL) connection.
-
SSL connector URI – The JMS message broker listen URI, in the format ssl://host:port, where host specifies the server name and port specifies the server port number. See the OpenWire connector URI format description for information about specifying the host value. The default port value is 30667.
-
Local client (connector) URI – The local client connection URI, in the format tcp://localhost:port, where localhost specifies your local server name and port specifies the server port number. The default port value depends on previous selection (30666 or 30667 for SSL). If the OpenWire connector is enabled, the default port for loop-back interface is used. The Configuration Wizard uses this URI as default value for the first Server JMS Collector configuration in the Tenant configuration.
-
Remote client (connector) URI – The remote client connection URI, in the format tcp://host:port or ssl://host:port, where host specifies your server name and port specifies the server port number. The default port value depends on previous selection (30666 or 30667 for SSL).
-
Keystore location – The path to the keystore which will be used for secure connection. Click the Open file browser button at the end of the line to find your location. If you followed our example for keystore preparation and you saved the created keystore to the default location, the keystore location should be: install_path/conf/crypto/stores/broker-ks.jks.
For more information, see the section “Preparing Truststores and Keystores for SSL Configuration” → “Preparing the Message Broker” in this guide. -
Keystore password – The valid password for your keystore. Click the button at the end of the password field to view the password.
-
Truststore location – The path to the truststore which will be used for secure connection. Click the Open file browser button at the end of the line to find your location. If you followed our example for truststore preparation and you saved created truststore to the default location, the location should be: install_path/conf/crypto/stores/broker-ts.jks.
For more information, see the section “Preparing Truststores and Keystores for SSL Configuration” → “Preparing the Message Broker” in this guide.
If it is missing, the standard Java KeyStore (JKS) is assumed. -
Truststore password – The valid password for your truststore. Click the button at the end of the password field to view the password.
-
Message repository – the folder where the queue data and messages will be stored.
Once you click Next, the Configuration Wizard checks the Message Broker connectivity. If invalid values are provided or some configuration is missing, an error message is displayed and you cannot continue with the configuration process until you supply valid values. If you do not use the recommended secure connections, a warning message is displayed, but you can continue with the configuration.
Related Topics:
“Starting the Configuration Wizard”
“Preparing Truststores and Keystores for SSL Configuration”
Message Broker System Service
In the Message Broker System Service dialog, you set the system service configuration.
| The dialog window may be different for Windows and for UNIX. |
Specify the following parameters:
-
(Re-)Install system service support – Whether (checked) or not (unchecked) to install or re-install support for running as a system service. This parameter is set (checked) and read-only on initial configuration.
-
Run as a system service – Whether (checked) or not (unchecked) to run the message broker as a system service.
Windows Instructions-
Service startup type – The service start type. Use the drop-down list to make your selection (AUTO / AUTO_DELAYED / DISABLED / MANUAL).
-
Log on as – The account under which the DirX Audit Message Broker should run. You can select System Account or Other Account. If you select Other Account, you must specify Domain, User and Password for this account.
UNIX Instructions
-
Run system service as user: – The user under which the DirX Audit Message Broker should run.
-
Run system service under group: – The group under which the DirX Audit Message Broker should run.
-
-
Start system service now – Whether (checked) or not (unchecked) to start the message broker service after finishing the configuration.
-
System service name – The service name.
-
System service display name – The service display name.
Related Topics: “Starting the Configuration Wizard”
Message Broker Administration
In the Message Broker Administration dialog, you set the administration credentials for the ActiveMQ system user and you can enable or disable the monitoring with Java Management Extensions technology and the Web console:
-
System (system) – The password for the internal ActiveMQ system account for administration.
-
Enable JMX – Whether (checked) or not (unchecked) DirX Audit Message Broker monitoring with Java Management Extensions technology is enabled. It is enabled by default and has read-only access.
-
Username – The user name to use for connecting to the JMX agent.
-
Password – The password to use for connecting to the JMX agent.
-
-
Enable Web Console – Whether (checked) or not (unchecked) Message Broker Web Console is enabled. It is enabled by default. JMX have to be enabled to enable Web Console.
-
Admin (admin) – The password for the administration account for WebConsole (the administrator can delete queues, for example).
-
User (user) – The password for the normal user account for WebConsole.
-
Click the button at the end of the password field to view the passwords. Passwords are saved in the configuration files and are encrypted using an installation-specific master encryption key. This master key is randomly generated during the first installation on a given host and is different on each installed host.
Related Topics: “Starting the Configuration Wizard”
Manager Container Folder
In the Manager Container Folder dialog, specify the full pathname of the installed container (Apache Tomcat) or click the Open the file browser button to browse to the installed container. The specified directory must exist and contain a supported version of Apache Tomcat.
Related Topics: “Starting the Configuration Wizard”
Server Scheduled Jobs
In the Server Scheduled Jobs dialog, specify the scheduled jobs time range for the server application. Later in the Tenant configuration you can specify tenant specific server options.
Note: The dialog window may be different for Windows and for UNIX.
-
Time range for running scheduled jobs – The time range when you want to run scheduled jobs. The default values are at night 9 p.m. – 5 a.m.
-
Exclude range – When checked, the time range when scheduled jobs should not be run; for example, between 2 a.m. and 3 a.m. because time is shifting or your system backup is in progress.
Related Topics: “Starting the Configuration Wizard”
Pre-Configuration Summary
The Configuration Wizard displays the Core configuration selections you have made and asks you to review them.
-
Click Previous to change any settings you have made.
-
Click Next to start the Core configuration process.
Related Topics: “Starting the Configuration Wizard”
Configuration in Progress
While configuring the DirX Audit core is in progress, the Configuration Wizard displays the current task in orange, successfully performed tasks in green and failed tasks in red. It displays the detailed action of the current task in the Action detail field.
When the Core configuration process completes, click:
-
Display current configuration log – To display information on the DirX Audit configuration you just performed, including thrown exceptions.
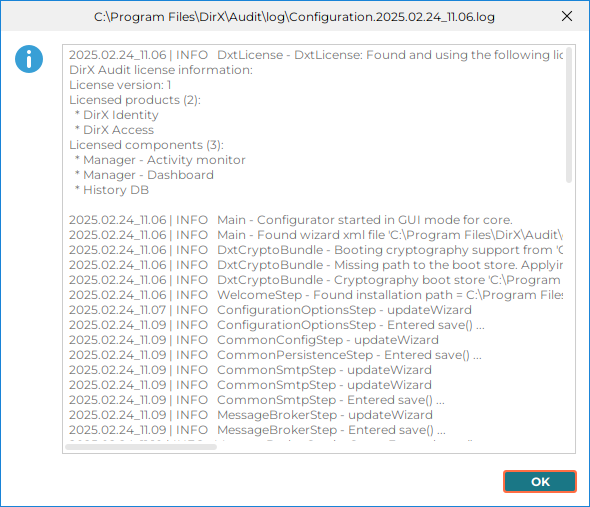
-
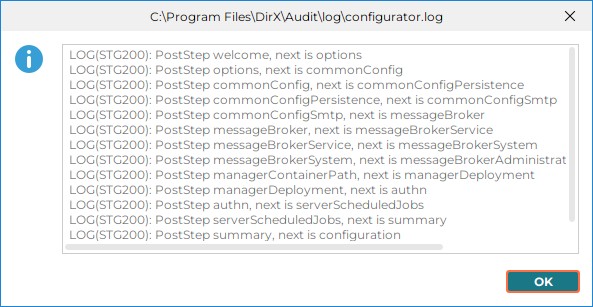
Display configurator log – To display information on the application status of the Configuration Wizard.
-
Next – To start the Tenant configuration.
Related Topics: “Starting the Configuration Wizard”
Next Actions Options
In the Next Actions Options dialog allows you to start the Tenant configuration and specify how many tenants you want to configure. In the dialog, you can specify:
-
Run Tenant Configuration – Whether (checked) or not (unchecked) to start the Tenant Configuration. At least one tenant must be configured if you configure a new installation.
-
Expected number of tenants – The number of tenants you want to configure. At least one tenant must be configured.
If you select to configure multiple tenants, the Tenant configuration dialogs are started as many times as the number of tenants you enter.
-
Click Finish to finish the Core configuration process and to start the Tenant configuration process.
Related Topics: “Starting the Configuration Wizard”
Using the Configuration Wizard for the Tenant Configuration
This section provides information about the Tenant configuration. It is started automatically when you click Finish in the Next Actions Options dialog in the Core configuration.
You can start the Configuration Wizard for the Tenant configuration at any time to modify your existing tenant configuration or add a new tenant. For more details on how to start the Tenant configuration, see the section “Re-configuration” in this guide.
Tenant Options
In the Tenant Options dialog, select what you want to configure:
-
Create New Tenant – To create a new tenant.
-
Modify Existing Tenant – To configure settings of an existing tenant.
-
Remove Existing Tenant – To remove a tenant.
When you select what you want to configure, the Configuration Wizard displays the configuration tasks to be performed on the left-hand side of the dialog and you can click Next to continue.
Create New Tenant
The Create New Tenant dialog is displayed when you select Create New Tenant in the Tenant Options dialog.
In the Create New Tenant dialog, specify the tenant name. The tenant name must be unique and it is used as default for the server service display name and description. The Tenant ID is generated automatically and it is used for internal server folders, server service name, and tenant identification; for example, in the Message Broker configuration and in the DirX Audit Manager URL.
If you already have another tenant configured, the following check box is displayed:
-
Copy configuration from – Check to copy the tenant configuration from an existing tenant to your current tenant configuration. Use the drop-down list to make your tenant selection.
Click Next to continue with the Tenant configuration. The next step is the Configuration Options dialog.
Modify Existing Tenant
The Modify Existing Tenant dialog is displayed when you select Modify Existing Tenant in the Tenant Options dialog.
In the Modify Existing Tenant dialog, specify the tenant you want to configure:
-
Tenant to modify – Select the tenant you want to modify from the drop-down list.
-
Tenant name – You can modify the tenant name. The modified name will be used, for example, for the server service description. If you want to modify an existing server service display name, you must go through the Application Container Configuration in the Tenant configuration.
-
Tenant ID – The Tenant ID is generated automatically and cannot be edited.
-
Copy configuration from – Check to copy the tenant configuration from an existing tenant to your current tenant configuration. Use the drop-down list to make your tenant selection.
Click Next to continue with the Tenant configuration. The next step is the Configuration Options dialog.
Remove Existing Tenant
The Remove Existing Tenant dialog is displayed when you select Remove Existing Tenant in the Tenant Options dialog.
In the Remove Existing Tenant dialog, specify the tenant you want to remove:
-
Tenant to remove – Select the tenant you want to remove from the drop-down list.
Click Next to continue with the Tenant configuration. The next step is the Pre-configuration Summary dialog.
Related Topics: “Using the Configuration Wizard for the Tenant Configuration”
Configuration Options
In the Configuration Options dialog, specify the components you want to configure:
-
Database Configuration
-
Data DB Configuration – Configure the required database connectivity parameters for storing audit data.
-
Configuration DB Configuration – Configure the required database connectivity parameters for storing configuration data.
-
History DB Configuration – Configure the required database connectivity parameters for storing history data.
-
-
Common LDAP Authentication Configuration – Configure the LDAP authentication parameters.
-
Audit Manager Application Configuration – Configure deployment of Audit Manager Application.
-
Audit Server Application Configuration
-
Application Container Configuration – Configure the application container for running the DirX Audit Server application.
-
REST Service Configuration – Configure REST Service to access resources audit data in databases.
-
REST Service Authentication Configuration – Configure authentication for REST Service to access audit data in databases.
-
Collectors Configuration – Configure the DirX Audit Server collectors.
-
Scheduled Jobs Configuration – Configure the options for scheduling the DirX Audit Server jobs.
-
Scheduled Purge Jobs Configuration – Configure the DirX Audit data for which the DirX Audit Server purge job(s) should be configured.
-
Scheduled History Synchronization Jobs Configuration – Configure the options for history entries synchronization.
-
When you set up a new tenant, the Configuration Wizard requires that you configure all components.
Related Topics:
“Starting the Configuration Wizard”
“Using the Configuration Wizard for the Tenant Configuration”
Data DB Configuration
In the Data DB Configuration dialog, specify the required database connectivity parameters.
This database is used to store audit messages.
-
DB Server type – The supported relational database management systems (RDBMS).
-
Authentication method – The supported authentication methods for the selected database server type. The available options are:
-
Database Authentication with username and password – this is the only possible method for the Oracle DB Server type values.
-
Kerberos Authentication with username and password – this option is available only for the Microsoft SQL Server DB Server type values.
-
Windows Authentication – this option is available only for the Microsoft SQL Server DB Server type values.
-
-
Driver class name – The full Java class name of the JDBC driver for the selected database. You can use the pre-defined value or replace it with the correct one.
-
Connection URL – The URL used for connecting to the Data DB. You can use the default pre-defined URL syntax and replace the hostname (the host name of the database server), port (the port number for the JDBC connection) and servicename or dbname with the current values in your environment.
Default syntax for SQL Server:
jdbc:sqlserver://hostname:port;databaseName=dbname;encrypt=false
Default syntaxes for Oracle Database:
jdbc:oracle:thin:@//hostname:port:servicenameor
jdbc:oracle:thin:@//hostname:port:OracleSID
If you have problem with the validation of the server certificate, you can configure the driver to ignore the certificate validity and trust any provided server certificate by using the following URL. You should not use this option for productive environments (as it’s unsafe).For SQL Server:
jdbc:sqlserver://hostname:port;databaseName=dbname;encrypt=true;trustServerCertificate=true
If you wish to connect with encryption, you must have the DBMS certificate available in a truststore and use the following URL.For SQL Server:
jdbc:sqlserver://hostname:port;databaseName=dbname;

encrypt=true;trustServerCertificate=false
or
jdbc:sqlserver://hostname:port;databaseName=dbname;

encrypt=true;trustServerCertificate=false;

trustStore=storename;trustStorePassword=storepassword; hostNameInCertificate=certificatehostname
Note that the Connection URL is stored unencrypted in the configuration.cfg file. You can expose the truststore password when specifying it.For Oracle Database:
jdbc:oracle:thin:@(DESCRIPTION=(ADDRESS=(PROTOCOL=TCPS)(PORT=port)
(HOST=hostname))(CONNECT_DATA=(SERVICE_NAME=servicename))(SECURITY=(ssl_server_cert_dn="servercertificatedn")))
Note that Oracle Database uses a different port for unsecured (default 1521) and secured (default 2484) connections.Make sure that you enter different Data DBs for different tenants.
-
Username – The RDBMS technical account name for connection when Database Authentication with username and password is selected in Authentication method.
The Kerberos principal is in the form username@REALM; for example,
admin@MY-COMPANY.COM, when Kerberos Authentication with username and password is selected in Authentication method. The Kerberos realm name is always case-sensitive and by convention (best practice) uppercase. This parameter is not available when the Windows Authentication is selected in Authentication method. -
Password – The password that belongs to Username. The password is saved in the Tenant configuration file and is encrypted using an installation-specific master encryption key. This master key is randomly generated during the first installation on a given host and is different on each installed host. Click the button at the end of the password field to view the password. This parameter is not available when the Windows Authentication is selected in Authentication method.
-
Save original audit messages – Whether (checked) or not (unchecked) the original audit message should be saved in the database. Possible values are true and false. If set to true, the original message is saved.
-
Use full-text search – Whether (checked) or not (unchecked) to use full-text for searching in selected fields (for example, Audit Event – Detail). Using full-text search is usually faster on bigger data. Important note: The full-text catalogs / indexes must be created in the selected database.
-
Test connection – Click to test the database connection. If the connection fails, an error message is displayed. In this case, you can continue with the configuration, but it is your responsibility to correct your settings later on. When Windows Authentication is selected in Authentication method, be sure that you use the same account to run the Configuration Wizard as is used to run DirX Audit Server and Apache Tomcat system services or the connection test can be misleading.
-
Validate DB – Click to validate the database schema. This action validates the existing schema, or if the database schema does not exist, the validation action creates it. A prerequisite is that the technical account used for the database connectivity has sufficient privileges for creating database objects like tables, views, materialized / indexed views, indexes and triggers. If your database schema is not valid, contact your support organization.
Once you click Next, the Configuration Wizard checks the Data DB connection. If invalid values are provided – for example, for the JDBC driver – an error message is displayed. In this case, you can continue with the configuration, but it is your responsibility to correct your settings later on. The Configuration Wizard checks to make sure your Data DB is not in use by another tenant. If it is, you cannot continue with the configuration process until you supply valid values.
Related Topics:
“Starting the Configuration Wizard”
“Using the Configuration Wizard for the Tenant Configuration”
Config DB Configuration
In the Config DB Configuration dialog, specify the required database connectivity parameters. This database is used to store configuration data.
-
The same as data DB – Whether (checked) or not (unchecked) to use the same settings here as you used for the database containing audit messages.
-
DB Server type – The supported relational database management systems.
-
Authentication method – The supported authentication methods for the selected database server type. The available options are:
-
Database Authentication with username and password – this is the only possible method for the Oracle DB Server type values.
-
Kerberos Authentication with username and password – this option is available only for the Microsoft SQL Server DB Server type values.
-
Windows Authentication – this option is available only for the Microsoft SQL Server DB Server type values.
-
-
Driver class name – The full Java class name of the JDBC driver for the selected database. You can use the pre-defined value or replace it with the correct one.
-
Connection URL – The URL used for connecting to the Config DB. You can use the default pre-defined URL syntax and replace the hostname (the host name of the database server), port (the port number for the JDBC connection) and servicename or dbname with the current values in your environment.
Default syntax for SQL Server:
jdbc:sqlserver://hostname:port;databaseName=dbname;encrypt=falseDefault syntaxes for Oracle Database:
jdbc:oracle:thin:@//hostname:port:servicenameor
jdbc:oracle:thin:@//hostname:port:OracleSIDIf you have problem with the validation of the server certificate, you can configure the driver to ignore the certificate validity and trust any provided server certificate by using the following URL. You should not use this option for productive environments (as it’s unsafe).
For SQL Server:
jdbc:sqlserver://hostname:port;databaseName=dbname;encrypt=true;trustServerCertificate=trueIf you wish to connect with encryption, you must have the DBMS certificate available in a truststore and use the following URL.
For SQL Server:
jdbc:sqlserver://hostname:port;databaseName=dbname;

encrypt=true;trustServerCertificate=false;

trustStore=storename;trustStorePassword=storepassword;

hostNameInCertificate=certificatehostname
For Oracle Database:
jdbc:oracle:thin:@(DESCRIPTION=(ADDRESS=(PROTOCOL=TCPS)(PORT=port)(HOST=hostname))(CONNECT_DATA=(SERVICE_NAME=servicename))(SECURITY=(ssl_server_cert_dn="servercertificatedn")))Note that Oracle Database uses a different port for unsecured (default 1521) and secured (default 2484) connections.
Make sure that you enter different Config DBs for different tenants.
-
Username – The RDBMS technical account name for connection when Database Authentication with username and password is selected in Authentication method.
The Kerberos principal is in the form username@REALM; for example,
admin@MY-COMPANY.COM, when Kerberos Authentication with username and password is selected in Authentication method. The Kerberos realm name is always case-sensitive and by convention (best practice) uppercase. This parameter is not available when the Windows Authentication is selected in Authentication method. -
Password – The password that belongs to Username. The password is saved in the Tenant configuration file and is encrypted using an installation-specific master encryption key. This master key is randomly generated during the first installation on a given host and is different on each installed host. Click the button at the end of the password field to view the password. This parameter is not available when the Windows Authentication is selected in Authentication method.
-
Test connection – Click to test the database connection. If the connection fails, an error message is displayed. In this case, you can continue with the configuration, but it is your responsibility to correct your settings later on. When Windows Authentication is selected in Authentication method, be sure that you use the same account to run the Configuration Wizard as is used to run DirX Audit Server and Apache Tomcat system services or the connection test can be misleading.
-
Validate DB – Click to validate the database schema. This action validates the existing schema, or if the database schema does not exist, the validation action creates it. A prerequisite is that the technical account used for the database connectivity has sufficient privileges for creating database objects like tables, views, materialized / indexed views, indexes and triggers. If your database schema is not valid, contact your support organization.
Once you click Next, the Configuration Wizard checks the Config DB connection. If invalid values are provided – for example, for the JDBC driver – an error message is displayed. In this case, you can continue with the configuration, but it is your responsibility to correct your settings later. The Configuration Wizard checks to make sure that your Config DB is not in use by another tenant. If it is, you cannot continue with the configuration process until you supply valid values.
Related Topics:
“Starting the Configuration Wizard”
“Using the Configuration Wizard for the Tenant Configuration”
History DB Configuration
In the History DB Configuration dialog, specify the required database connectivity parameters.
This database is used to store history entries.
-
The same as data DB – Whether (checked) or not (unchecked) to use the same settings here as you used for the database containing audit messages.
-
The same as config DB – Whether (checked) or not (unchecked) to use the same settings here as you used for the database containing configuration data.
-
DB Server type – The supported relational database management systems (RDBMS).
-
Authentication method – The supported authentication methods for the selected database server type. The available options are:
-
Database Authentication with username and password – this is the only possible method for the Oracle DB Server type values.
-
Kerberos Authentication with username and password – this option is available only for the Microsoft SQL Server DB Server type values.
-
Windows Authentication – this option is available only for the Microsoft SQL Server DB Server type values.
-
-
Driver class name – The full Java class name of the JDBC driver for the selected database. You can use the pre-defined value or replace it with the correct one.
-
Connection URL – The URL used for connecting to the History DB. You can use the default pre-defined URL syntax and replace the hostname (the host name of the database server), port (the port number for the JDBC connection) and servicename or dbname with the current values in your environment.
Default syntax for SQL Server:
jdbc:sqlserver://hostname:port,databaseName=dbname;encrypt=false*Default syntaxes for Oracle Database:
jdbc:oracle:thin:@//hostname:port:servicenameor
jdbc:oracle:thin:@//hostname:port:OracleSIDIf you have problem with the validation of the server certificate, you can configure the driver to ignore the certificate validity and trust any provided server certificate by using the following URL. You should not use this option for productive environments (as it’s unsafe).
For SQL Server:
jdbc:sqlserver://hostname:port;databaseName=dbname;encrypt=true;trustServerCertificate=trueIf you wish to connect with encryption, you must have the DBMS certificate available in a truststore and use the following URL.
For SQL Server:
jdbc:sqlserver://hostname:port;databaseName=dbname;

encrypt=true;trustServerCertificate=false;

trustStore=storename;trustStorePassword=storepassword;

hostNameInCertificate=certificatehostname
For Oracle Database:
jdbc:oracle:thin:@(DESCRIPTION=(ADDRESS=(PROTOCOL=TCPS)(PORT=port)(HOST=hostname))(CONNECT_DATA=(SERVICE_NAME=servicename))(SECURITY=(ssl_server_cert_dn="servercertificatedn")))Note that Oracle Database uses a different port for unsecured (default 1521) and secured (default 2484) connections.
Make sure that you enter different History DBs for different tenants.
-
Username – The RDBMS technical account name for connection when Database Authentication with username and password is selected in Authentication method.
The Kerberos principal is in the form username@REALM; for example,
admin@MY-COMPANY.COM, when Kerberos Authentication with username and password is selected in Authentication method. The Kerberos realm name is always case-sensitive and by convention (best practice) uppercase. This parameter is not available when the Windows Authentication is selected in Authentication method. -
Password – The password that belongs to Username. The password is saved in the Tenant configuration file and is encrypted using an installation-specific master encryption key. This master key is randomly generated during the first installation on a given host and is different on each installed host. Click the button at the end of the password field to view the password. This parameter is not available when the Windows Authentication is selected in Authentication method.
-
Test connection – Click to test the database connection. If the connection fails, an error message is displayed. In this case, you can continue with the configuration, but it is your responsibility to correct your settings later on. When Windows Authentication is selected in Authentication method, be sure that you use the same account to run the Configuration Wizard as is used to run DirX Audit Server and Apache Tomcat system services or the connection test can be misleading
-
Validate DB – Click to validate the database schema. This action validates the existing schema, or if the database schema does not exist, the validation action creates it. A prerequisite is that the technical account used for the database connectivity has sufficient privileges for creating database objects like tables, views, materialized / indexed views, indexes and triggers. If your database schema is not valid, contact your support organization.
Once you click Next, the Configuration Wizard checks the History DB connection. If invalid values are provided – for example, for the JDBC driver – an error message is displayed. In this case, you can continue with the configuration, but it is your responsibility to correct your settings later. The Configuration Wizard checks to make sure that your History DB is not in use by another tenant. If it is, you cannot continue with the configuration process until you supply valid values.
Related Topics:
“Starting the Configuration Wizard”
“Using the Configuration Wizard for the Tenant Configuration”
Common LDAP Authentication Configuration
In the Common LDAP Authentication Configuration dialog, specify the common LDAP authentication connectivity parameters if you want to use LDAP for user authentication, LDAP collector or History synchronization. Completing these fields will allow you to use the information in subsequent dialogs.
-
Configure common LDAP authentication – Whether (checked) or not (unchecked) to configure common LDAP authentication parameters. Then you can continue to fill in the required LDAP authentication parameters, which can be used in the following dialogs.
-
LDAP server host – The host name of the LDAP server.
-
Use SSL – Whether (checked) or not (unchecked) the LDAP connection is an SSL connection. Using an SSL connection is the default setting because we recommend communicating over secure channels between components and services.
-
LDAP server port – The port number for the LDAP connection.
-
Authentication type – The authentication type. Please keep the predefined value SIMPLE.
-
Domain – The DirX Identity domain. This value is used in the next LDAP authentication parameters and replaces the ${domain} placeholder.
-
Search account user DN – The Distinguished Name of the technical LDAP account for searching users and groups on authentication.
-
Search account password – The password of the technical account. The password is saved in the Tenant configuration file and is encrypted using an installation-specific master encryption key. This master key is randomly generated during the first installation on a given host and is different on each installed host. Click the button at the end of the password field to view the password.
-
Search base for users – The base for the LDAP search. Use this setting to limit the subtree where you search for the authenticating user.
-
Search filter for users – The LDAP filter to use to limit the result where the authenticating user is searched. Use %s to represent a string containing the user target naming attribute, the equal sign and the user name provided by the authentication form or an HTTP request header variable for a single sign on; for example, cn=Tinker Boris.
-
User target – The naming attribute of users. It is usually the cn attribute.
-
Search base for groups – The base for the LDAP search. Use this setting to limit the subtree where you search for the groups of which the authenticating user can be a member.
-
Search filter for groups – The LDAP filter to use to limit the result where the groups of which the authenticating user can be a member are searched. Use %d to represent a distinguished name (DN) of the authenticating user.
-
List of auditor groups – The list of LDAP groups (DNs) to be mapped to the Auditor role. Separate each group DN with a semicolon (;).
-
List of restricted auditor groups – The list of LDAP groups (DNs) to be mapped to the Restricted Auditor role. Separate each group DN with a semicolon (;).
-
List of audit administrators groups – The list of LDAP groups (DNs) to be mapped to the Audit Administrator role. Separate each group DN with a semicolon (;).
-
User identification attribute – The unique identifying attribute of users. Ensure that all entries in the authentication service have a non-empty value in this attribute and that these values are unique.
-
User email attribute – The LDAP attribute holding the user’s email address. The attribute value is used when the user configures scheduled reporting jobs.
-
Truststore location – The path to the truststore used for establishing secure SSL/TLS connections to the LDAP directory server. For more information about the default locations and how to prepare your own truststore, see the section “Preparing the LDAP Truststore for Authentication and LDAP Collector Configuration”. If you used the described example, the expected truststore file is named install_path/conf/crypto/stores/ldap-ts.jks. If the requested certificates are part of certificates imported in the Java Runtime Environment, the truststore location field can be left empty. If it is missing, the standard Java KeyStore (JKS) is assumed.
-
Truststore password – The password to access the truststore. Click the button at the end of the password field to view the password. If the requested certificates are part of certificates imported in the Java Runtime Environment, the truststore location and the password fields can be left empty.
-
Test connection – Click to test the LDAP connection.
Once you click Next, the Configuration Wizard checks the LDAP connection. If invalid values are provided – for example, server host or truststore – an error message is displayed. In this case, you can continue with the configuration, but it is your responsibility to correct your settings later. The Configuration Wizard also checks if your LDAP connection is in use by another tenant. If it is, a warning message is displayed, but you can continue with the configuration process if desired.
Related Topics:
“Starting the Configuration Wizard”
“Using the Configuration Wizard for the Tenant Configuration”
“Preparing Truststores and Keystores for SSL Configuration”
Audit Manager Application
The Audit Manager Application dialog displays the application configuration. You can specify the following parameters:
-
(Re-)deploy Audit Manager application – Whether (checked) or not (unchecked) to re-deploy the Audit Manager application with your changes.
Related Topics:
“Starting the Configuration Wizard”
“Using the Configuration Wizard for the Tenant Configuration”
Application Container Configuration
In the Application Container Configuration dialog, configure the tenant-specific server container. You can specify the following parameters.
Note: The dialog window may be different for Windows and for UNIX.
-
(Re-)Install system service support – Whether (checked) or not (unchecked) to install or re-install support for running as a system service. This parameter is set (checked) and read-only on initial configuration.
-
Run as a system service – Whether (checked) or not (unchecked) to run the server container as a system service.
Windows Instructions-
Service startup type – The service start type. Use the drop-down list to make your selection (AUTO / AUTO_DELAYED / DISABLED / MANUAL).
-
Log on as – The account under which the DirX Audit Server should run. You can select System Account or Other Account. If you select Other Account, you must specify Domain, User and Password for this account.
UNIX Instructions
-
Run system service as user: – The user under which the DirX Audit Server should run.
-
Run system service under group: – The group under which the DirX Audit Server should run.
-
-
Start system service now – Whether (checked) or not (unchecked) to start the server container service after finishing the configuration.
-
System service name – The service name that contains the tenant’s unique identification.
-
System service display name – The service display name that contains the tenant’s unique name.
-
Enable JMX – Whether (checked) or not (unchecked) DirX Audit Server monitoring with Java Management Extensions technology is enabled. It is enabled by default and has read-only access.
-
Username – The user name to use for connecting to the JMX agent.
-
Password – The password to use for connecting to the JMX agent.
-
RMI registry port – The Remote Method Invocation (RMI) registry port specific for each tenant for the JMX interface. The value is selected by default from the range 30091 – 30xxx.
-
RMI server port – The Remote Method Invocation (RMI) server port specific for each tenant for the JMX interface. The value is selected by default from the range 30451 – 304xx.
-
Related Topics:
“Starting the Configuration Wizard”
REST Service Configuration
In the REST Service Configuration dialog, specify the REST service parameters:
-
REST service port – The REST service port specific for each tenant for the REST interface. The value is selected by default from the range 30501 – 305xx.
-
Allow origins – Origins which will access REST Service. Origins should contain protocol, host and port of clients accessing resources via REST service. For example, if Audit Manager runs on domain https://localhost:8443, field Allow origins should contain this. Added origins can be set each on new line or separated by comma.
-
Session cookie domain – Session cookie domain field is optional. This value should be set if domain setting the cookie is different from domain reading the cookie. Domain should contain the host. For example, if Audit Manager runs on https://localhost:8443 and REST Service runs on https://localhost:30501 there is no need to set this attribute. If the REST Service runs on https://different-host:30501, the session cookie domain should be set to value different-host.
-
Enable caching – Whether (checked) or not (unchecked) to use the REST Service caches. To disable caching, uncheck the option.
-
Enable SSL – Whether (checked) or not (unchecked) the Audit Server should use SSL connection. Using an SSL connection is the default setting because we recommend communicating over secure channels between components and services.
-
Keystore location – The path to the keystore which will be used for secure connection. Click the Open file browser button at the end of the line to find your location. The keystore location should be: install_path/conf/crypto/stores/server-ks.jks. For more information, see the section “Preparing Truststores and Keystores for SSL Configuration” in this guide. This field is mandatory if Enable SSL is checked.
-
Keystore password – The valid password for your keystore. Click the button at the end of the password field to view the password. This field is mandatory if Enable SSL is checked.
-
Truststore location – The path to the truststore which will be used for secure connection. Click the Open file browser button at the end of the line to find your location. The location should be: install_path/conf/crypto/stores/server-ts.jks. For more information, see the section “Preparing Truststores and Keystores for SSL Configuration” in this guide. If it is missing, the standard Java KeyStore (JKS) is assumed. This field is not mandatory if Enable SSL is checked.
-
Truststore password – The valid password for your truststore. Click the button at the end of the password field to view the password. This field is not mandatory if Enable SSL is checked.
-
-
Local client URI – The local connection URI for client connecting to this REST service locally, in the format http(s)://localhost:port/Tenants/tenantID/api/audit, where localhost specifies your local server name, port specifies the server port number and tenantID specifies your configured tenant ID. The default port value depends on previous selection (30501 – 305xx).
-
Remote client URI – The remote connection URI for client connecting to this REST service remotely, in the format http(s)://host:port/Tenants/tenantID/api/audit, where host specifies your server name, port specifies the server port number and tenantID specifies your configured tenant ID. The default port value depends on previous selection (30501 – 305xx). You should open these ports on firewalls on the machine where DirX Audit is installed.
Related Topics:
“Starting the Configuration Wizard”
“Preparing Truststores and Keystores for SSL Configuration”
REST Service Authentication Configuration
In the REST Service Authentication Configuration dialog, specify the required REST service authentication connectivity parameters.
In the Authentication method, you can specify which authentication methods you want to use:
-
LDAP authentication
-
OpenId Connect authentication
Sample scenarios:
-
LDAP authentication
Prerequisites:
The user accessed the DirX Audit Manager with the following link:
https://hostname:port/audit-manager-tenantID
The user with the specified username and password is searched in the configured LDAP directory service. If it is found and if a valid password is provided, the user is authenticated.
If the user is authorized, the application is redirected to the protected area of the DirX Audit Manager.
If the user is not authorized, the application shows message that the user is unauthorized.
If you select the LDAP authentication, specify the required LDAP authentication parameters.
-
Use common LDAP authentication – Whether (checked) or not (unchecked) to use common authentication connectivity parameters saved in a previous “Common LDAP Authentication Configuration dialog”. If you choose common LDAP authentication, the parameters below are read-only.
-
LDAP server host – The host name of the LDAP server.
-
Use SSL – Whether (checked) or not (unchecked) the LDAP connection is an SSL connection. Using an SSL connection is the default setting because we recommend communicating over secure channels between components and services.
-
LDAP server port – The port number for the LDAP connection.
-
Authentication type – The authentication type. Please keep the predefined value SIMPLE.
-
Domain – The DirX Identity domain. This value is used in the next LDAP authentication parameters and replaces the ${domain} placeholder.
-
Search account user DN – The Distinguished Name of the technical LDAP account for searching users and groups on authentication.
-
Search account password – The password of the technical account. The password is saved in the Tenant configuration file and is encrypted using an installation-specific master encryption key. This master key is randomly generated during the first installation on a given host and is different on each installed host. Click the button at the end of the password field to view the password.
-
Search base for users – The base for the LDAP search. Use this setting to limit the subtree where you search for the authenticating user.
-
Search filter for users – The LDAP filter to use to limit the result where the authenticating user is searched. Use %s to represent a string containing the user target naming attribute, the equal sign and the user name provided by the authentication form or an HTTP request header variable for a single sign on; for example, cn=Tinker Boris.
-
User target – The naming attribute of users. It is usually the cn attribute.
-
Search base for groups – The base for the LDAP search. Use this setting to limit the subtree where you search for the groups of which the authenticating user can be a member.
-
Search filter for groups – The LDAP filter to use to limit the result where the groups of which the authenticating user can be a member are searched. Use %d to represent a distinguished name (DN) of the authenticating user.
-
List of auditor groups – The list of LDAP groups (DNs) to be mapped to the Auditor role. Separate each group DN with a semicolon (;).
-
List of restricted auditor groups – The list of LDAP groups (DNs) to be mapped to the Restricted Auditor role. Separate each group DN with a semicolon (;).
-
List of audit administrators groups – The list of LDAP groups (DNs) to be mapped to the Audit Administrator role. Separate each group DN with a semicolon (;).
Additional REST Service configuration:
-
Mapping of LDAP attributes that should be accessible for user authenticated in Audit Manager.
-
ID, Name and Email are mandatory and pre-defined with default values.
-
Other attributes – Provide additional option to add attributes that can be found in the user’s LDAP. Specify each attribute as a key-value pair in the format
attributeName_label:LDAP_attributeName. You can add multiple attributes each pair on separate line, for example
phone:telephonenumber
work_id:employeenumber
-
-
Truststore location – The path to the truststore used for establishing secure SSL/TLS connections to the LDAP directory server. For more information about the default locations and how to prepare your own truststore, see the section “Preparing the LDAP Truststore for Authentication and LDAP Collector Configuration”. If you used the described example, the expected truststore file is named install_path/conf/crypto/stores/ldap-ts.jks. If the requested certificates are part of certificates imported in the Java Runtime Environment, the truststore location field can be left empty. If it is missing, the standard Java KeyStore (JKS) is assumed.
-
Truststore password – The password to access the truststore. Click the button at the end of the password field to view the password. If the requested certificates are part of certificates imported in the Java Runtime Environment, the truststore location and the password fields can be left empty.
-
Inactive session lifetime (m) – The time in minutes representing the lifetime of an inactive session after which the inactive session is timed out.
-
Maximum session lifetime (m) – The time in minutes representing the maximum lifetime of a session cookie after which the session cookie is invalidated and new session cookie must be created.
-
Test connection – Click to test the LDAP connection.
In the OpenId Connect authentication section, specify the required authentication parameters.
-
Use custom truststore – Whether (checked) or not (unchecked) use the custom truststore.
-
Truststore location – The path to the truststore used for establishing secure SSL/TLS connections to the authorization server.
-
Truststore password – The password to access the truststore. Click the button at the end of the password field to view the password.
-
-
OpenID Configuration – OpenID Connect configuration on OAuth authentication server,
for examplehttps://oauth-provider-hostname:port/oauth-provider/.well-known/openid-configuration -
Specific configuration values – you can use Load values from service button to load values from OpenID Connect configuration service.
-
Issuer – The Issuer Identifier of the OpenID Connect Provider. This value is the same as the iss claim value in the ID tokens issued by this provider.
For examplehttps://oauth-provider-hostname:port/oauth-provider. -
JWT Set URI – The URL of the OpenID Connect Provider’s JSON Web Key Set document. This document contains signing keys that clients use to validate the signatures from the provider.
For examplehttps://oauth-provider-hostname:port/oauth-provider/.well-known/jwks.json. -
Authorization endpoint – The URL of the OpenID Connect Provider’s OAuth Authorization Endpoint used to configure authorization in security scheme of OpenAPI (Swagger).
For examplehttps://oauth-provider-hostname:port/oauth-provider/authz. -
Token endpoint – The URL of the OpenID Connect Provider’s OAuth Token Endpoint used to configure authorization in security scheme of OpenAPI (Swagger).
For examplehttps://oauth-provider-hostname:port/oauth-provider/token.
-
-
Client ID – Unique identifier of client application.
-
Redirect URI – URI to be redirected to after authorizing on authorization server.
For example, https://localhost:8443/audit-manager-tenantID/dirx-dxt-app-manager -
The list of roles to be mapped to the specific role:
-
List of auditor roles – The list of roles to be mapped to the Auditor role. Separate each role with a comma (,).
-
List of restricted auditor roles – The list of roles to be mapped to the Restricted Auditor role. Separate each role with a comma (,).
-
List of audit administrators roles – The list of roles to be mapped to the Audit Administrator role. Separate each role with a comma (,).
-
-
Claims mapping – Names of claims contained in JSON web token that should be accessible for user authenticated in Audit Manager.
Claim can be top-level or nested. For top-level claim put in the name alone. For nested claim the mapping should be defined using SpEL expression specifying the path to the claim value, for example: [resource_access][dxt][roles]. For more information see the section Mapping of JWT payload claims in the chapter “Managing DirX Audit Manager and REST API” in the DirX Audit Administration Guide.
-
Roles, ID, Name and Email are mandatory and pre-defined with default values.
-
Other claims – Provide additional option to add extra claims that can be found in claims of JSON web token. Specify each claim as a key-value pair in the format
claimName_label:JSON_claimValue. You can add multiple claims each pair on separate line, for example
audience:aud
expiration:exp
-
-
Test connection – Click to test the OpenID connection.
Related Topics:
“Starting the Configuration Wizard”
“Preparing Truststores and Keystores for SSL Configuration”
“Configuring LDAP Authentication”
“Configuring OIDC Authentication”
Audited Systems Selection
In the Audited Systems Selection dialog, choose the set of collectors for the systems that will be audited:
-
DirX Audit (base) – Selects the generic collectors for collecting audit messages in the DirX Audit format.
-
DirX Identity – Selects the collectors for collecting audit messages in the DirX Identity format.
-
DirX Access – Selects the collectors for collecting audit messages from DirX Access.
The Configuration Wizard calculates the next steps depending on the number of products selected.
Related Topics: “Starting the Configuration Wizard”
Collectors Configuration
In the Collectors Configuration dialog, choose the collectors and components that should be enabled ( E ) and configured ( C ):
-
Error handling – Check to enable and configure the components that handle errors during audit messages processing.
-
File collectors – Check to enable and configure the collectors that load audit messages from files.
-
JMS collectors – Check to enable and configure the collectors that load audit messages from a queue of the Message Broker.
-
LDAP collectors – Check to enable and configure the collectors that load audit messages from an LDAP server.
In the dialog, you can select:
-
Do not cleanup the server container even if stopped – Check to prevent immediate server container cleanup when changes are configured.
Related Topics: “Starting the Configuration Wizard”
Server Error Handling
In the Server Error Handling dialog, specify the error-handling parameters:
-
Errors folder – The folder path at which to store audit messages with errors. Note that the folder name is configurable. When you enter only a folder name instead of the full path, the Configurator creates the folder in the following default path:
install_path/server_container/tenants/tenantID/.
The folder path must be unique and must not conflict with other folder paths of the same or other tenants to prevent mixing data originating from different sources. If the folder does not exist at DirX Audit Server service start-up, it is created automatically
Related Topics: “Starting the Configuration Wizard”
Server LDAP Collector for DirX Identity Format
In the Server LDAP Collector for DirX Identity Format dialog, specify the required parameters.
-
Use common LDAP authentication – Whether (checked) or not (unchecked) to use common authentication connectivity parameters saved in a previous Common LDAP Authentication Configuration dialog. If you choose common LDAP authentication, the parameters below are read-only.
-
Server host – The host name or IP address of the LDAP server.
-
Use SSL – Whether (checked) or not (unchecked) the connection is an SSL connection. Using an SSL connection is the default setting because we recommend communicating over secure channels between components and services.
-
Port – The port number for the LDAP/LDAPs connection.
-
Domain – The DirX Identity domain. This value is used in the next LDAP Collector authentication parameters and replaces the ${domain} placeholder.
-
User name – The LDAP technical account name for connection.
-
Password – The password of the technical account. Click the button at the end of the password field to view the password.
-
Search base – The base for the LDAP search. Use this parameter to specify the subtree from which you want to get the audit messages.
-
Repeat interval – The time in milliseconds between runs. If there is a collector running when the timer is triggered, it is ignored.
-
Send record count –The number of messages to be sent together in one enterprise service bus (ESB) message. Use this parameter to reduce ESB traffic and improve performance.
-
Truststore location – The path to the truststore used for establishing secure SSL/TLS connections to the LDAP collector. For more information about default locations and how to prepare your own truststore, see the section “Preparing the LDAP Truststore for Authentication and LDAP Collector Configuration” in the chapter “Installation Configurations”. If you used the same LDAP server as you are using for authentication, you can use the truststore you created. If you followed our example, the expected truststore file is named install_path/conf/crypto/stores/ldap-ts.jks. In the event that the requested certificates are part of certificates imported in the Java Runtime Environment, the truststore location field can be left empty. If it is missing, the standard Java KeyStore (JKS) is assumed.
-
Truststore password – The truststore password. Click the button at the end of the password field to view the password. In the event that the requested certificates are part of certificates imported in the Java Runtime Environment, the truststore location and the password fields can be left empty.
-
Test connection – Click to test the LDAP connection. If invalid values are provided an error message is displayed. In this case, you can continue with the configuration but it is your responsibility to correct your settings later on.
Once you click Next, the Configuration Wizard checks the LDAP connection. If invalid values are provided – for example, server host or truststore – an error message is displayed. In this case, you can continue with the configuration but it is your responsibility to correct your settings later. The Configuration Wizard checks to make sure that your LDAP connection is not in use by another tenant. If it is, you cannot continue with the configuration process until you supply valid values.
Related Topics:
“Starting the Configuration Wizard”
“Preparing Truststores and Keystores for SSL Configuration”
Server JMS Collector for DirX Identity Format
In the Server JMS Collector for DirX Identity Format dialog, specify the required parameters.
-
Custom Message Broker – Whether (checked) or not (unchecked) to use a custom Message Broker. Using a custom Message Broker means specifying a separate installation already configured outside of DirX Audit. If you want to use a custom Message Broker, you will enter only already configured settings for Reader:
-
Broker URL – The JMS message broker URL. The default JMS broker syntax is:
tcp://host:port?wireFormat.maxFrameSize=104857600&wireFormat.maxInactivityDuration=0
where you replace host (specify the server name) and port (the server port number) with the current values in your environment. -
Queue name – The JMS queue name. Note that this name must be the same as the name configured at the custom Message Broker installation and must be unique. The name must be the same as the one you need to set for the corresponding JMS collector on the DirX Audit Server side.
-
User – The user name to authenticate when accessing the message queue.
-
Password – The password to authenticate when accessing the message queue. Click the button at the end of the password field to view the password.
-
Truststore location – The path to the truststore to be used for a secure connection. If you followed our example for truststore preparation and you saved your created truststore to the default location, the location should be: install_path/conf/crypto/stores/broker-ts.jks. For more information, see the section “Preparing Truststores and Keystores for SSL Configuration” in the chapter “Installation Configurations”. If it is missing, the standard Java KeyStore (JKS) is assumed.
-
Truststore password – The valid password for your truststore. Click the button at the end of the password field to view the password.
-
Test connection – Click to test the Message Broker connection. If the connection fails, an error message is displayed. In this case, you can continue with the configuration, but it is your responsibility to correct your settings later on.
-
-
If you use DirX Audit Message Broker, you can see or configure:
-
Broker URL – The JMS message broker URL. The Configuration Wizard takes it from the Local client (connector) URI in the Message Broker Service dialog and it is read-only here. The default JMS broker syntax is:
tcp://host:port? wireFormat.maxFrameSize=104857600&wireFormat.maxInactivityDuration=0 -
Queue name – The JMS queue name. Note that this name must be the same as the name configured at the publisher. For example, the DirX Identity JMS Audit Handler publishes the audit messages to a queue. The name must be the same name – for example, dxt.tenantID.dxi – as the one you need to set for the corresponding JMS collector on the DirX Audit Server side. Note that this queue name is pre-defined (it contains the tenant ID); only the queue name suffix is configurable. The queue name must be unique and must not conflict with the queue names of other JMS collectors.
-
Use common accounts – Whether (checked) or not (unchecked) to use the same (shared) common accounts for all collectors. If you want to use common accounts, they will be configured later in the Common JMS Collector Credentials dialog. If you want to use specific accounts for each collector, you must configure:
-
User for Reader – The user name to authenticate when accessing the message queue.
-
Password for Reader – The password to authenticate when accessing the message queue. Click the button at the end of the password field to view the password.
-
User for Writer – The user name to authenticate when accessing the message queue.
-
Password for Writer – The password to authenticate when accessing the message queue. Click the button at the end of the password field to view the password.
-
-
Related Topics:
“Starting the Configuration Wizard”
“Preparing Truststores and Keystores for SSL Configuration”
Server JMS Collector for DirX Access Format
In the Server JMS Collector for DirX Access Format dialog, specify the required parameters.
-
Custom Message Broker – Whether (checked) or not (unchecked) to use a custom Message Broker. Using a custom Message Broker means specifying a separate installation already configured outside of DirX Audit. If you want to use a custom Message Broker, you will enter only already configured settings for Reader:
-
Broker URL – The JMS message broker URL. The default JMS broker syntax is:
tcp://host:port?wireFormat.maxFrameSize=104857600&wireFormat.maxInactivityDuration=0
where you replace host (specify the server name) and port (the server port number) with the current values in your environment. -
Queue name – The JMS queue name. Note that this name must be the same as the name configured at the custom Message Broker installation and must be unique. The name must be the same as the one you need to set for the corresponding JMS collector on the DirX Audit Server side.
-
User – The user name to authenticate when accessing the message queue.
-
Password – The password to authenticate when accessing the message queue. Click the button at the end of the password field to view the password.
-
Truststore location – The path to the truststore to be used for a secure connection. If you followed our example for truststore preparation and you saved your created truststore to the default location, the location should be: install_path/conf/crypto/stores/broker-ts.jks. For more information, see the section “Preparing Truststores and Keystores for SSL Configuration” in the chapter “Installation Configurations”. If it is missing, the standard Java KeyStore (JKS) is assumed.
-
Truststore password – The valid password for your truststore. Click the button at the end of the password field to view the password.
-
Test connection – Click to test the Message Broker connection. If the connection fails, an error message is displayed. In this case, you can continue with the configuration, but it is your responsibility to correct your settings later on.
-
-
If you use DirX Audit Message Broker, you can see or configure:
-
Broker URL – The JMS message broker URL. The Configuration Wizard takes it from the Local client (connector) URI in the Message Broker Service dialog and it is read-only here. The default JMS broker syntax is:
tcp://host:port? wireFormat.maxFrameSize=104857600&wireFormat.maxInactivityDuration=0` -
Queue name – The JMS queue name. Note that this name must be the same as the name configured at the publisher. For example, the DirX Identity JMS Audit Handler publishes the audit messages to a queue. The name must be the same name – for example, dxt.tenantID.dxa – as the one you need to set for the corresponding JMS collector on the DirX Audit Server side. Note that this queue name is pre-defined (it contains the tenant ID); only the queue name suffix is configurable. The queue name must be unique and must not conflict with the queue names of other JMS collectors.
-
Use common accounts – Whether (checked) or not (unchecked) to use the same (shared) common accounts for all collectors. If you want to use common accounts, they will be configured later in the Common JMS Collector Credentials dialog. If you want to use specific accounts for each collector, you must configure:
-
User for Reader – The user name to authenticate when accessing the message queue.
-
Password for Reader – The password to authenticate when accessing the message queue. Click the button at the end of the password field to view the password.
-
User for Writer – The user name to authenticate when accessing the message queue.
-
Password for Writer – The password to authenticate when accessing the message queue. Click the button at the end of the password field to view the password.
-
-
Related Topics:
“Starting the Configuration Wizard”
“Preparing Truststores and Keystores for SSL Configuration”
Server JMS Collector for DirX Audit Format
In the Server JMS Collector for DirX Audit Format dialog, specify the required parameters:
-
Custom Message Broker – Whether (checked) or not (unchecked) to use a custom Message Broker. Using a custom Message Broker means specifying a separate installation already configured outside of DirX Audit. If you want to use a custom Message Broker, you will enter only already configured settings for Reader:
-
Broker URL – The JMS message broker URL. The default JMS broker syntax is:
tcp://host:port?wireFormat.maxFrameSize=104857600&wireFormat.maxInactivityDuration=0
where you replace host (specify the server name) and port (the server port number) with the current values in your environment. -
Queue name – The JMS queue name. Note that this name must be the same as the name configured at the custom Message Broker installation and must be unique. The name must be the same as the one you need to set for the corresponding JMS collector on the DirX Audit Server side.
-
User – The user name to authenticate when accessing the message queue.
-
Password – The password to authenticate when accessing the message queue. Click the button at the end of the password field to view the password.
-
Truststore location – The path to the truststore to be used for a secure connection. If you followed our example for truststore preparation and you saved your created truststore to the default location, the location should be: install_path/conf/crypto/stores/broker-ts.jks. For more information, see the section “Preparing Truststores and Keystores for SSL Configuration” in the chapter “Installation Configurations”. If it is missing, the standard Java KeyStore (JKS) is assumed.
-
Truststore password – The valid password for your truststore. Click the button at the end of the password field to view the password.
-
Test connection – Click to test the Message Broker connection. If the connection fails, an error message is displayed. In this case, you can continue with the configuration, but it is your responsibility to correct your settings later on.
-
-
If you use DirX Audit Message Broker, you can see or configure:
-
Broker URL – The JMS message broker URL. The Configuration Wizard takes it from the Local client (connector) URI in the Message Broker Service dialog and it is read-only here. The default JMS broker syntax is:
tcp://host:port? wireFormat.maxFrameSize=104857600&wireFormat.maxInactivityDuration=0 -
Queue name – The JMS queue name. Note that this name must be the same as the name configured at the publisher. For example, the DirX Identity JMS Audit Handler publishes the audit messages to a queue. The name must be the same name – for example, dxt.tenantID.dxt – as the one you need to set for the corresponding JMS collector on the DirX Audit Server side. Note that this queue name is pre-defined (it contains the tenant ID); only the queue name suffix is configurable. The queue name must be unique and must not conflict with the queue names of other JMS collectors.
-
Use common accounts – Whether (checked) or not (unchecked) to use the same (shared) common accounts for all collectors. If you want to use common accounts, they will be configured later in the Common JMS Collector Credentials dialog. If you want to use specific accounts for each collector, you must configure:
-
User for Reader – The user name to authenticate when accessing the message queue.
-
Password for Reader – The password to authenticate when accessing the message queue. Click the button at the end of the password field to view the password.
-
User for Writer – The user name to authenticate when accessing the message queue.
-
Password for Writer – The password to authenticate when accessing the message queue. Click the button at the end of the password field to view the password.
-
-
Related Topics:
“Starting the Configuration Wizard”
“Preparing Truststores and Keystores for SSL Configuration”
Common JMS Collector Credentials
In the Common JMS Collector Credentials dialog, specify common credentials that will be used for all JMS collectors where you have specified that you want to use common accounts.
-
Reader:
-
User – The user name to authenticate when accessing the message queue. The name is pre-defined.
-
Password – The password to authenticate when accessing the message queue. Click the button at the end of the password field to view the password.
-
-
Writer:
-
User – The user name to authenticate when accessing the message queue.
-
Password – The password to authenticate when accessing the message queue. Click the button at the end of the password field to view the password.
-
Related Topics: “Starting the Configuration Wizard”
Server File Collector for DirX Identity Format
In the Server File Collector for DirX Identity Formats dialog, specify the required parameters:
-
Input folder – The path to the folder to be monitored for audit messages. All files stored in this folder are processed except the ones that do not match the file mask; see the parameter File mask. Note that this folder name is configurable and is not hard coded. When you enter only a folder name instead of the full path, the Configurator creates the folder in the following default path: install_path/server_container/tenants/tenantID. The folder path must be unique and must not conflict with other folder paths of the same or other tenants to prevent the mixing of data originating from different sources.
-
Automatically create the folder – Whether (checked) or not (unchecked) to create the input directory automatically. When checked, the input directory is created automatically on DirX Audit Server service start-up. When unchecked, it must already exist.
-
File mask – The filter that defines the files to be processed. Only files that match this filter will be processed. You can use the asterisk (*) and the question mark (?) as wildcards.
-
Recursive – Whether (checked) or not (unchecked) to monitor all of the subfolders within the folder specified in Input folder.
-
Period – The time delay between runs in milliseconds.
-
Delay – The initial delay (before the first run) in milliseconds.
Related Topics: “Starting the Configuration Wizard”
Server File Collector for DirX Access Format
In the Server File Collector for DirX Access Format dialog, specify the required parameters:
-
Input folder – the path to the folder to be monitored for audit messages. All files stored in this folder are processed except the ones that do not match the file mask (see the parameter File mask). Note that this folder name is configurable and is not hard coded. When you enter only a folder name instead of the full path, the Configurator creates the folder in the following default path: install_path/server_container/tenants/tenantID. The folder path must be unique and must not conflict with other folder paths of the same or other tenants to prevent the mixing of data originating from different sources.
-
Automatically create the folder – Whether (checked) or not (unchecked) to create the input directory automatically. When checked, the input directory is created automatically on DirX Audit Server service start-up. When unchecked, it must already exist.
-
File mask – The filter that defines the files to be processed. Only files that match this filter will be processed. You can use the asterisk (*) and the question mark (?) as wildcards.
-
Recursive – Whether (checked) or not (unchecked) to monitor all subfolders within the folder specified in Input folder.
-
Period – The time delay between runs in milliseconds.
-
Delay – The initial delay (before the first run) in milliseconds.
Related Topics: “Starting the Configuration Wizard”
Server File Collector for DirX Audit Format
In the Server File Collector for DirX Audit Format dialog, specify the required parameters:
-
Input folder – The path to the folder to be monitored for audit messages. All files stored in this folder are processed except for the ones that do not match the file mask; see the parameter File mask. Note that this folder name is configurable and is not hard coded. When you enter only a folder name instead of the full path, the Configurator creates the folder in the following default path: install_path/server_container/tenants/tenantID. The folder path must be unique and must not conflict with other folder paths of the same or other tenants to prevent the mixing of data originating from different sources.
-
Automatically create the folder – Whether (checked) or not (unchecked) to create the input directory automatically. When checked, the input directory is created automatically on DirX Audit Server service start-up. When unchecked, it must already exist.
-
File mask – The filter that defines the files to be processed. Only files that match this filter will be processed. You can use the asterisk (*) and the question mark (?) as wildcards.
-
Recursive – Whether (checked) or not (unchecked) to monitor all subfolders within the folder specified in Input folder.
-
Period – The time delay between runs in milliseconds.
-
Delay – The initial delay (before the first run) in milliseconds.
Related Topics: “Starting the Configuration Wizard”
Scheduled Jobs Configuration
In the Scheduled Jobs Configuration dialog, specify the schedules for DirX Audit Server jobs which typically run regularly (daily) to process the data collected over a period of a few days. You can specify different times for all configured tenants to avoid overloading the DirX Audit Server.
You can set up an advanced CRON expression to schedule the jobs more precisely. For example, the expression 0+0/10+*+?+*+* starts the job every ten minutes. For more information on how to set up a CRON expression, see http://www.quartz-scheduler.org/documentation/quartz-2.3.0/tutorials/crontrigger.html.
Alternatively, you can click the Simple time configuration button to display the setting options. Select daily at to specify hour and minutes; or select every to specify minutes.
For each job, you can select whether you want to schedule the job and specify the following parameters:
-
Recommended time range – The time range when the server runs scheduled jobs. The Tenant configuration reads the values saved by the Core Configurator Server Container dialog. You can use the Fill in recommended values button to fill all schedules in recommended time range.
-
Context records calculation – Whether (checked) or not (unchecked) to schedule the job. The default value is
0+0/5+*+?+*+*which starts the job every 5 minutes. The message limit per run field for this job controls the number of messages processed in a run of the context records calculation job. Specify the value as a positive nonzero integer; the recommended range for the value is between 100 and 1000. The higher the value, the less frequent the execution should be. The default value for message limit per run is set to 100 and the default frequency at which the job is run corresponds to this value. -
History DB update – Whether (checked) or not (unchecked) to schedule the job. The default value is
0+0+21+?+*+*which starts the History post–processing job at 21:00. -
Fact population – Whether (checked) or not (unchecked) to schedule the job. The default value is
0+40+23+?+*+*which starts the Fact population job at 23:40.
Related Topics: “Starting the Configuration Wizard”
Scheduled Purge Jobs Configuration
DirX Audit Server provides several different purge jobs. Each job processes a specific kind of DirX Audit data. In the Scheduled Purge Jobs Configuration dialog, select the type of DirX Audit data to be processed:
-
History entries data purge job configuration – Checkout to enable schedule configuration for delete expired history entries data.
-
Audit messages data purge job configuration – Checkout to enable schedule configuration for delete complete audit messages, including message additions and original messages.
-
Original audit messages data purge job configuration – Checkout to enable schedule configuration for delete only original messages. You cannot select this type unless Save original audit messages is selected in the Data DB Configuration dialog.
Use the “Schedule Configuration for Purging…” dialogs to activate and schedule the job(s) for the DirX Audit data type(s) you select in this dialog and to specify how old the data should be in order for it to be deleted.
Related Topics: “Starting the Configuration Wizard”
Schedule Configuration for Purging Ended History Entries Data
Use the Schedule Configuration for Purging Ended History Entries Data dialog to specify:
-
Enable history entries data purge – Whether (checked) or not (unchecked) to activate the DirX Audit Server job that deletes this type of DirX Audit data. If you enable history entries data purge, you can set:
-
The age of the data to be deleted, in years or months.
-
-
Enable export for data to be purged – Whether (checked) or not (unchecked) to export and save the data to be purged.
If you enable export you must select Purged data export folder and the DirX Audit Server job exports data before it is deleted. You can use it only if history entries data purge is enabled.
We recommend entering an absolute path to a directory outside the application’s installation folder so that your data will not be deleted if the application is reconfigured.
If you enable history entries data purge, you can set:
-
Whether the job should run daily or monthly, and if monthly, the day of the month on which it should run, and the time of day at which it should be run.
Alternatively, you can check Set with CRON expression and specify the schedule as a CRON expression.
For example, the expression0+0+10+?+*+1#1starts the job at 10am on the first Sunday of each month.
For more information on how to set up a CRON expression, see http://www.quartz-scheduler.org/documentation/quartz-2.3.0/tutorials/crontrigger.html.
Related Topics: “Starting the Configuration Wizard”
Schedule Configuration for Purging Audit Messages Data
Use the Schedule Configuration for Purging Audit Messages Data dialog to specify:
-
Enable audit messages data purge – Whether (checked) or not (unchecked) to activate the DirX Audit Server job that deletes this type of DirX Audit data. If you enable audit messages data purge, you can set:
-
The age of the data to be deleted, in years or months.
-
-
Enable export for data to be purged – Whether (checked) or not (unchecked) to export and save the data to be purged.
If you enable export you must select Purged data export folder and the DirX Audit Server job exports data before it is deleted. You can use it only if audit message data purge is enabled.
We recommend entering an absolute path to a directory outside the application’s installation folder so that your data will not be deleted if the application is reconfigured.
If you enable history entries data purge, you can set:
-
Whether the job should run daily or monthly, and if monthly, the day of the month on which it should run, and the time of day at which it should be run.
Alternatively, you can check Set with CRON expression and specify the schedule as a CRON expression.
For example, the expression0+0+10+?+*+1#1starts the job at 10am on the first Sunday of each month. For more information on how to set up a CRON expression, see http://www.quartz-scheduler.org/documentation/quartz-2.3.0/tutorials/crontrigger.html.
Related Topics: “Starting the Configuration Wizard”
Schedule Configuration for Purging Original Audit Messages Data
Use the Schedule Configuration for Purging Original Audit Messages Data dialog to specify:
-
Enable original audit messages data purge – Whether (checked) or not (unchecked) to activate the DirX Audit server job that deletes this type of DirX Audit data. If you enable original audit messages data purge, you can set:
-
The age of the data to be deleted, in years or months.
-
Whether the job should run daily or monthly, and if monthly, the day of the month on which it should run, and the time of day at which it should be run. Alternatively, you can check Set with CRON expression and specify the schedule as a CRON expression.
For example, the expression0+0+10+?+*+1#1starts the job at 10am on the first Sunday of each month. For more information on how to set up a CRON expression, see http://www.quartz-scheduler.org/documentation/quartz-2.3.0/tutorials/crontrigger.html.
-
Related Topics: “Starting the Configuration Wizard”
History Synchronization LDAP Configuration
In the History Synchronization LDAP Configuration dialog, specify the LDAP connection parameters used for audit entries synchronization.
-
Use common LDAP authentication – Whether (checked) or not (unchecked) to use common authentication connectivity parameters saved in a previous Common LDAP Authentication Configuration dialog. If you choose common LDAP authentication, the parameters below are read-only. Only the Page size can be modified.
If you want to set other authentication connectivity parameters, you must specify the required parameters:
-
LDAP server host – The host name of the LDAP server.
-
Use SSL – Whether (checked) or not (unchecked) the LDAP connection is an SSL connection. Using an SSL connection is the default setting because we recommend communicating over secure channels between components and services.
-
LDAP server port – The port number for the LDAP connection.
-
Authentication type – The authentication type. Please keep the predefined value SIMPLE.
-
Domain – The DirX Identity domain. This value is used in the next LDAP authentication parameters and replaces the ${domain} placeholder.
-
Search account user DN – The Distinguished Name of the technical LDAP account for searching users and groups on authentication.
-
Search account password – The password of the technical account. The password is saved in the Tenant configuration file and is encrypted using an installation-specific master encryption key. This master key is randomly generated during the first installation on a given host and is different on each installed host. Click the button at the end of the password field to view the password.
-
Page size – The maximum number of entries per page when LDAP paging is used for iterating through results. The default is 100 and should be modified only when needed.
-
Truststore location – The path to the truststore used for establishing secure SSL/TLS connections to the LDAP directory server. For more information about the default locations and how to prepare your own truststore, see the section “Preparing the LDAP Truststore for Authentication and LDAP Collector Configuration”. If you used the described example, the expected truststore file is named install_path/conf/crypto/stores/ldap-ts.jks. If the requested certificates are part of certificates imported in the Java Runtime Environment, the truststore location field can be left empty. If it is missing, the standard Java KeyStore (JKS) is assumed.
-
Truststore password – The password to access the truststore. Click the button at the end of the password field to view the password. If the requested certificates are part of certificates imported in the Java Runtime Environment, the truststore location and the password fields can be left empty.
-
Test connection – Click to test the LDAP connection.
Once you click Next, the Configuration Wizard checks the LDAP connection. If invalid values are provided – for example, server host or truststore – an error message is displayed. In this case, you can continue with the configuration, but it is your responsibility to correct your settings later. The Configuration Wizard also checks if your LDAP connection is in use by another tenant. If it is, a warning message is displayed, but you can continue with the configuration process if desired.
Related Topics:
“Starting the Configuration Wizard”
“Preparing Truststores and Keystores for SSL Configuration”
DirX Audit History Synchronization Guide
Discontinued DirX Identity Synchronization Workflows Migration Connectivity Configuration
As of DirX Audit 7.2, the new DirX Audit History Synchronization jobs replace the DirX Identity synchronization workflows for the DirX Audit History Database. During the migration process, the Configuration Wizard checks if there are any discontinued workflows configured on DirX Identity. If there are, it displays them in the following steps and offers actions that can be taken.
The Discontinued DirX Identity Synchronization Workflows Migration Connectivity Configuration dialog is displayed only during the migration process. Specify the LDAP connection parameters used for migration:
-
LDAP server host – The host name of the LDAP server where discontinued DirX Identity synchronization workflows for the DirX Audit History Database may be used and configured.
-
Use SSL – Whether (checked) or not (unchecked) the LDAP connection is an SSL connection. Using an SSL connection is the default setting because we recommend communicating over secure channels between components and services.
-
LDAP server port – The port number for the LDAP connection.
-
Authentication type – The authentication type. Please keep the predefined value SIMPLE.
-
Domain – The DirX Identity domain where discontinued DirX Identity synchronization workflows for the DirX Audit History Database may be used and configured.
-
Admin account user DN – The Distinguished Name of the technical LDAP account for searching workflows, attributes, and their subsequent deactivation.
-
Admin account password – The password of the technical account. The password is saved in the Tenant configuration file and is encrypted using an installation-specific master encryption key. This master key is randomly generated during the first installation on a given host and is different on each installed host. Click the button at the end of the password field to view the password.
-
Workflows folder – Name of folder containing the Discontinued DirX Identity Synchronization Workflows. If the field is left empty all Discontinued DirX Identity Synchronization Workflows will be taken into consideration.
-
Truststore location – The path to the truststore used for establishing secure SSL/TLS connections to the LDAP directory server. For more information about the default locations and how to prepare your own truststore, see the section “Preparing the LDAP Truststore for Authentication and LDAP Collector Configuration”. If you used the described example, the expected truststore file is named install_path/conf/crypto/stores/ldap-ts.jks. If the requested certificates are part of certificates imported in the Java Runtime Environment, the truststore location field can be left empty. If it is missing, the standard Java KeyStore (JKS) is assumed.
-
Truststore password – The password to access the truststore. Click the button at the end of the password field to view the password. If the requested certificates are part of certificates imported in the Java Runtime Environment, the truststore location and the password fields can be left empty.
-
Test connection – Click to test the LDAP connection.
Once you click Next, the Configuration Wizard checks the LDAP connection. If invalid values are provided – for example, server host or truststore – an error is displayed and you must correct it for the migration process to continue.
Related Topics:
“Starting the Configuration Wizard”
“Preparing Truststores and Keystores for SSL Configuration”
DirX Audit History Synchronization Guide
Discontinued DirX Identity Synchronization Workflows Channels Configuration
As of DirX Audit 7.2, the new DirX Audit History Synchronization jobs replace the DirX Identity synchronization workflows for the DirX Audit History Database. During the migration process, the Configuration Wizard checks if any discontinued workflows are configured. If yes, it will display them and offer actions that can be taken.
The Discontinued DirX Identity Synchronization Workflows Channels dialog is displayed only during the migration process. It displays discovered configured discontinued workflows with their configuration (entry type and attribute mapping). You should check these workflows and decide if you want to migrate their attribute mapping configuration to the new DirX Audit History Synchronization. You can select:
-
Migrate workflows – Whether (checked) or not (unchecked) to migrate the discontinued workflows configuration (entry type and its attribute mapping) to the new DirX Audit History Synchronization.
-
Exclude all large attributes – Whether (checked) or not (unchecked) to exclude all large attributes configured in discontinued DirX Identity synchronization workflows for the DirX Audit History Database from the new DirX Audit History Synchronization. See the DirX Audit History Synchronization Guide for more details about excluded attributes.
Once you click Next, the Configuration Wizard checks your choices. If migration is selected, it prepares to migrate the discontinued DirX Identity synchronization workflows attribute mapping configuration.
Migrated attribute mappings that are different from the default DirX Audit History Synchronization configuration (install_path/conf/defaults/tenant/configuration.cfg) are written in the tenant-specific configuration file (install_path/conf/tenants/tenantID/configuration.cfg). A complete list of migrated attribute mapping configuration is also written to a text file for your review (install_path/conf/tenants/tenantID/history_migration_result.txt).
Related Topics:
“Starting the Configuration Wizard”
“Preparing Truststores and Keystores for SSL Configuration”
DirX Audit History Synchronization Guide
Discontinued DirX Identity Synchronization Workflows Deactivation
As of DirX Audit 7.2, the new DirX Audit History Synchronization jobs replace the DirX Identity synchronization workflows for the DirX Audit History Database. These discontinued workflows must be disabled on DirX Identity. During the migration process, the Configuration Wizard checks if any discontinued workflows are configured and active. If there are, it displays them and offers actions that can be taken.
The Discontinued DirX Identity Synchronization Workflows Deactivation dialog is displayed only during the migration process. It displays discovered configured and active discontinued workflows. You should check these workflows and decide if you want to deactivate them on DirX Identity. You can select:
-
Deactivate workflows – Whether (checked) or not (unchecked) the discontinued workflows should be automatically deactivated on DirX Identity.
If you don’t want to deactivate discontinued workflows automatically during the migration process, you must do it manually as these workflows are no longer supported.
Once you click Next, the Configuration Wizard checks your choices. If you have selected workflow deactivation, it prepares for deactivation and then deactivates them when you finish the configuration.
The Configuration Wizard also checks combined DirX Identity workflows. If these workflows contain only discontinued DirX Identity synchronization workflows for the DirX Audit History Database, they are also automatically deactivated if you choose this option. However, combined DirX Identity workflows that contain other workflows not used for synchronization to the DirX Audit History Database cannot be deactivated automatically. In this case, the information message is displayed and you must either manually deactivate them or remove the references to the discontinued DirX Identity synchronization workflows for the DirX Audit History Database from the combined workflow configuration.
The complete list of disabled DirX Identity synchronization workflows for the DirX Audit History Database workflows is saved in the following text file:
install_path/conf/tenants/tenantID/history_workflows_disable_result.txt.
The list of combined DirX Identity workflows which contain other workflows that are not relevant to DirX Audit History Database synchronization is saved in the following text file: install_path/conf/tenants/tenantID/history_combined_nonhdb_workflows_result.txt.
Related Topics:
“Starting the Configuration Wizard”
“Preparing Truststores and Keystores for SSL Configuration”
DirX Audit History Synchronization Guide
Scheduled History Synchronization Jobs Configuration
In the Scheduled History Synchronization Jobs Configuration dialog, you can create, modify, or remove the History synchronization jobs used for history entries synchronization.
Important: Before you configure History Synchronization jobs to run regularly you must:
-
Check if the discontinued DirX Identity synchronization workflows used for audit entries synchronization to the DirX Audit History Database are disabled on DirX Identity.
-
Check if DirX Identity Store is configured as required by History Synchronization, see the “Preparing the DirX Identity Store” in the DirX Audit History Synchronization Guide for details.
-
Check the default History Synchronization attribute configuration. You need to decide whether it is sufficient to synchronize only the attributes defined in the default tenant configuration (install_path/conf/defaults/tenant/configuration.cfg) or if you need to change or extend the list of synchronized attributes. If you want to modify the list of synchronized attributes, you must modify them in the tenant-specific configuration file created after the first tenant configuration (install_path/conf/tenants/tenantID/configuration.cfg). See the DirX Audit History Synchronization Guide for details on how to configure attributes for synchronized entry types.
You can schedule two types of History Synchronization jobs – Modify job and Delete job. The Modify job synchronizes recently added or modified entries and all their attributes together with validity periods from DirX Identity domain to the DirX Audit History Database. The Delete job detects entries deleted from the DirX Identity domain and closes the validity of entries and their attributes in the DirX Audit History Database.
Make sure not to schedule two or more DirX Audit History Synchronization jobs at the same time. If the second job is scheduled to start while another History Synchronization job is still running, the second job will not start.
| If you are migrating from an older DirX Audit version that used DirX Identity synchronization workflows for the DirX Audit History Database and you choose automatic migration, two History Synchronization jobs are predefined for you. Their configuration is set according to the information obtained during the migration process. They are disabled and you must verify their settings before you enable them and run regularly. |
-
Modify job for migration
-
Delete job for migration
In the “Scheduled History Synchronization Jobs Configuration” dialog, specify the configuration for each configured job:
-
Enable / disable (E) – Whether the configured job is enabled (checked) or disabled (unchecked).
-
Synchronization job modification – Click on the drop-down list to change the job name and its configuration. Specify the parameters:
-
Description – A detailed description of the job.
-
Schedule – When the job should run. You must use CRON expression to schedule the job. For example,
0+0+21+?+*+*for a delete job, which starts the job at 21:00, and0+0+0/3+?+*+*for a modify job, which starts the job every 3 hours. For more information on how to set up a CRON expression, see http://www.quartz-scheduler.org/documentation/quartz-2.3.0/tutorials/crontrigger.html. -
Entry types – The entry types will be synchronized. You must use the entry type’s id defined in the Tenant configuration file separated by a comma. For example, for synchronization information about users and their roles and permissions, you can use the following entry type ids:
-
permission,role,user
The complete list of all entry type ids: -
account,businessobject,certificationassignmentchange,certificationcampaign, certificationentry,certificationnotification,configurationobject,domainobject, tsconfigurationobject,accessright,delegation,group,permission,auditpolicy,policy, role,roleparam,targetsystem,ticket,user,assignment,activitydefinition, workflowdefinition, activityinstance,workflowinstance
-
-
Only modified since – How old modifications should be synchronized. This option is available only for the modify job. You can use relative date-time range defined in the following syntax: <CurrentTimePeriodType>[(+|-)<Offset>] where <CurrentTimePeriodType> is one of: TH, TD, TW, TM, TY expressing hour, day, week, month or year, and <Offset> is an integer representing the offset by which to shift the given time period; for example, TD-5. You can also leave it empty to synchronize all selected entry types without a time restriction (it is recommended if you don’t have synchronized objects created in the past).
-
-
Remove (R) – Click the minus button to remove the job from configuration.
You can add a new job on the last line: fill in the name, select the type of synchronization job (modify/delete) and then click the plus button to add it to the list. The job is added to the list with an automatically generated unique id and you can modify its configuration.
Once you click Next, the Configuration Wizard checks the jobs configuration. If some value is missing or invalid values are provided, an error message is displayed and you must correct it.
Pre-Configuration Summary
The Configuration Wizard displays the Tenant configuration selections you have made and asks you to review them.
-
Click Previous to change any settings you have made.
-
Click Next to start the Tenant configuration process.
Related Topics:
“Starting the Configuration Wizard”
Configuration in Progress
While configuring the tenant is in progress, the Configuration Wizard displays the current task in gray, successfully performed tasks in green and failed tasks in red. It displays the detailed action of the current task in the Action detail field.
When the Tenant configuration process completes, click:
-
Display current configuration log – To display information on the DirX Audit Tenant configuration you just performed, including thrown exceptions.
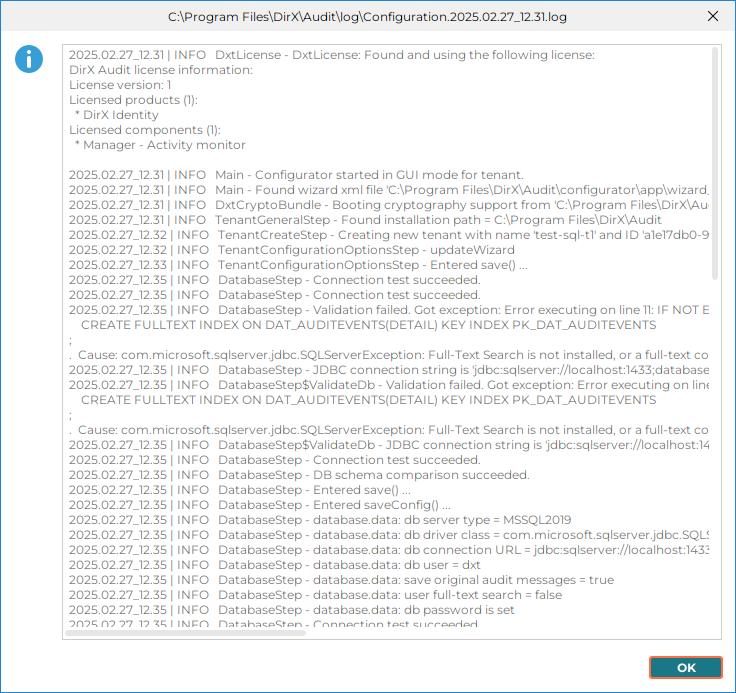
-
Next – To continue with the Tenant configuration.
Related Topics:
“Starting the Configuration Wizard”
Next Actions Options
In the Next Actions Options dialog, specify whether or not you want to continue with Tenant configuration:
-
Run Tenant Configuration - Whether (checked) or not (unchecked) you want to start the Tenant configuration procedure again to keep creating or modifying new or existing tenants.
-
Click Finish to complete the Tenant configuration process.
Related Topics:
“Starting the Configuration Wizard”
Post-Configuration Tasks
Before using some of the features, you may want to adapt some settings or you may need to perform additional actions. The following sections discuss these tasks.
Dashboard and Fact Population
The DirX Audit Manager’s Dashboard feature evaluates OLAP tables that are created and filled by the fact population component of DirX Audit Server.
Fact population runs scheduled according to the default schedule you specified in the Scheduled Jobs Configuration dialog, which usually starts the job once per night. Before you can view charts on audit events in DirX Audit Manager, you must make sure that the corresponding tables exist. You can adapt the schedule or run the fact population CLI tool manually. For details, see the chapter “Managing Fact and Dimension Tables” in the DirX Audit Administration Guide.
DirX Audit comes with a set of product Dashboard views that you can start using in the DirX Audit Manager. See the chapter “Using Dashboard” of the DirX Audit Manager Guide.
History Entry Setup
Before you can view history entries using DirX Audit Manager, you must:
-
Import history entries from DirX Identity at least once. See the “History Synchronization LDAP Configuration” and “Scheduled History Synchronization Jobs Configuration” dialogs description in this chapter for details how to run DirX Audit History Synchronization job. See the DirX Audit History Synchronization Guide for details on how to configure the History Synchronization jobs.
-
Run the history post-processing server job at least once. For details on how to adapt the schedule for updating the foreign keys in the DirX Audit History Database, see the chapter “Managing History Database Tables” in the DirX Audit Administration Guide. The default schedule you specified in the Scheduled Jobs Configuration dialog usually starts the job once per night.
Database Indexing
To achieve satisfactory database performance, you should strongly consider creating indexes. For more information on this task, see the chapter “Tuning Database Performance” in the DirX Audit Administration Guide.
Using Silent Configuration
DirX Audit can also be configured in silent mode, which requires no user interaction. To initiate a silent configuration:
-
Run the Core configuration in the standard/GUI mode and then cancel it and choose to keep the changes when the Pre-Configuration Summary dialog is displayed. This action customizes the core configuration.cfg properties file in the install_path/conf folder so that you can use it as a preset for the silent Core configuration operation.
-
Run the Tenant configuration in the standard/GUI mode and then cancel it and choose to keep the changes when the Pre-Configuration Summary dialog is displayed. This action customizes the tenant-specific configuration.cfg properties file in the install_path/conf/tenants/tenantID folder so that you can use it as a preset for the silent Tenant configuration operation.
-
We recommend stopping DirX Audit services, including the Apache Tomcat service if it is used to start the DirX Audit Manager.
-
Start the Core configuration: Run configuration.bat (configuration.sh) in install_path/configurator/bin with the following parameters:
configuration.bat -i SILENT -option(s)
For example:configuration.bat -i SILENT -ca -
Start the Tenant configuration: Run configuration.bat (configuration.sh) in install_path/configurator/bin with the following parameters:
configuration.bat tenant -i SILENT -id tenantID1 tenantID2 -option(s)
In the following example, the silent complete tenant configuration will be started for all tenants:
configuration.bat tenant -i SILENT -ca
In the following example, the silent tenant message broker configuration will be started for a tenant with the ID 4f753e1d-d0de-4aef-bb22-caace7342e99:
configuration.bat tenant -i SILENT -id 4f753e1d-d0de-4aef-bb22-caace7342e99 -mb
In the following example, the silent complete tenant configuration will be started for two tenants with IDs 4f753e1d-d0de-4aef-bb22-caace7342e99 and 1eb03110-0e7d-42f8-be24-7f2acd5e757d:
configuration.bat tenant -i SILENT -id 4f753e1d-d0de-4aef-bb22-caace7342e99 1eb03110-0e7d-42f8-be24-7f2acd5e757d -ca -
Check for errors and search for the string The configuration finished successfully! in the file install_path/log/Configuration.configurationDate_Time.log.
To run in silent mode, you must specify the option for all components (-ca) or a list of the component options you want to configure. To use the optional test/verify database options in silent mode, you must also specify at least one component option.
Using Core Configuration Options
You can run configuration.bat core -h or configuration.bat core --help to get an overview of the available options.
- Common Core configuration options
-
-h or --help – Lists common options and their description.
-i arg – Configuration mode. - Component options are
-
-ca or --configure_all – Configure all components.
-cs or --common_settings – Configure Common settings.
-ep or --encrypt_passwords – Encrypt passwords.
-mb or --message_broker – Configure Message Broker.
-mc or --manager_container – Configure Manager Container.
Using Tenant Configuration Options
You can run configuration.bat tenant -h or configuration.bat tenant --help to get an overview of the available options.
- Common tenant configuration options
-
-h or --help – Lists common options and their description.
-i arg – Configuration mode.
-id tenantID(s) – Specifies the tenant(s) for which the configuration is to start. This parameter is optional. If it is not used, the configuration starts for all tenants. Use the space character to separate multiple tenantIDs. - Component options are
-
-ca or --configure_all – Configure all components.
-ep or --encrypt_passwords – Encrypt passwords.
-mb or --message_broker – Configure Message Broker.
-md or --manager_deployment – Configure Manager Deployment.
-sc or --server_container – Configure Server container.
-sd or --server_deployment – Configure Server deployment.
You can also use optional database operations options (which must be used in conjunction with at least one of the component options).
- Optional database operations options
-
-tcc or --test_config – Test the Config DB connection.
-tdc or --test_data – Test the Data DB connection.
-thc or --test_history – Test the History DB connection.
-vcd or --validate_config – Validate the Config database.
-vdd or --validate_data – Validate the Data database.
-vhd or --validate_history – Validate the History database.
Running a Silent Configuration on a Different Machine
You can also use the configuration files from a different installation and machine (created by the same version of DirX Audit), but make sure that you take only the suitable Core or Tenant configuration files.
The following example describes how to start the Core and the Tenant configuration on the production machine; configuration files were prepared on the test machine with the Core and Tenant configuration:
-
Make your local copy of the install_path/conf/configuration.cfg properties file from the test machine. Replace all encrypted passwords saved in the configuration file with plain text because all passwords are encrypted using an installation-specific master encryption key. This master key is randomly generated during the first installation on a given host and is different on each installed host. Save your changes.
-
Make your local copy of the install_path/conf/tenants folder with the tenants you want to use and their properties files from the test machine. Replace all encrypted passwords saved in the configuration files with plain text. Save your changes.
-
Copy your modified configuration.cfg properties file to the install_path/conf folder on the production machine where the Core silent configuration is to be run. In this example, DirX Audit is installed on the machine and install_path represents the DirX Audit installation location (you can use silent installation described in the section “Silent Installation” in the chapter “Installation Configurations”). You must check the file system paths in the copied configuration.cfg file and then update them to the new host (unless DirX Audit is installed in exactly the same path on both machines).
-
Copy your modified tenant properties file to the install_path/conf/tenants folder on the production machine and check the file system paths in the copied files.
-
To run DirX Audit Manager, you must install Apache Tomcat, which serves as the DirX Audit Manager’s container. Make sure that the correct install_path is set in your configuration files.
-
To run Oracle Database as the DirX Audit database, you must copy the Oracle Database JDBC driver into the install_path/lib folder on the production machine.
-
Copy all keystores and truststores prepared on the test machine to the install_path/conf/crypto/stores folder on the production machine and check the paths in the configuration files.
-
We recommend stopping DirX Audit services, including the Apache Tomcat service if it is used to start the DirX Audit Manager.
-
Start the Core configuration: Run configuration.bat (configuration.sh) in install_path/configurator/bin with the following parameters:
configuration.bat -i SILENT -option(s)
For example:
configuration.bat -i SILENT -ca -
Check for errors and search for the string The configuration finished successfully! in the file install_path/log/Configuration.configurationDate__Time_.log.
-
Start the Tenant configuration: Run configuration.bat (configuration.sh) in install_path/configurator/bin with the following parameters:
configuration.bat tenant -i SILENT -id tenantID1 tenantID2 -option(s)
In the following example, the silent complete tenant configuration will be started for all tenants:
configuration.bat tenant -i SILENT -ca -
Check for errors and search for the string The configuration finished successfully! in the file install_path/log/Configuration.configurationDate__Time_.log.
Configuring LDAPS
DirX Audit allows you to configure LDAP over SSL (LDAPS) for establishing secure SSL/TLS connections to the LDAP directory server. The secure communication is set as the default communication between components and services during configuration process and if you followed the default steps, no further settings are required.
If you have not set up secure SSL/TLS connections to the LDAP directory server, follow these steps to configure LDAPS in DirX Audit:
-
Configure LDAPS authentication for DirX Audit Manager and DirX Audit Server.
-
Configure LDAPS authentication for the DirX Audit Server LDAP Collector for DirX Identity.
-
Start the DirX Audit services.
The next sections detail these tasks and explain how to set debugging.
Configure DirX Audit Manager and DirX Audit Server for LDAPS
To configure authentication over LDAPS for DirX Audit Manager and for DirX Audit Server:
-
Run the DirX Audit Configuration Wizard for Tenant configuration.
-
Go to the Common LDAP Authentication Configuration or REST Service Authentication Configuration step in the wizard.
-
Check Use SSL.
-
Enter the LDAP server SSL port. The default value is 636.
-
Enter the path and credentials for the truststore file that contains the relevant DirX Directory Server and trusted CA certificates. See the section “Preparing the LDAP Truststore for Authentication and LDAP Collector Configuration” in the chapter “Installation Configurations” for details.
-
Enter other settings as necessary.
-
Finish the configuration.
Configure the Server LDAP Collector for DirX Identity Format for LDAPS
To configure authentication over LDAPS for the DirX Audit Server LDAP Collector:
-
Run the DirX Audit Configuration Wizard for Tenant configuration.
-
Go to the Server LDAP Collector for DirX Identity Format step in the wizard.
-
Check Is SSL.
-
Enter the SSL port. The default value is 636.
-
Enter the path and credentials for the truststore file that contains the relevant DirX Directory Server and trusted CA certificates. See the section “Preparing the LDAP Truststore for Authentication and LDAP Collector Configuration” in the chapter “Installation Configurations” for details.
-
Enter other settings as necessary.
-
Finish the configuration.
Start DirX Audit Services
Start the following DirX Audit services:
-
DirX Audit Message Broker 9.1
-
DirX Audit Server tenant_display_name 9.1 (a separate instance of DirX Audit Server is created for every tenant)
-
The Apache Tomcat service where you deployed DirX Audit Manager
Next, check that the DirX Audit Server and DirX Audit Manager connectivity is set up correctly:
-
Some minutes after start-up, DirX Audit Server tries to connect to the DirX Audit Message Broker and the LDAP server. Once the server has audit messages to import, it connects to the DirX Audit database. If something fails, you should see error messages in the log file install_path/server_container/tenants/tenantID/logs/dirxaudit-server.log.
-
Log in to the DirX Audit Manager to test whether you can authenticate. For error messages, check the console output in your browser (use the Developer Tools) or see the REST error messages in the server log file install_path/server_container/tenants/tenantID/logs/dirxaudit-server.log.