Customizing Objects
DirX Identity Provisioning and Connectivity objects are described by text scripts called object descriptions that are formatted in Extensible Markup Language (XML). Each object description contains a set of elements that describe:
-
The object itself, by listing its properties and their values
-
The object mapping, to identify an instance from a given directory entry
-
A list of context menu actions that become available by right-mouse-button clicks on the object’s tree item
-
A list of property pages that present the object’s attributes in DirX Identity Manager
-
A set of description extensions, currently just the set of attributes to be loaded when the object data are retrieved for the first time
-
The object’s attributes and their definitions
The sections in this chapter describe:
-
The XML elements and XML attributes that comprise an object description (see Object Description Format)
-
Tasks specific to customizing Provisioning object descriptions (see the section "Customizing Provisioning Objects")
-
Tasks specific to customizing Connectivity object descriptions (see the section "Customizing Connectivity Objects")
-
How to create component descriptions to be used in object descriptions (see the section "Creating Component Descriptions")
Object Description Format
An object description consists of the XML elements shown in the following example:
<object
     name="dxrUser" ... other object attributes ... >
     <!-- import another object description to inherit its specifications -->
<import file="storage://DirXmetaRole/DN_of_object_description_entry" />

     <!--How to map an object read from the database to an object description: -->
     <mapping>
          <attribute objectclass="{any}dxrUser"/>
     </mapping>

     <!--Actions for the context menu -->
<action
...
</action>

     <!--Property page definitions -->
     <propertysheet>
          <propertypage ... />
     </propertysheet>

     <extension>
          <loadAttributes>
               ...
          </loadAttributes>
     </extension>

     <!--Property definitions -->
     <properties>
          <property name="objectclass" ... />
          ...
     </properties>

</object>
The remainder of this section provides more information on these elements and how to use them in an object description.
Object Element
The object element describes a DirX Identity object like a user or a role. The following table lists the XML attributes that can or must be specified within an object element.
| Attribute | Mandatory or Optional | Description |
|---|---|---|
name |
Mandatory |
The unique name of the object description; often referenced as "odName". |
class |
Mandatory |
The Java class name that represents this object in DirX Identity Manager and Agent. Do not change this value. |
namingattribute |
Optional |
The property (LDAP attribute) that defines the object name in the DirX Identity store (the RDN). |
displayattribute |
Optional |
The property (LDAP attribute) that is used when the object is displayed in the Manager tree. Default: cn. |
label |
Optional |
The string that is used as the display name for the object class. |
icon |
Mandatory |
The name of the icon to be displayed with the object in the tree. |
candelete |
Optional |
Whether the object can be deleted from the store. Default: true. |
cancopy |
Optional |
Whether the object can be copied to another container in the store. Default: true. |
canrename |
Optional |
Whether the object can be renamed. Default: true. |
canmove |
Optional |
Whether the object can be moved to another container in the store. Default: true, if cancopy = true and candelete = true. |
haschildren |
Optional |
Whether the object is a folder below which entries can be created. Default: false. |
parents |
Mandatory |
The objects (names of object descriptions = odNames) below which this object can be created. DirX Identity evaluates this attribute when you select to create a new object. It scans all object descriptions for parents attributes that reference its own object description names. Only these objects can be created. |
helpcontext |
Optional |
The unique reference to the corresponding online help page. |
accesscontrol |
Optional |
Set this flag to 'true' if you want to enable access control for this object type. If the flag is to "false" or is not available, access control is not enabled. Note: if you enable access control, you must set up the corresponding access policies. |
Body Element
The body element is used in imported object descriptions as the root element instead of the object element. It can contain the same sub-elements as the object element, but it does not contain its XML attributes, which must be specified in the definition element.
Definition Element
The definition element is contained in a body element.The definition element allows the same XML attributes as the object element, but does not contain any sub-elements.See the object element for a description of XML attributes.
Mapping Element
The mapping element is a mandatory inner element of an object description.DirX Identity uses this element to map an object read from the DirX Identity store to an object description.In general, a mapping element uses the object class as the identifier, as shown in this sample for the user object:
     <mapping>
          <attribute objectclass="{any}dxrContainer"/>
          <attribute dxrType="dxrTSContainer"/>
     </mapping>
The {any} element as the objectclass attribute’s value indicates that the attribute can take any value, but the explicit dxrContainer value indicates that the object’s object class must take also this value.However, some objects with the same object class must be handled differently; for example, folders in the roles view vs. folders in the target systems views.Consequently, the mapping element uses the dxrType attribute to distinguish between the different types of object, as shown in the example.
You can combine the {any} element with the ~ (not) and the {none} element.Every relevant object has a type properties set.In the following example you want to define a special object description for all objects with type internal.All other objects should use a general ObjectDescription:
The mapping element part for internal is the following:
     <mapping>
         <attribute objectclass="{any}myObjectClass"/>
         <attribute dxrType="internal"/>
    </mapping>
The mapping element part for general is the following:
     <mapping>
         <attribute objectclass="{any}myObjectClass"/>
         <attribute dxrType="~internal"/>
    </mapping>
In the following example all objects with a filled type property not equal (the ~ sign) to internal map to the general object description. Objects with an empty type property do not match with both mappings. The {none} element defines that it should also match for empty type properties:
     <mapping>
         <attribute objectclass="{any}myObjectClass"/>
         <attribute dxrType="{none},~internal"/>
    </mapping>
Different target systems usually need different naming rules for their accounts and groups: both attributes and default values will differ. As a result, target system-specific object descriptions are necessary. These object descriptions are held below the corresponding target system folder in the DirX Identity store. When DirX Identity needs to associate an object description with an account or group (either when reading an existing one or when creating a new one) it uses the distinguished name (DN) of the object to select the correct description from the list of account or group object descriptions.
Consequently, the mapping element of an account or group object description must contain the DN of the corresponding target system folder, as follows:
-
In the mapping element for the object description, you supply an XML description for the DN that contains the tag *,$(./../../..). For example:
<mapping>
     <attribute dn="*, $(./../../..)"/>
     <attribute objectclass="{any} dxrTargetSystemAccount" />
</mapping>
The object description is placed below the target system folder:
TS_folder/Configuration/Object Descriptions/description_object
-
When DirX Identity reads this object description, it replaces the variable $(./../../..) with the DN of the target system folder (the entry three layers above it). If the DN of the selected account or group object contains this DN string, DirX Identity uses it as the object description.
The same substitution mechanism is used for the property page and other descriptions.
Action Element
The action element specifies the actions that are possible in the context menu when an object is selected in a DirX Identity Manager tree view. The action is identified by the class attribute, which specifies a DirX Identity-supplied Java class. For example:
<action
     class="siemens.DirXjdiscover.api.actions.NewAction"
     class="siemens.DirXjdiscover.api.actions.DeleteAction"
/>
The following table lists a subset of the actions that you can add or remove from an object description:
| Action | Class | Description |
|---|---|---|
New |
siemens.DirXjdiscover.api.actions.NewAction |
Allows the user to enter a new object below the object. This action is only applicable to folders. The permissible object classes are calculated using the "parents" attribute of all object descriptions. |
Delete |
siemens.DirXjdiscover.api.actions.DeleteAction |
Allows the user to delete the object or folder. |
Enable / disable |
siemens.dxr.manager.actions.ActionEnableDisable |
Allows the user to enable and disable the object; this action applies only to accounts, and must not be changed. |
Rename |
siemens.DirXjdiscover.api.actions.RenameAction |
Allows the user to change the naming attribute for the object (modifyDN). This action is permitted for all objects except accounts and groups. |
Report |
siemens.dxr.manager.actions.ActionReport |
Allows the user to produce a report. |
Properties and Property Elements
The properties element in an object description specifies the attributes of an entry in the Identity store that DirX Identity is to read or write. Each LDAP attribute of the entry is specified by a property element within the properties element. For each LDAP attribute of the entry, you must define its LDAP attribute type, its data type (String or other), whether or not it is a multi-valued attribute and its default values.
The following table describes the XML attributes that you can or must specify for each property element.
| Attribute | Mandatory / optional | Description |
|---|---|---|
name |
Mandatory |
The property’s LDAP attribute name. For example, name="givenName". This value must be consistent with the LDAP attribute name in the directory schema. In the Connectivity configuration, you can set up specific attributes within propertyPage elements. In this case, you can use the shortcut "_SP" for "dxmSpecificAttributes". Note that it is not possible to use this shortcut here in the name definition. |
label |
Mandatory |
The display name of the property when viewed with Manager. For example, label="Given Name". |
type |
Mandatory |
The Java type that specifies how the property is controlled and displayed. For a description of the available types and editors see the chapter "Types and Editors". |
mandatory |
Mandatory |
Whether or not the property must have a value. For example, mandatory="true". You can specify a value with the defaultvalue attribute. |
readonly |
Optional |
Whether or not the value of the property is only displayed and cannot be changed. For example, readonly="true". |
multivalue |
Optional |
Whether or not the property has multiple values. For example, multivalue="true". Several editors are available to handle this type of property: |
visible |
Optional |
Whether or not the property is visible in Manager. For example: visible="false" (the default is "true"). An invisible property exists in the data model and is set from internal routines but is not displayed in Manager. |
defaultvalue |
Optional |
The default value to be used for the property when the object is created. For example, defaultvalue="false" or defaultvalue="\{dxrUser,inetOrgPerson,person,top}" |
subsetdelimiter |
Optional |
The subset delimiter to use for all specificAttributes values. This attribute defines the character that separates the name and the value. For example, subsetdelimiter="/" assumes the values to be in the structure: Warning: DirX Identity requires this value to be a space character in most values. Do not change it! |
tags |
Optional |
A list of valid entries for the property. When of type String, this property permits the definition of a list of valid entries. Only the listed values are available; there is no direct edit. For example, tags="On,Off". You can use the value "(None)" to allow selection of no value (this results in deletion of this attribute). Example: tags="(None),On,Off". In this case, the user can choose between On and Off and no value. Note that fields with tags are marked with a red border if they are not filled with a value (the attribute does not exist). The red border is suppressed when the "(None)" tag value is used in the list. You can also use proposal lists to define the possible values for a property; see the topic "Specifying Proposal Lists in Property Descriptions" for details. |
master |
Optional |
For Provisioning objects only, the property’s master attribute. The master attribute is similar, but different from the naming rule. A naming rule specifies default values that can subsequently be changed at any time. A mastered property always has the same value as the same attribute in the master entry. See the topic "Using the Master Attribute" for an example. |
dependsOn |
Optional |
For Provisioning objects only, one or more properties of the entry on which this property depends. Each time one of the specified properties changes, the rule for generating this property value is re-evaluated. When using this attribute, take care to avoid circular dependencies. |
uniqueIn |
Optional |
Usable for Provisioning objects only (accounts and groups). It guarantees that within a specific subtree object identifiers are unique. Use this XML attribute for properties like login names or identifications that must be unique within a domain. The value is interpreted as the root entry of the subtree in which the property value must be unique. Be sure to supply a naming rule (XML or Java script) that allows for alternatives (XML naming rule) or loops (Java script) in case the first proposed value already exists in the namespace. See the template Java scripts and XML naming rules that are used for accounts for examples. |
Specifying Default Values for a Property
DirX Identity offers a number of ways to specify default values for a property. Default values are set only when DirX Identity creates the object. The simplest way to specify one or more default values for a property is to use the defaultvalue attribute, as shown in this example:
<property
     name="l"
     ...
     defaultvalue="München"/>
For a multi value property, you can specify, for example:
<property name="objectclass" defaultvalue="{dxrAccessPolicy,top}"/>
Sometimes this mechanism is not sufficient, especially for the automatic generation of e-mail addresses, account names or even default passwords. For these cases, you can use naming rules to specify default values. You can specify them with XML elements and attributes or as Java scripts.
Using Specific Attributes in Property Descriptions
DirX Identity uses the specificAttributes construct for group attributes that are used as permission parameters in permission matching rules. (See the DirX Identity Connectivity Administration Guide for details) These attributes are stored in the multi-valued group attribute dxrRPValues for Provisioning objects and dxmSpecificAttributes for Connectivity objects. The format is: attribute name=attribute value, for example, l=München. The attribute name must be an attribute that is specified as a permission parameter. Specific attributes are specified as follows:
<property name="dxrRPValues" subsetdelimiter="="/>
<property name="dxrRPValues(l)" multivalue="true" type="java.lang.String" editor="siemens.dxr.manager.controls.MetaRoleJnbComboBox"/>
First, the property dxrRPValues is defined with a subsetdelimiter of =. Then the property l is defined as specific attribute with the term dxrRPValues(l).
Specifying Proposal Lists in Property Descriptions
DirX Identity offers several ways to specify a proposal list, which is a list of possible values for an attribute. The simplest way is to use the tags attribute of the property element to specify the possible values. Here is an example that specifies that the values De and En are allowed for the dxrLanguage property:
<property
     name="dxrLanguage"
     label="Language"
     type="java.lang.String"
     tags="De{German / Deutsch},En{English}"
     defaultvalue="De"
/>
Use the tagprovider element when you want to store the proposal list in the DirX Identity store. The following example directs DirX Identity to take the proposal list for the l property from the attribute dxrProposedValues of the DirX Identity object with the DN "cn=Location,cn=Proposal Lists,cn=Configuration,cn=PQR-metaRole":
<property
     name="l"
     label="Location"
     multivalue="true"
     type="java.lang.String"
     editor="siemens.dxr.manager.controls.MetaRoleJnbComboBox">
     <tagprovider
          class="siemens.dxr.manager.Proposal"
          dn="cn=Location,cn=Proposal Lists,cn=Configuration,cn=$(rootDN)"
          proposals="dxrProposedValues"/>
</property>
Proposal list objects are usually located below the domain configuration subtree in the folder "cn=Proposal Lists,cn=Configuration,cn=domainRoot". In this case, you can use the cn attribute in the tagprovider element instead of the dn attribute, as shown in this example:
<property
     name="l"
     ...
     <tagprovider
           class="siemens.dxr.manager.Proposal"
           cn="cn=LocationValues"
           proposals="dxrProposedValues"/>
</property>
The cn attribute specifies the unique common name of the object underneath the domain’s configuration folder. DirX Identity searches for this object of object class dxrProposal within the domain.
There are no restrictions on where to place proposal lists: below domain configuration (recommended) or below a target system. The proposed values are stored in the attribute identified by the proposals tag. In the previous example, the proposed values are stored in the object with the cn "cn=LocationValues" in the multi-valued attribute dxrProposedValues.
Property Sheet and Property Page Elements
DirX Identity Manager presents each object using property sheets that consist of one or more tabs called property pages. These elements must be configured in the object description and the property page descriptions.
The propertysheet element specifies the entire presentation and consists of one or more propertypage elements. The propertysheet element has no attributes. Each propertypage element defines a visual tab for the object. The following table lists the XML attributes that can or must be specified for a propertypage element.
| Attribute | Mandatory or Optional? | Description |
|---|---|---|
name |
Mandatory |
The internal name of this element (not the display name). For example, name="General". |
title |
Mandatory |
The display name of the tab in DirX Identity Manager. For example, title="JobProperties". |
helpcontext |
Optional |
The help context that should be shown in the Java Help viewer. For example, helpcontext="Job". |
class |
Optional |
The Java class that handles this property page. The default is the class siemens.dxm.gui.components.PropertypageGeneric ("generic page"), which displays all properties in an easily configurable table view. In previous releases of DirX Identity, the class siemens.DirXjdiscover.api.nodes.customizer.BMLNodePropertyPage ("BML page") was used. It allowed fine grained layout configuration (see the layout attribute). This feature is deprecated due to the fact that the generic property page mechanism has been enhanced to allow individual layout configuration. |
layout |
Optional |
Controls the layout of the page. Two possibilities exist:
Do not use BML page layout anymore. This feature is deprecated and will not be supported in the future. |
Here is the propertysheet definition in the user object description:
<propertypage name="UserGeneral"
      helpcontext="usergeneral" class="siemens.dxr.manager.nodes.customizer.GenericPropertyPage"
      title="General"
      layout="properties:[General;cn,{givenName,initials},
      {dxrSalutation,title,sn},
      {gender,dayOfBirth},{dxmOprMaster,employeeNumber,dxmGUID},
      description],
      [Categories;employeeType,businessCategory]"/>
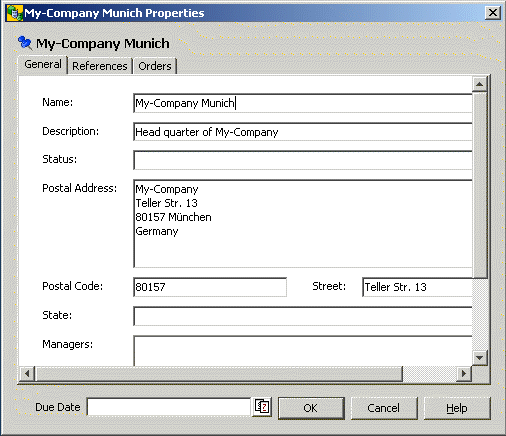
The following figure shows the resulting user property sheet in the General tab in DirX Identity Manager:
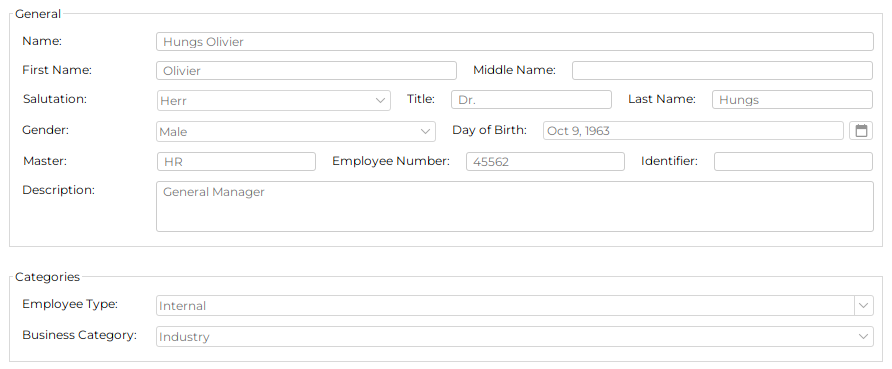
The first line displays the Name attribute, while the next line shows the First Name and Middle Name attributes in the same line. The third line is an example for three attributes in a row. All of these attributes including Description are grouped and marked with the header General.
Another group (Categories) combines the attributes Employee Type and Business Category.
Import Element
You can use the import element to inherit common configurations stored in another object description. DirX Identity uses the import element to separate customer extensions from system configuration.
In the extension you can define new properties or property pages or overwrite property descriptions that were already specified in the imported entry. DirX Identity concatenates the imported entry with the current one by adding the current elements to the imported ones. If you specify an element with the same name in both the extension and the imported entry, the extension definition wins, since it is read after the other.
There is one essential difference between "surrounding" and imported object descriptions. The XML parser gets them as one XML document. According to the XML standard, a well-formed XML document may only contain one root element. For object descriptions, this is the object element. Since the surrounding description "contains" the imported entry, only the surrounding, i.e. importing entry may contain the object element. Those object descriptions that are imported, use the body element instead of the object element. The body element may contain the same sub elements as the object does. But it does not contain any attributes! They have to be specified in the definition element, which does not contain any sub elements.
This is the basic structure of an imported and a surrounding object description:
First the imported description, which is in the entry "cn=TSAccount.xml,cn=Object Descriptions,cn=Windows 2000,cn=TargetSystems,cn=Configuration,cn=HHB-Domain":
<body>
<definition class="..." label="..." candelete="..." ... />
<mapping>...</mapping>
<!-- and the other elements, especially propertysheet, properties and property -->
</body>
The following entry imports the previous description:
<object name="SvcTSAccount>
<import file="storage://DirXmetaRole/cn=TSAccount.xml,cn=Object Descriptions,cn=Windows 2000,cn=TargetSystems,cn=Configuration,$(rootDN)?content=dxrObjDesc" />
<mapping>...</mapping>
<!-- and other elements, especially properties and property -->
</object>
Load Attributes Element
Folder object descriptions can contain the loadAttributes element, for example, the org.xml description:
     <extension>
          <loadAttributes>
               <children name="{ou,sn,givenName,dxrState}" />
          </loadAttributes>
     </extension>
In this example, the name attribute in the children inner element of the loadAttributes element tells DirX Identity which properties to read when objects are loaded from the LDAP directory for the first time. The properties that are specified are the important properties used for displaying an object in a tree or list view or identifying its state. This mechanism helps to improve performance, because DirX Identity does not need to re-read the entries due to missing attributes.
A children inner element refers to all child objects of a folder object.
In addition to the children inner element, all - real and virtual - property names that refer to a directory entry referenced by the current entry are allowed as inner elements of loadAttributes; for example, roles, senior roles, groups, accounts, and so on. Please do not change these constructs.
Usermatch Element (multiple TSAccount.xml configurations)
By default, each Target System has one TS.xml for its own configuration, one Group.xml and one TSAccount.xml. Whenever an account for this Target System is created, the resolution looks for an object description with the name "SvcTSAccount".
There are scenarios where the target system accounts need to be configured differently depending on the type of user it is created for. In such case you can define multiple TSAccount.xml configurations below the target system folder. Each of these configurations must have a different file name, for example "TSAccount-Internal.xml" and "TSAccount-External.xml". The object description name though <object name="SvcTSAccount"> must be the same for all configurations.
To be able for the resolution service to pick the right TSAccount.xml configuration, you must define a <usermatch …> element below the <extension> element in each of the TSAccount.xml configurations. The usermatch element contains an attribute and a value property that define the criteria for picking this configuration based on an attribute-value-pair at the user. The following example shows a usermatch element that picks this configuration if the user has the attribute employeeType with the value Internal:
<extension>
	<usermatch attribute="employeeType" value="Internal"/>
</extension>
The <usermatch> element id only used for picking the right TSAccount.xml during account creation. For already existing accounts the object description is determined by the <mapping> element as described in Mapping Element.
|
A working example for a TSAccount.xml configuration utilizing the <usermatch> element looks like this:
<object name="SvcTSAccount">

    <mapping>
            <attribute objectclass="{any}dxrTargetSystemAccount"/>
            <attribute dn="*,$(./../../..)"/>
            <attribute dxrType="Internal"/> (1)
    </mapping>

    <properties>
		<property name="dxrType"
                type="java.lang.String"
                defaultvalue="Internal" /> (2)
    </properties>

    <extension>
        <usermatch attribute="employeeType" value="Internal"/> (3)
	</extension>

</object>| 1 | In the mapping the additional attribute dxrType is used to identify the object description for already existing entries. |
| 2 | Setting the property dxrType to "Internal" during account creation ensures that later the right object descriptions configuration is used. |
| 3 | The <usermatch> element ensures that during account creation this object description is used for users with the attribute employeeType set to "Internal". The <usermatch> element must be enclosed by the <extension> element. |
Full Example for multiple Account Object Descriptions
In this example, the following files are created below the target system folder "cn=Object Descriptions,cn=Configuration,cn=Extranet Portal,cn=TargetSystems,cn=My-Company" replacing the default TSAccount.xml:
<object name="SvcTSAccount">

    <!-- load base group -->
    <import file="storage://DirXmetaRole/cn=TSAccount.xml,cn=Object Descriptions,cn=LDAP,cn=TargetSystems,cn=Configuration,$(rootDN)?content=dxrObjDesc" />

    <mapping>
            <attribute objectclass="{any}dxrTargetSystemAccount"/>
            <attribute dn="*,$(./../../..)"/>
            <attribute dxrType="Internal"/>
    </mapping>

    <!-- LDAP specific properties -->
    <properties>
   		<property name="dxrType"
                type="java.lang.String"
                defaultvalue="Internal"/>

		<property name="description"
                type="java.lang.String"
                defaultvalue="Internal Account" />
    </properties>

    <extension>
    	<usermatch attribute="employeeType" value="Internal"/>
	</extension>

</object><object name="SvcTSAccount">
<!-- load base group -->
<import file="storage://DirXmetaRole/cn=TSAccount.xml,cn=Object Descriptions,cn=LDAP,cn=TargetSystems,cn=Configuration,$(rootDN)?content=dxrObjDesc" />
<mapping>
<attribute objectclass="{any}dxrTargetSystemAccount"/>
<attribute dn="*,$(./../../..)"/>
<attribute dxrType="External"/>
</mapping>
<!-- LDAP specific properties -->
<properties>
<property name="dxrType"
type="java.lang.String"
defaultvalue="External"/>
<property name="description"
type="java.lang.String"
defaultvalue="External Account" />
</properties>
<extension>
<usermatch attribute="employeeType" value="Contractor"/>
</extension>
</object>Types for Properties
You can specify types for properties. This section describes
-
Types which are common to both Connectivity and Provisioning configuration.
-
Types which are available only for Connectivity.
-
Types which are available only for Provisioning.
DirX Identity uses types to handle attributes correctly.
Common Types
The following common types are available:
-
java.io.File - a file name property (includes the path).
Default editor: siemens.dxm.storage.beans.JnbFile -
java.lang.Boolean - a boolean property with values True or False.
Default editor: siemens.dxm.storage.beans.JnbBoolean -
java.lang.Integer - the property is a field that can contain only numbers.
Default editor: siemens.dxm.storage.beans.JnbIntegerField -
java.lang.String - the property is a simple text field.
Default editor: "siemens.dxm.storage.beans.JnbTextField" -
siemens.dxm.storage.StorageObject - a storage object.
Default editor: siemens.dxm.storage.beans.JnbReference -
siemens.dxm.util.BooleanInteger - a boolean property with values 1 or 0.
Default editor: siemens.dxm.storage.beans.JnbBooleanInteger -
siemens.dxm.util.GeneralizedTime - a property that contains both time and date.
Default editor: siemens.dxm.storage.beans.JnbGeneralizedTime -
siemens.dxm.util.TextAreaString - a property that contains text.
-
[B - a property that contains binary values like pictures or certificates.
Editors
You can specify types and editors for properties to handle attribute types correctly. The editor specifies display and handling at the user interface. This section provides information about editors provided with DirX Identity. In addition to the editors described in the following sections there are a lot of internal used editors.
Usually one editor can handle just one value. To handle multi-value attributes there is a specific multi-value editor or you must use the general multi-value editor. (See section "General Multi-Value Editor" for details.)
The following sections describe editors for
-
simple property types like integer or boolean values.
-
strings.
-
date and time.
-
references like references to files or distinguished names.
-
filters.
-
specific components and types like pictures and IP addresses.
-
code.
For each editor the types are provided that the editor can handle. For a property the editor is specified in the following format:
-
type="data_type"
[multivalue="{true|false}"]
[editor="single-value_editor"]
[editorparams="editor_parameters"]
[multivalueeditor="multi-value_editor"]
where
- type="data_type"
-
Specifies the property type. data_type is the name of the type, for example java.lang.Integer. (See "Types for Properties" for valid data_type names.)
- multivalue="{true|false}"
-
Specifies whether the property type is a multi-value (true) or a single-value (false). This statement is optional. The default value is false.
- editor="single-value_editor"
-
Specifies the editor. This statement is optional. It can be omitted if a default editor is specified for the property type. (See "Default Editors" for details.) single-value_editor is the name of the single-value editor, for example siemens.dxm.storage.beans.JnbIntegerField. (See the following sections for valid single_value_editor names.)
- editorparams="editor_parameters"
-
Specifies the editor parameters. This statement is optional and can be omitted if the editor is used with default parameters or without parameters. editor_parameters are editor specific. Separate multiple editor parameters with ;. The syntax for editor_parameters is as follows:
parameter_name_1*=parameter_value_1[;*parameter_name_2*=*parameter_value_2 …]
where
parameter_name is the name of the parameter, for example visibleparts and
parameter_value is the parameter value, for example dhms.
Here is an example for editor_parameters:
visibleparts=dhms;partsperrow=4 - multivalueeditor="multi-value_editor"
-
Specifies the multi-value editor. This statement is optional and can be omitted for single-value property types (multivalue="false"). multi_value_editor is either the name of the general multi-value editor (see "General Mult-Value Editor" for details) if no specific multi-value editor is available or the name of the specific multi-value editor (see the following sections for details).
Default Editors
If an editor is associated to a property type as the default editor it is not necessary to specify this editor. Nevertheless you can use another editor for a type for special handling.
For Provisioning, you can find the default editor assignment for a type in the file Domain Configuration → Object Descriptions → Editors.xml.
For Connectivity, you can find the default editor assignment for a type in the Data View. Browse to the entry *
Connectivity dxmC=DirXmetahub* → dxmC=Configuration → dxmC=GUI → dxmC=system → dxmC=core → dxmC=editors.xml.
Click the All Attributes tab and press the Export the binary value button of the dxmContent attribute. Specify the file name editors.xml and open the exported file in the Internet Explorer.
Using Variables
It is possible to use variables in editor parameters. Specify variables in the format:
$(variable_name)
The variables are replaced at run-time.
Example:
$(rootDN)
At run-time the variable is replaced with the current value of $(rootDN), for example cn=My-Company.
Using Expressions
It is possible to use expressions in editors. Specify expressions in the format:
${expression}
Expressions are replaced at run-time. (See "Using Variable Substitution" in the DirX Identity Application Development Guide for details.)
Example:
${workflow.subject.sn}
At run-time the variable is replaced with the current value of ${workflow.subject.sn}, for example Smith.
Nationalization Support in Editors
Some of the editors described in the following sections support nationalization. The context-sensitive menu of these editors provides the following additional operations:
-
Insert a Message… - inserts a message with an absolute path, for example #{Common Text.DoNotAnswer}.
-
Insert a Message relative… - inserts a message with a relative path to the selected object, for example #{../../_Nationalization.UserCreationFailed_body}.
-
Resolve a Message … - displays the resolved message in the default language of the domain.
Insert message operations can be performed in edit-mode only. The insert operation opens a Select dialog:

Browse to the message you want to insert. Select the message and press OK to insert the message placeholder, for example #{Common Text.DoNotAnswer}.
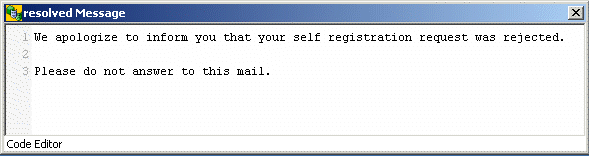
The resolve a message operation can be performed in edit and display-mode. The following message:
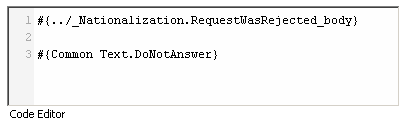
is resolved with default language English:
For more information about nationalization support, see "Nationalizing Request Workflows" in the DirX Identity Application Development Guide.
General Multi-Value Editor
If there is no specific multi-value editor you use the general multi-value editor to handle multi-value attributes.
Name
siemens.dxr.manager.controls.MetaRoleJnbMultivalue
Description
This editor handles multi-value attributes. First you specify the corresponding single-value editor followed by the general multi-value editor specification:
-
type="data_type"
multivalue="true"
[editor="single-value_editor"]
[editorparams="editor_parameters"]
multivalueeditor="siemens.dxr.manager.controls.MetaRoleJnbMultivalue"
(For a detailed description of the statements, see "Editors".)
The multi-value editor displays the list of values and buttons to add a value  or delete a selected value
  .
.
Type
multi-value
Editor parameters
None.
Data Types
All data types.
Applicable
General.
Output Format
Multiple values of the single-value editor specified.
Example
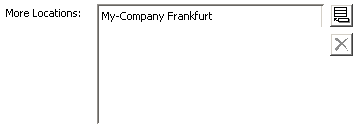
In the following example, additional locations can be specified for a user:
Editor specification:
<property name="dxrSecLocationLink"
   type="siemens.dxm.storage.StorageObject"
   label="More Locations"
   multivalue="true"
   editorparams="choosefilter=dxrLocation;chooserootdn=cn=Countries,cn=BusinessObjects,$(rootDN)"
   editor="siemens.dxm.storage.beans.JnbReference"
   multivalueeditor="siemens.dxr.manager.controls.MetaRoleJnbMultiValue" />
Screenshot:
Click:
![]() to add a value.
to add a value.
![]() to delete a selected value.
to delete a selected value.
Editors for Simple Types
This section provides information about editors for simple property types like integer or boolean.
Editor for Boolean
Use this editor for the handling of Boolean types.
Name
siemens.dxm.storage.beans.JnbBoolean
Description
This editor handles boolean property types.
Type
single-value
Editor parameters
None.
Data Types
java.lang.Boolean
Applicable
General.
Output Format
If the box is checked the editor returns Boolean.TRUE else it returns Boolean.FALSE.
Example
Editor specification:
type="java.lang.Boolean"
multivalue="false"
editor="siemens.dxm.storage.beans.JnbBoolean"
Screenshot:

Returns the value Boolean.TRUE.
Editor for Boolean Integer
Use this editor for the handling of Boolean integer.
Name
siemens.dxm.storage.beans.JnbBooleanInteger
Description
This editor handles Boolean integer property types. Instead of returning true or false it returns the integer values 1 and 0.
Type
single-value
Editor parameters
None.
Data Types
java.lang.BooleanInteger
Applicable
General.
Output Format
If the box is checked the editor returns 1 else it returns 0.
Example
Editor specification:
type="java.lang.BooleanInteger"
multivalue="false"
editor="siemens.dxm.storage.beans.JnbBooleanInteger"
Screenshot:
Returns the value 1.
Editor for Boolean Inverse
Use this editor for the handling of Boolean types.
Name
siemens.dxm.storage.beans.JnbBooleanInverseDefault
Description
This editor handles Boolean property types. The box is checked if the value is set to True or if the value does not exist. If the value is False the box is not checked.
Type
single-value
Editor parameters
None.
Data Types
java.lang.Boolean
Applicable
General.
Output Format
If the box is checked the editor returns Boolean.TRUE else it returns Boolean.FALSE.
Example
Editor specification:
type="java.lang.Boolean"
multivalue="false"
editor="siemens.dxm.storage.beans.JnbBooleanInverseDefault"
Screenshot:
![]()
Returns the value Boolean.TRUE.
Editor for Integer
Use this editor for the handling of integer fields.
Name
siemens.dxm.storage.beans.JnbIntegerField
siemens.DirXjdiscover.api.beans.JnbIntegerField
Description
This editor handles integer property types. It prevents the input of non-digit characters.
Type
single-value
Editor parameters
None.
Data Types
java.lang.Integer
Applicable
siemens.dxm.storage.beans.JnbIntegerField: General
siemens.DirXjdiscover.api.beans.JnbIntegerField: Connectivity
Output Format
The editor returns the specified integer value.
Example
Editor specification:
type="java.lang.Integer"
multivalue="false"
editor="siemens.dxm.storage.beans.JnbIntegerField"
Screenshot:

The editor returns the integer value 2623.
Editors for Strings
This section provides information about editors for property types in string format.
Editor for Integer Strings
Use this editor for the handling of integer in string format.
Name
siemens.dxm.storage.beans.JnbIntegerString
Description
This editor handles integers in string format. It prevents the input of non-digit characters.
Type
single-value
Editor parameters
None.
Data Types
java.lang.String
Applicable
General.
Output Format
The editor returns the specified integer value in string format.
Example
Editor specification:
type="java.lang.String"
multivalue="false"
editor="siemens.dxm.storage.beans.JnbIntegerString"
Screenshot:
The editor returns the integer value 2623 in string format.
Editor for Simple One-Line String
Use this editor for the handling of simple one-line strings.
Name
siemens.dxm.storage.beans.JnbTextField
Description
This editor handles property types in simple one-line string format.
Type
single-value
Editor parameters
None.
Data Types
java.lang.String
Applicable
General.
Output Format
The editor returns the specified value in string format.
Example
Editor specification:
type="java.lang.String"
multivalue="false"
editor="siemens.dxm.storage.beans.JnbTextField"
Screenshot:

The editor returns the string Gabriela.
Editor for Simple One Line String with Limited Character Set
Use this editor for the handling of simple one-line strings with a limited character set.
Name
siemens.dxm.storage.beans.JnbSimpleTextField
Description
This editor handles property types in simple one-line string format. It prohibits specifying the characters / (slash), \ (backslash), . (dot), = (equal-sign), and : (colon) to avoid conflicts with nationalization support. No escaping is possible.
Type
single-value
Editor parameters
None.
Data Types
java.lang.String
Applicable
General.
Output Format
The editor returns the specified value in string format.
Example
Editor specification:
type="java.lang.String"
multivalue="false"
editor="siemens.dxm.storage.beans.JnbSimpleTextField"
Screenshot:
![]()
The editor returns the string Gabriela.
Editor for Simple One-Line String with Nationalization Support
Use this editor for the handling of language-specific simple one-line strings.
Name
siemens.dxm.storage.beans.JnbTextFieldNat
Description
This editor handles property types in one-line string format. It supports nationalization.
Type
single-value
Editor parameters
None.
Data Types
java.lang.String
Applicable
General.
Output Format
The editor returns the specified value in string format.
Example
Editor specification:
type="java.lang.String"
multivalue="false"
editor="siemens.dxm.storage.beans.JnbTextFieldNat"
Screenshot:

At run.time the software replaces the placeholder #{../_Nationalization.ApprovalByPrivilegeManagers_title} and returns the associated string, for example
Genehmigung durch den Berechtigungsverantwortlichen
for German or
Approval by Privilege Managers
for English.
Editor for Multiple-Line String
Use this editor for the handling of multiple-line strings.
Name
siemens.dxm.beans.JnbBorderTextArea
Description
This editor handles property types in multiple-line string format. After pressing the return-key the editor adds a new line.
Type
single-value
Editor parameters
None.
Data Types
java.lang.String
Applicable
General.
Output Format
The editor returns the specified value in string format.
Example
Editor specification:
type="java.lang.String"
multivalue="false"
editor="siemens.dxm.beans.JnbBorderTextArea"
Screenshot:

The editor returns the string Assistant.
Editor for Multiple-Line String with Nationalization Support
Use this editor for the handling of language-specific multiple-line strings.
Name
siemens.dxm.beans.JnbBorderTextAreaNat
Description
This editor handles property types in multiple-line string format. It supports nationalization. After pressing the return-key the editor adds a new line.
Type
single-value
Editor parameters
None.
Data Types
java.lang.String
Applicable
General.
Output Format
The editor returns the specified value in string format.
Example
Editor specification:
type="java.lang.String"
multivalue="false"
editor="siemens.dxm.beans.JnbBorderTextAreaNat"
Screenshot:

At run-time the software replaces the placeholder #\{Request Workflows/Assignment Workflows.AssignmentOfPrivilegeRejected_subject} and returns the associated string, for example
Ablehnung der Berechtigung ${workflow.resources[0].dxrassignto@cn} für den Benutzer ${workflow.subject.cn}
for German or
Assignment of privilege ${workflow.resources[0].dxrassignto@cn} to user ${workflow.subject.cn} was rejected
for English.
At run-time the software replaces the expressions ${workflow.resources[0].dxrassignto@cn} and ${workflow.subject.cn} by the current value.
Editor for Postal Address
Use this editor for the handling of a postal address.
Name
siemens.DirXjdiscover.api.ldap.beans.JnbLdapPostalAddress
Description
This editor handles a postal address.
Type
single-value
Editor parameters
mandatory=boolean_value
If true, a postal address must be present (default: false).
Data Types
java.lang.String
Applicable
General
Output Format
The editor returns the postal address in DirX syntax.
Example
Editor specification:
type="java.lang.String"
multivalue="false"
editor="siemens.DirXjdiscover.api.ldap.beans.JnbLdapPostalAddress"
Screenshot:
Editors for String with Specific Values
Use this editor for the handling of string with a specific range of values.
Name
siemens.dxm.storage.beans.JnbRandomStringTag
siemens.dxm.storage.beans.JnbStringTag
siemens.dxr.manager.controls.MetaRoleJnbComboBox
Description
This editor handles strings with a specific range of values. It provides a drop-down list containing all valid values. If using the siemens.dxm.storage.beans.JnbRandomStringTag editor you can edit the field. If the field is edited there is no check whether the edited value is contained in the list of valid values. Specify the valid values in a tag statement. Separate the values by a comma-sign ,:
tags="value1,value2…"
for example:
tags="IMPORTED,IGNORE,DELETED"
Alternatively you can store the valid values for a property in proposal lists in the Identity store. (See section "Specifying Proposal Lists in Property Descriptions" for details.)
Type
single-value
Editor parameters (only siemens.dxr.manager.controls.MetaRoleJnbComboBox editor)
- editable=boolean
-
Specifies whether the field is editable (true) or not (false) The default value is false. If the field is edited there is no check whether the edited value is contained in the list of valid values.
Data Types
java.lang.String
Applicable
siemens.dxm.storage.beans.JnbRandomStringTag: General
siemens.dxm.storage.beans.JnbStringTag: Genaral
siemens.dxr.manager.controls.MetaRoleJnbComboBoxGeneral: Provisioning
Output Format
The editor returns the selected value in string format.
Example
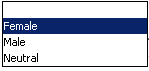
Editor specification:
type="java.lang.String"
multivalue="false"
tags="Female, Male,Neutral"
editor="siemens.dxm.storage.beans.JnbRandomStringTag"
Screenshot:

Click  to display the drop-down to select one of the values:
Editors for Date and Time
This section provides information about editors for property types in date and / or time format.
Editor for Simple Time Period
Use this editor for the handling of simple time periods.
Name
siemens.DirXjdiscover.api.beans.JnbTimePeriod
Description
This editor handles the input of simple time intervals. It displays a text-box to specify an integer string and a combo-box (seconds, minutes, hours, days) to select the time unit for the interval. Specifying non-digit characters in the text-box is prohibited. The editor converts the specified value into seconds.
Type
single-value
Editor parameters
None.
Data Types
java.lang.Integer
Applicable
General
Output Format
The editor returns the time period value in integer format in seconds.
Example
Editor specification:
type="java.lang.Integer"
multivalue="false"
editor="siemens.DirXjdiscover.api.beans.JnbTimePeriod"
Screenshot:

Specify an integer value and select the time unit you want to specify from the drop-down list:

Editor for Time Period (Hour-Format)
Use this editor for the handling of simple time periods.
Name
siemens.dxm.storage.beans.JnbTimeInterval
Description
This editor handles the input of simple time intervals. Only digits and colons can be specified. Specify the value in the format:
hh:mm:ss
where
hh specifies the number of hours starting from 00,
mm specifies the minutes from 00 through 59,
ss specifies the seconds from 00 through 59.
Type
single-value
Editor parameters
None.
Data Types
siemens.dxm.util.TimeInterval
Applicable
General
Output Format
The editor returns the specified time interval value in the format described under "Description" above.
Example
Editor specification:
type="siemens.dxm.util.TimeInterval"
multivalue="false"
editor="siemens.dxm.storage.beans.JnbTimeInterval"
Screenshot:

Editor for Time Period
Use this editor for the handling of time periods.
Name
siemens.dxr.manager.controls.requestworkflow.JnbTimeout
Description
This editor handles the input of time intervals as used within request and real-time workflow definitions.
Type
single-value
Editor parameters
- visibleparts=value
-
Specifies the time-period units in:
-
s specifies seconds
-
m specifies minutes
-
h specifies hours
-
d specifies days
-
M specifies moths
-
Y specifies years
-
- partsperrow=integer_value
-
Specifies the number of fields / parts of the time period per row.
Data Types
java.lang.String
Applicable
General
Output Format
The editor returns the time period value in the format PyearsYmonthsMdaysDThoursHminutesMsecondsS.
Example
Editor specification:
type="java.lang.String"
multivalue="false"
editorparams="visibleparts=dhms;partsperrow=4"
editor="siemens.dxr.manager.controls.requestworkflow.JnbTimeout"
Screenshot:

Editor for Date
Use this editor for the handling of dates.
Name
siemens.DirXjdiscover.api.ldap.beans.JnbLdapGeneralizedDate
Description
This editor handles dates. Click  to display the calendar widget and select the date or specify the date in the field provided in the following format:
Mmm dd, yyyy
where
Mmm is the three letter abbreviation for the month, for example Jan, Feb, and so on.
dd specifies the day (01 .. 31).
yyyy specifies the year, for example 2026.
Type
single-value
Editor parameters
None.
Data Types
siemens.dxm.util.GeneralizedDate
Applicable
Provisioning
Output Format
The editor returns the generalized date in the GeneralizedDate format.
Example
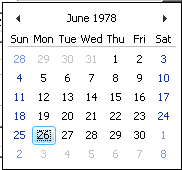
Editor specification:
type="siemens.dxm.util.GeneralizedDate"
multivalue="false"
editor="siemens.DirXjdiscover.api.ldap.beans.JnbLdapGeneralizedDate"
Screenshot:

Click to display the calendar widget:
Editor for Generalized Time
Use this editor for the handling of time values.
Name
siemens.dxm.storage.beans.JnbGeneralizedTime
siemens.DirXjdiscover.api.ldap.beans.JnbLdapGeneralizedTime
Description
This editor handles generalized time objects. Click to display the calendar widget and select the date and time or specify the date in the field provided in the following format:
dd/MM/yyyy hh:mm:ss {AM|PM}
where
dd specifies the day (01 .. 31).
MM specifies the month (01 .. 12).
yyyy specifies the year, for example 2026.
hh specifies the hour (00 .. 12).
mm specifies the minute (00 .. 59).
ss specifies the second (00 .. 59).
Type
single-value
Editor parameters
None.
Data Types
siemens.dxm.util.GeneralizedTime
Applicable
General
Output Format
The editor returns the generalized time in GeneralizedTime format.
Example
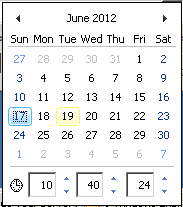
Editor specification:
type="siemens.dxm.util.GeneralizedTime"
multivalue="false"
editor="siemens.dxm.storage.beans.JnbGeneralizedTime"
Screenshot:

Click to display the calendar widget:
Editor for Local Time
Use this editor for the handling of dates.
Name
siemens.dxr.manager.controls.JMetaRoleFilterCalendar
Description
This editor handles dates. Click to display the calendar widget and select the date or specify the date in the field provided in the following format:
Mmm dd, yyyy
where
Mmm is the three letter abbreviation for the month, for example Jan, Feb, and so on.
dd specifies the day (01 .. 31).
yyyy specifies the year, for example 2026.
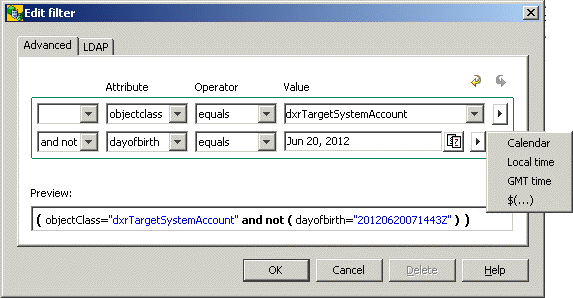
Click  and select the format from the item list displayed:
-
Calendar - for displaying the calendar widget and selecting the date from the widget.
-
Local time - for specifying the value $(localtime). The editor returns the current local date at run-time.
-
GMT time - for specifying the value $(gmttime). The editor returns the current GMT time at run-time.
-
$(…) - for specifying a time expression like $(gmttime+14).
Type
single-value
Editor parameters
None.
Data Types
java.lang.String
Applicable
Provisioning
Output Format
The editor returns the specified value.
Example
Editor specification:
type="java.lang.String"
multivalue="false"
editor="siemens.dxr.manager.controls.JMetaRoleFilterCalendar"
Screenshot:

Click to display the calendar widget and select the date:
Click and select the format from the item list displayed:

Editors for References
This section provides information about editors for property types containing references like references to files or distinguished names.
Editor for File References
Use this editor for references to files.
Name
siemens.dxm.storage.beans.JnbFile
Description
This editor handles filename properties. It displays the full qualified filename (including the path) and provides buttons to display the file content  or browse to the file
  .
.
Type
single-value
Editor parameters
- showpath
-
If defined, the path to the file is displayed instead of just displaying the name of the file.
- win_unc
-
If defined, the path to the file located on a mapped network drive is displayed and stored in UNC format. This parameter has effect only on Windows platform. (Hint: If you are turning this parameter on/off with a already selected file, you should clear the editor and select the file again to make sure that the notation change is also propagated to LDAP).
Data Types
java.io.File
Applicable
General
Output Format
The editor returns the full qualified filename in string format.
Example
Editor specification:
type="java.io.File"
multivalue="false"
editor="siemens.dxm.storage.beans.JnbFile"
Screenshot:

Click
to display the file content and edit the file.
to browse to the file.
Editor for Object References
Use this editor for the handling of references.
Name
siemens.dxm.storage.beans.JnbReference
Description
This editor handles references to objects. It allows selection of storage objects from a tree. Alternatively the displayed value can be an attribute of the selected object instead of the DN. Click  to display the details of the referenced object.
Type
single-value
Editor parameters
- nobrowsebutton
-
Suppresses the browse button
 .
. - noremovebutton
-
Suppresses the remove button
. - showpath
-
Displays the tree path with display names.
- showabsolutepath
-
Shows the path including the root path.
- showdn
-
The DN of the object is displayed.
- chooserootdn=value
-
Specifies the root node where to start the object browser.The root node can be the dn of a target system, for example ${tsDN}, or the dn of a cluster, for example ${tsClusterDN}.If there is no cluster the target system dn is used.The current object must be a child of a target system or a cluster.
- choosefilter=object_name_1[,object_name_2 …]
-
Specifies the selectable object names of the object descriptions. Use a comma as the delimiter.
- lastselection=true
-
Specifies to remember the last selection. If the editor is invoked again, it tries to show the last selected entry in the tree.
Data Types
siemens.dxm.storage.StorageObject
Applicable
General
Output Format
The editor returns the referenced object.
Example
Editor specification:
type="siemens.dxm.storage.StorageObject"
multivalue="false"
editorparams="choosefilter=dxrLocation;chooserootdn=cn=Countries,cn=BusinessObjects,$(rootDN)"
editor="siemens.dxm.storage.beans.JnbReference"
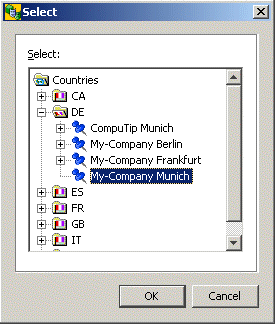
Screenshot:

Choose one line and click on it to display the details e.g. My-Company Munich.
Right mouse Click on the selected line, go to Delete in order to delete the value My-Company Munich.
Click to display the object browser and select the referenced object:
Editor for Object References in String Format
Use this editor for the handling of references in string format.
Name
siemens.dxr.manager.controls.MetaRoleJnbLdapDN
Description
This editor handles references to objects in string format. It allows selection of storage objects from a tree. Alternatively you can edit the distinguished name of the referenced object. Click
the button to display the details of the referenced object.
the to display the object browser and select the referenced object.
Type
single-value
Editor parameters
- chooserdn=value
-
Specifies the root node where to start the object browser.The root node can be the dn of a target system, for example ${tsDN}, or the dn of a cluster, for example ${tsClusterDN}.If there is no cluster the target system dn is used.The current object must be a child of a target system or a cluster.
- choosefilter=object_name_1[,object_name_2 …]
-
Specofies the selectable object names of the object descriptions.Use a comma as the delimiter.
Data Types
java.lang.String
Applicable
Provisioning
Output Format
The editor returns the referenced object in string format.
Example
Editor specification:
type="java.lang.String"
multivalue="false"
editorparams="choosefilter=dxrUser;chooserdn=cn=Users"
editor="siemens.dxr.manager.controls.MetaRoleJnbLdapDN"
Screenshot:

Editors for Search Filters
This section provides information about editors for the handling of search filters. For more information about search filters, see section "Search Filters" in chapter "String Representation for LDAP Binds" in the DirX Identity Meta Controller Reference.
Common Features of Filter Editors
You can edit the correct filter value in the field provided or press the button to open a window with two tabs:
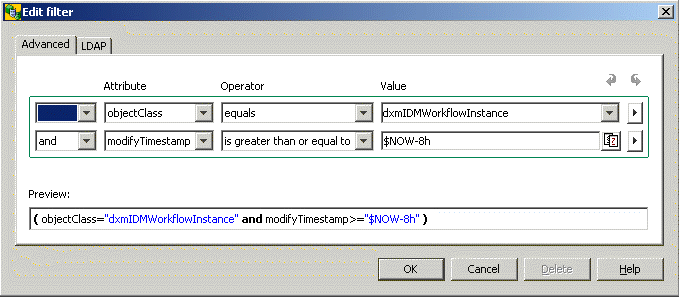
-
The Advanced tab provides a form that guides the user through building the filter value. Drop-down lists are available for providing all valid values for attributes and operators. Mandatory fields are displayed in red.
Click
to select one of the valid values from the drop-down list provided.
 to provide the context sensitive menu for adding or deleting filter items:
-
New row - creates a new filter item row.
-
Delete row - deletes the current filter item row.
-
New group - creates a new filter item group.
-
Delete group - deletes the current filer item group.
-
Help - provides help information.
 to redo last filter input action.
 to undo last filter input action.
-
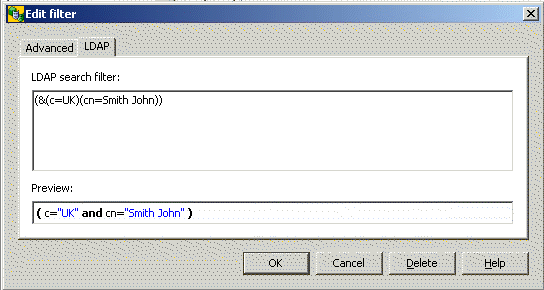
In the LDAP tab the user can edit the filter in LDAP format. He must know the correct format, valid attribute names and operators.
Editor for Filters with References
Use this editor for the handling of search filters.
Name
siemens.dxm.beans.JnbMetaLdapFilterPreview
Description
This editor handles the specification of Search Filters in Connectivity. This editor can handle references in filters.
Type
single-value
Editor parameters
- tclinput
-
If this parameter is present, the filter value is enclosed in curly brackets {}. The default behavior is not to enclose the value.
Data Types
java.lang.String
Applicable
Connectivity
Output Format
The editor returns the filter value in string format.
Example
Editor specification:
type="java.lang.String"
multivalue="false"
editor="siemens.dxm.beans.JnbMetaLdapFilterPreview"
Screenshot:

Click to edit the filter:*
Advanced* tab:
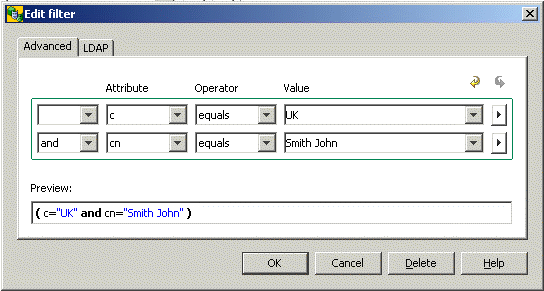
LDAP tab
Editor for Filters with Variable $Now
Use this editor for the handling of search filters.
Name
siemens.dxm.beans.JnbQueryLdapFilterPreview
Description
This editor handles the specification of Search Filters. It can handle the value $NOW for attributes of type GENERALIZED_TIME in filters. For this purpose it uses the editor siemens.dxm.storage.beans.JnbGeneralizedTime for GENERALIZED_TIME attributes. (See "Editor for Generalized Time" for details.)
Type
single-value
Editor parameters
None.
Data Types
java.lang.String
Applicable
General
Output Format
The editor returns the filter value in string format.
Example
Editor specification:
type="jav.lang.String"
multivalue="false"
editor="siemens.dxm.beans.JnbQueryLdapFilterPreview"
Screenshot:
Editor for Filter Returning Time Classes
Use this editor for the handling of search filters.
Name
siemens.dxr.manager.controls.JnbMetaRoleQueryLdapFilterPreview
Description
This editor handles the specification of Search Filters. It can handle the value $NOW for attributes of type GENERALIZED_TIME in filters and returns the time classes and the time editor class in the Provisioning context. For this purpose it uses the editor siemens.dxr.manager.controls.JMetaRoleFilterCalendar for GENERALIZED_TIME attributes. (See "Editor for Local Time" for details.)
Type
single-value
Editor parameters
None.
Data Types
java.lang.String
Applicable
Provisioning
Output Format
The editor returns the filter value in string format.
Example
Editor specification:
type="java.lang.String"
multivalue="false"
editor="siemens.dxr.manager.controls.JnbMetaRoleQueryLdapFilterPreview"
Screenshot:
Editors for Specific Components and Types
This section provides information about editors for specific property types and components like pictures or filters.
Change Password Button
Use this editor to handle a password change.
Name
siemens.DirXjdiscover.api.beans.JnbPasswordButton
Description
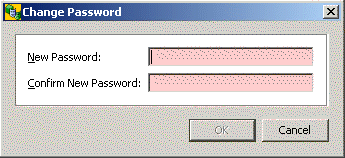
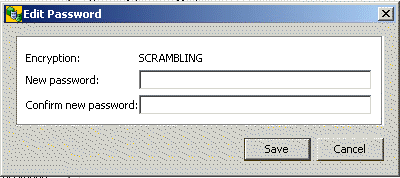
This editor handles the modification of passwords. It displays a change password button. After clicking the button a form to change the password opens. The editor checks whether the user specified the correct old password value. If there is a password policy it also checks whether the new password is conformant to the password policy. The editor transfers all passwords in scrambled or encrypted format.
Type
single-value
Editor parameters
None.
Data Types
java.lang.String
Applicable
General
Output Format
The editor returns the new password value in scrambled or encrypted format.
Example
Editor specification:
type="java.lang.String"
multivalue="false"
editor="siemens.DirXjdiscover.api.beans.JnbPasswordButton"
Screenshot:

After clicking the change password button the following window is displayed:
Editor for Passwords (Connectivity)
Use this editor to handle passwords.
Name
siemens.dxm.beans.JnbDXMPassword
Description
This editor handles passwords. Click
the  button to delete the displayed password value.
the button to open a password dialog that allows handling DirX Identity compatible passwords.
The editor checks whether the user specified the correct old password value if there is one. If there is a password policy it also checks whether the new password is conformant to the password policy. The editor transfers all passwords in scrambled or encrypted format.
Type
single-value
Editor parameters
None.
Data Types
java.lang.String
Applicable
Connectivity
Output Format
The editor returns the new password value in scrambled or encrypted format.
Example
Editor specification:
type="java.lang.String"
multivalue="false"
editor="siemens.dxm.beans.JnbDXMPassword"
Screenshot:

Click button to delete the displayed password value.
Click button to open the following window and specify the password value:
Editor for Binary
Use this editor for the handling of binary types.
Name
siemens.DirXjdiscover.api.ldap.beans.JnbLdapBinary
Description
This editor handles binary property types. It provides buttons for import  , export
  and display
  of the binary value.
Type
single-value
Editor parameters
None.
Data Types
[B
Applicable
General
Output Format
The editor returns the binary value.
Example
Editor specification:
type="[B"
multivalue="false"
editor="siemens.DirXjdiscover.api.ldap.beans.JnbLdapBinary"
Screenshot:

Click
to display the binary data
to import a binary value
to export the binary value.
Editor for Binary Data Stored as Base64-encoded String
Use this editor for the handling of p12 files. The binary content of those files is stored as base64-encoded string in the LDAP attribute. It can be used for importing and exporting binary data from a file to an LDAP attribute where the binary data is stored as base64 representation of the binary data.
Name
siemens.dxm.storage.beans.JnbLdapBinary2B64
Description
This editor handles binary data. The binary data is internally converted to a base64-encoded string.
Type
single-value
Editor parameters
- noshowbutton
-
If defined, the Details button
is not visible (default: not defined (visible)). - noimportbutton
-
If defined, the Import button
is not visible (default: not defined (visible)). - noexportbutton
-
If defined, the Export button
is not visible (default: not defined (visible)). - nodeletebutton
-
If defined, the Delete button
is not visible (default: not defined (visible)).
Data Types
Java.lang.String
Applicable
General
Output Format
The editor returns a base64-encoded string.
Example
Editor specification:
type="java.lang.String"
editor="siemens.dxm.storage.beans.JnbLdapBinary2B64"
Screenshot:

Click
to display the Base64 String
to import binary data from a file
to export binary data to a file
to delete the content.
Editor for Certificate
Use this editor for the handling of one certificate.
Name
siemens.DirXjdiscover.api.ldap.beans.JnbLdapCertificate
Description
This editor handles one certificate.
Type
single-value
Editor parameters
- mandatory=boolean_value
-
If true, a certificate must be present (default: false).
- showButtons=boolean_value
-
If true, all buttons are visible (default: true).
- showDetailsButton=boolean_value
-
If true, the Details button
is visible (default: true). - showImportButton=boolean_value
-
If true, the Import button
is visible (default: true). - showExportButton=boolean_value
-
If true, the Export button
is visible (default: true). - showDeleteButton=boolean_value
-
If true, the Delete button
is visible (default: true).
Data Types
[B
Applicable
General
Output Format
The editor returns the certificate value.
Example
Editor specification:
type="[B"
multivalue="false"
editor="siemens.DirXjdiscover.api.ldap.beans.JnbLdapCertificate"
Screenshot:
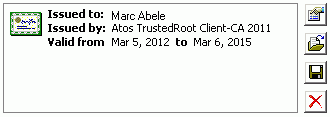
Click
to display the details of the certificate
to import a certificate
to export the certificate
to delete the certificate.
Editor for Certificates
Use this editor for the handling of multiple certificates.
Name
siemens.DirXjdiscover.api.ldap.beans.JnbLdapCertificates
Description
This editor handles multiple certificates. (See "General Multi-Value Editor" for general information about the use of multi value editors.)
Type
multi-value
Editor parameters
None
Data Types
[B
Applicable
General
Output Format
The editor returns the multiple certificate values.
Example
Editor specification:
type="[B"
multivalue="true"
editor="siemens.DirXjdiscover.api.ldap.beans.JnbLdapCertificate"
multivalueeditor="siemens.DirXjdiscover.api.ldap.beans.JnbLdapCertificates"
Screenshot:
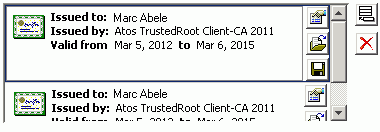
Click
to display the details of the certificate
to import a certificate
to export the certificate
to add a new certificate
to delete the selected certificate.
Editor for IP Address
Use this editor for the handling of IP addresses.
Name
siemens.dxm.storage.beans.JnbIPAddressField
Description
This editor handles IP addresses. Specify either the DNS name or the TCP/IP address in dotted notation.
Type
single-value
Editor parameters
None.
Data Types
siemens.dxm.util.IPAddress
Applicable
General
Output Format
The editor returns the IP address.
Example
Editor specification:
type="siemens.dxm.util.IPAddress"
multivalue="false"
editor="siemens.dxm.storage.beans.JnbIPAddressField"
Screenshot:
DNS name: 
TCP/IP address: 
Editor for Picture
Use this editor for the handling of pictures.
Name
siemens.DirXjdiscover.api.ldap.beans.JnbLdapJPEG
Description
This editor handles pictures. It displays buttons to view , import , export , and delete a picture.
Type
single-value
Editor parameters
- showButtons=boolean_value
-
If true, all buttons are visible (default: true).
- showViewButton=boolean_value
-
If true, the View button
is visible (default: true). - showImportButton=boolean_value
-
If true, the Import button
is visible (default: true). - showExportButton=boolean_value
-
If true, the Export button
is visible (default: true). - showDeleteButton=boolean_value
-
If true, the Delete button
is visible (default: true).
Data Types
[B
Applicable
General
Output Format
The editor returns the binary value.
Example
Editor specification:
type="[B"
multivalue="false"
editor="siemens.DirXjdiscover.api.ldap.beans.JnbLdapJPEG"
Screenshot:
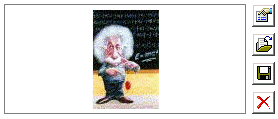
Click
to view the photo
to import a photo
to export the photo
to delete the photo.
Editors for Code
This section provides information about editors for code like Tcl or JavaScript.
Common Features of Code Editors
This section provides information about common features for all code editors. Note that some code editors may not provide all features.
Cursor Location
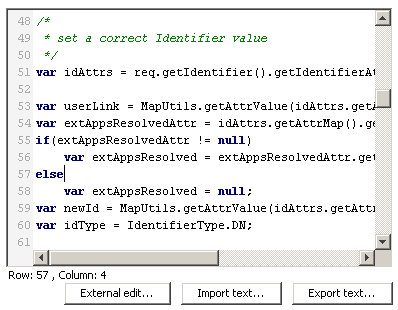
The code editors display row and column of the cursor position below the code area, for example Row: 57, Column: 17.
Context-Sensitive Menu
When clicking the context-sensitive mouse-button anywhere in the code a context-sensitive menu opens providing the following operations:
-
New Window - opens the code in a new window.
-
Undo - undo last action. You can undo one action.
-
Redo - redo last action. You can redo one action.
-
Cut - cuts the selected text.
-
Copy - copies the selected text to clipboard.
-
Paste - pastes the text from clipboard to the cursor location.
-
Find… - opens a find dialog for searching specific strings.
-
Replace… - opens a find and replace dialog for replacing specific strings.
-
Go to insertion point - locates the cursor at the next location for inserting new code.
-
Find other block end - locates the cursor at the next block end, for example at the end of an if statement.
-
Select all - selects the whole code.
-
Line numbers - if checked displays the line number at the beginning of the line.
-
Close - closes the new window and returns to the old window.
Common Buttons
The code editors provide the following buttons:
-
External Edit… - opens an external editor, for example Notepad. Specify the external editor in the dxi.cfg file. (See "Customizing the Property File (dxi.cfg)" in the DirX Identity User Interfaces Guide for details.)
-
Import … - opens a file browse dialog to import code from an external file.
-
Export … - opens a file browse dialog to export the code to an external file.
Editor for JavaScript
Use this editor for the handling of JavaScript.
Name
siemens.dxm.storage.beans.JnbJavaScriptTextArea
Description
This editor handles JavaScript code. It provides buttons to import and export JavaScript code, and a button to open an external editor.
Type
single-value
Editor parameters
None.
Data Types
siemens.dxm.util.TextAreaString
Applicable
General
Output Format
The editor returns the JavaScript code in string format.
Example
Editor specification:
type="siemens.dxm.util.TextAreaString"
multivalue="false"
editor="siemens.dxm.storage.beans.JnbJavaScriptTextArea"
Screenshot:
Editor for Tcl
Use this editor for the handling of Tcl.
Name
siemens.dxm.beans.JnbTCLEditor
Description
This editor handles Tcl code. It provides buttons to import and export Tcl code, and a drop-down list to go to named procedures.
Type
single-value
Editor parameters
None.
Data Types
siemens.dxm.util.TCLCodeString
Applicable
Connectivity
Output Format
The editor returns the Tcl code in string format.
Example
Editor specification:
type="siemens.dxm.util.TCLCodeString"
multivalue="false"
editor="siemens.dxm.beans.JnbTCLEditor"
Screenshot:
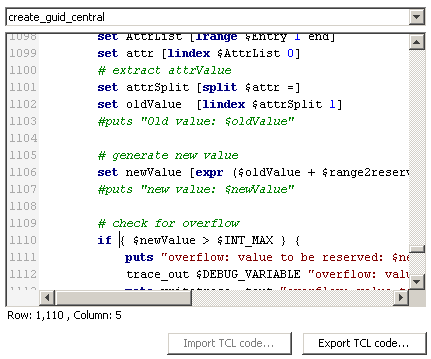
Editor for Text
Use this editor for the handling of texts.
Name
siemens.dxm.storage.beans.JnbTextArea
Description
This editor handles texts. When pressing Enter the editor adds a new line.
Type
single-value
Editor parameters
None.
Data Types
java.lang.String
Applicable
General.
Output Format
The editor returns the specified text in string format.
Example
Editor specification:
type="java.lang.String"
multivalue="false"
editor="siemens.dxm.storage.beans.JnbTextArea"
Screenshot:
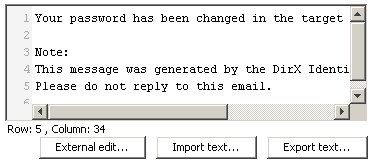
Editor for Text with Nationalization Support
Use this editor for the handling of language-specific texts.
Name
siemens.dxm.storage.beans.JnbTextAreaNat
Description
This editor handles language specific texts. It supports nationalization. When pressing Enter the editor adds a new line.
Type
single-value
Editor parameters
None.
Data Types
java.lang.String
Applicable
General.
Output Format
The editor returns the specified text in string format.
Example
Editor specification:
type="java.lang.String"
multivalue="false"
editor="siemens.dxm.storage.beans.JnbTextAreaNat"
Screenshot:
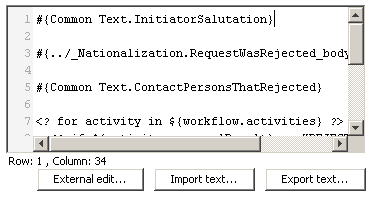
The editor replaces the placeholder #{Common Text.IniatorSalutation} with
Sehr geehrte(r) Frau oder Herr ${workflow.initiatorEntry.sn},
for German or
Dear Mrs./Mr. ${workflow.initiatorEntry.sn},
for English.
At run-time the software replaces the expression ${workflow.initiatorEntry.sn} by the current value.
Editor for XML
Use this editor for the handling of XML.
Name
siemens.dxm.storage.beans.JnbXMLTextArea
Description
This editor handles XML code. It provides buttons to import and export XML code, and a button to open an external editor.
Type
single-value
Editor parameters
None.
Data Types
siemens.dxm.util.TextAreaString
Applicable
General
Output Format
The editor returns the XML code in string format.
Example
Editor specification:
type="siemens.dxm.util.TextAreaString"
multivalue="false"
editor="siemens.dxm.storage.beans.JnbXMLTextArea"
Screenshot:
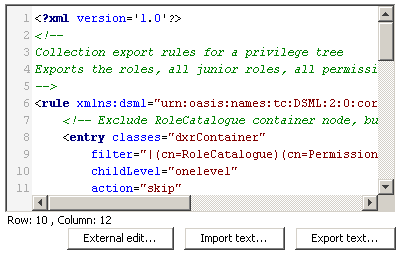
Customizing Provisioning Objects
This section describes how to:
-
Customize provisioning object property descriptions
-
Add a new user attribute
-
Add a new role attribute
About Provisioning Object Descriptions
DirX Identity Provisioning object descriptions are located in the domain configuration subtree:
cn=Configuration,cn=DomainName
where DomainName is the name of your domain.
Most of the object descriptions are system-specific and may be overwritten without notice on each DirX Identity update installation. The object descriptions for users, roles, permissions, accounts, groups, and for entries that represent the target system itself are intended to be changed by the DirX Identity customer. Each of these object descriptions is divided into a customizable part and a system-specific part. The customizable part imports the system-specific part and may extend it with additional properties or overwrite default descriptions of the system part.
The object descriptions in the following folders are system-specific:
cn=ObjectDescriptions,cn=Configuration,cn=DomainName - contains the basic descriptions and common parts of target system-specific or customer-modifiable object descriptions.
cn=TargetSystems,cn=Configuration,cn=DomainName - contains the configuration data that is target system- specific. A subfolder exists for each type of target system that DirX Identity supports. The object descriptions in each subfolder are for accounts, groups and for the entry that represents the target system itself.
The object descriptions in the following folders will typically be customized and will not be overwritten during an upgrade installation:
cn=Object Descriptions,cn=Customer Extensions,cn=Configuration,cn=DomainName - These descriptions are for all objects associated with real directory entries, especially for the user, the role and the permission entries.
| if you want to add completely new object types and the corresponding object descriptions, enter all of these object description paths into the file main.xml. The referenced files are read at the end of the configuration phase. |
cn=Object Descriptions,cn=Configuration,cn=TargetSystemType, … - These descriptions are for target system-specific objects. The object descriptions here contain templates for the target system entry and its accounts and groups. The default templates simply import the object description of the target system type, which allows you to configure them differently for each target system instance.
Provisioning Object Naming Conventions
In the Provisioning view group, objects are clearly separated into views. Within these views naming depends on customer requirements and is not restricted.
The following tips help working with DirX Identity. View also the example objects of the DirX Identity Sample Domains to see how names could be built.
Privileges
If a group is only assigned to one permission and one role it makes sense to use the same name for the group, permission and role.
Policies
DirX Identity comes with this default naming schema:
subject operation resource
where operation denotes the action like read or modify. Use handle if read and modify are used both.
For example:
UserAdmins create accounts
Users handle passwords of their accounts
Request Workflows
DirX Identity comes with this default naming schema:
operation subject modifier
For example:
Create User with Approval
Modify User
Approve Customer Self Services
Target Systems
A good default naming schema is:
type name area
where type stands for the target system type. Alternatively, you can use a target system or cluster folder to group target systems. For name, we recommend using the real and well-known names for target systems. These are, for example, machine names or project names. In many cases, it makes sense to specify additionally the area for which this target system is responsible.
For example:
Windows Domain XYZ Europe
SAP R/3 System ABC
Invoking JavaScript Programs from Provisioning Objects
You can use the RunJavaScriptByURL action in a Provisioning object description to add a context menu entry that invokes a specific JavaScript procedure to operate on one or more objects selected in DirX Identity Manager.
For example, the DirX Identity workflow instance object description (WorkflowInstance.xml) includes the RunJavaScriptByURL action to call a JavaScript procedure that restarts request workflow instances. Here is the definition:
<action class="siemens.dxr.manager.actions.ActionRunJavaScriptByURL" multiselection="true" parameter="restartWF@storage://DirXmetaRole/cn=restartReqWF.js,cn=RequestWorkflows,cn=JavaScripts,cn=Configuration,$(rootDN)?content=dxrObjDesc" />
As shown in this example:
-
The part of the parameter definition that occurs before the "at" sign (@) defines the string that is presented in the object’s context menu. The string is composed of the fixed string RunJavaScript followed by a specific string (restartWF in the example).
-
The remainder of the parameter definition gives the URL of the JavaScript procedure to be run on the object (a workflow instance, in this example) when the user selects the context menu entry for the action (RunJavaScript restartWF in the example)..
-
The action class parameter multiselection="true" specifies that the action is displayed in the context menu when multiple entries are selected so that the JavaScript procedure is run on all of the selected objects sequentially (scriptContext.getObject() returns the current entry). Using this method could be time-consuming for larger scripts. By default, multiselection is set to false so that the menu selection is not visible on multiple entry selections.
Customizing Provisioning Object Property Descriptions
This section describes how to customize property descriptions for provisioning objects. It includes information about:
-
Using the master attribute in a property element
-
Specifying naming rules in XML and JavaScript
-
Handling property dependencies
Using the Master Attribute in a Property Element
Here is an example of a master attribute in a property element:
<property
     name="sn"
     label="surname"
     type="java.lang.String"
     mandatory="true"
     master="dxrUserLink"
/>
<property
     name="dxrUserLink"
     label="user DN"
     type="java.lang.String"
/>
The master="dxrUserLink" instruction directs DirX Identity to get the attribute value of the sn property from the object referenced by the link in the attribute dxrUserLink during each save operation. In this example, the link is the corresponding user object. Furthermore, if DirX Identity creates the object, it takes the value automatically from the user object. Note that the property must have the same name in both objects.
| If working with hierarchical object descriptions and you intend to fill the property with another method (for example a JavaScript) while a higher object description defined a master relationship simply set master="" to break this higher rule. |
The mandatory="true" instruction indicates to DirX Identity that it needs a value for this attribute when storing it.
The master attribute can handle attributes of type binary (byte arrays, indicated by the type [B in the object description). You can use this mechanism, for example, to transport all certificates of a user to a privileged account. Describe the userCertificate property as shown below:
<property name="userCertificate"
 type="[B"
 label="Certificate"
 clearOnMasterRemoval="true"
 multivalue="true"
 master="dxrUsedBy"
 editor="siemens.DirXjdiscover.api.ldap.beans.JnbLdapCertificate"
/>
Note that the clearOnMasterRemoval="true" instruction ensures removal of the last certificate when the last user is unassigned. Normally, the synchronization of master properties does not clear attributes if the master is null.
You can also master an attribute with a different attribute name. Use the following syntax:
master=<linkAttributeName>.<attributeNameInLink>
Here is an example of mastering the manager user attribute to the accountManager account attribute:
<property
    name="accountManager"
    l    master="dxrUserLink.manager"
/>
To specify case-sensitive mastering, use the ,cs syntax. You can combine this syntax with the mastering of different attribute names. Case-sensitive mastering means that a change from abC to aBC will be mastered, so the account’s value is aBC. Use the following syntax:
master=<linkAttributeName>,cs[.<attributeNameInLink>]
Here is an example of case-sensitive mastering for the emloyeeNumber attribute:
<property
   name="employeeNumber"
       master="dxrUserLink,cs"
/>
Specifying Naming Rules in XML
The namingRule element is specified within the definition of the property. It is embedded in an extension XML element and has the following format:
<namingRule>
    <reference
        baseObject="identification of the object from which you take the value"
        address="[optional] attribute with a reference (DN) to the associated object"
        attribute="attribute type"
    />
</namingRule>
A naming rule can be used for account and user objects. They are most commonly used when DirX Identity is to create accounts.
You can specify a number of naming rules for one property. DirX Identity evaluates them beginning with the first one until it is able to generate a non-null value. This feature allows you to define alternatives when you are not sure that a necessary attribute value is available. For example: take the mail address from the user if he has one specified; otherwise generate a default one.
If an object description hierarchy has naming rules at all hierarchy levels, the naming rules are combined and evaluated in sequence.
You can use the following naming rule to stop evaluating naming rules:
<namingRule>
    <break/>
</namingRule>
If this naming rule is reached, the evaluation stops and the property is assumed to have no value.
If a value cannot be generated at the end of the evaluation sequence, an error message is issued.
If you define a JavaScript and naming rules exist at a lower level, you can exclude the namingRule evaluation at the lower levels if you define an empty naming rule in your object description:
<extension>
    <namingRule/>
</extension>
When DirX Identity creates an account, its property values can be taken from a number of objects associated with this account. The object is identified by the reference element within the XML naming rule. If you take a property
-
from its associated user, use "SvcUser"
-
from another property of the same account, use "SvcTSAccount"
-
from a property of an associated account, create a reference to "SvcTSAccount". See the Exchange 5.5 mailbox example later in this discussion for instructions on how to specify the reference
-
from a default value you stored at the target system object, use "SvcTS"
Here is an example that takes the surname from the associated user object:
<property name="sn" type="java.lang.String" mandatory="true">
    <extension>
       <namingRule>
           <reference baseObject="SvcUser" attribute="sn"/>
        </namingRule>
    </extension>
</property>
Within the namingRule element, the reference element’s baseObject attribute directs DirX Identity to take the property value from the SvcUser object, which is the associated user for this account.
The following table describes the XML attributes for the reference element.
| Attribute | Description |
|---|---|
baseObject |
Identifies the object by its class name. Only the symbols "SvcUser" (the associated user of an account) and "SvcTSAccount" (the account itself) are allowed. |
attribute |
Identifies the property of the base object. |
range |
Identifies a portion of the property value from index0 through index1. An index value of 0 denotes the first character. The "$" character denotes the end of the string: "$-3:$" mean the last 3 characters of the string. The rule fails if the property value is too short for the range. |
address |
Specifies the attribute within the base object that contains the property value. |
case |
Specifies the case for the reference element value. The default is case="lower". |
type |
Specifies the types of values allowed for the property. Possible values are string (default) and integer. If type = "integer", the rule fails if a character within the range is outside of 0-9. |
Sometimes it is necessary to get values from another associated object, as is the case with Exchange 5.5: the Exchange mailbox needs an associated account in some Windows domain. To reference this account and take some attribute values from it, use the address attribute of the reference element. For example:
<reference
baseObject="SvcTSAccount"
address="dxrToPeer"
attribute="cn"
/>
The address attribute specifies the attribute within the account that holds a reference to the base object. In the example just shown, the mailbox attribute dxrToPeer contains the distinguished name (DN) of the associated account, the base object.
The previous example to reference an attribute of the associated user can be re-written in the following form and returns the same result:
<property name="sn" type="java.lang.String" mandatory="true">
     <extension>
          <namingRule>
               <reference baseObject="SvcUser" address="dxrUserLink" attribute="sn"/>
          </namingRule>
     </extension>
</property>
The account attribute dxrUserLink holds the DN of the user and it is taken as the reference from the account to its associated user.
The same and much more can be achieved by the master attribute. The following example results in the same default value as the previous example:
<property name="sn" type="java.lang.String" mandatory="true" master="dxrUserLink" />
This instruction directs DirX Identity to take the value for the sn property from the object referenced by the property dxrUserLink, and this property is the associated user of the account. With the master attribute, properties designated as mastered by another object are always updated when the property in the master is updated. This functionality is currently only available for the account properties and the associated user.
The namingRule element allows more complex constructs to compose a property value from fixed parts, other property values and random numbers. Consider the following example, which composes the common name of an account from the first letters of the surname and givenName properties, the last five digits of the telephone number of the account itself, a fixed value, a counter and a random number (this example is not a typical naming rule, but it includes all components):
<property name="cn" mandatory="true" readonly="true" type="java.lang.String" >
     <extension>
          <namingRule>
               <reference
                   baseObject="SvcTSAccount"
                   attribute="sn"
                   range="0:0"
                    case="lower"
              />
              <fixedValue
                   value="0"
              />
          <reference
                   baseObject="SvcTSAccount"
                   attribute="givenName"
                   range="0:0"
                    case="lower"
               />
               <counter
                   min="0"
                   max="9"
               />
               <reference
                   baseObject="SvcTSAccount"
                   attribute="telephoneNumber"
               range="$-3:$"
                   type="integer"
               />
               <random
                   min="700"
                   max="901"
               />
          </namingRule>
      </extension>
</property>
The result for the user John Doe with telephone number ++49-89-636-12345 is d0j0345789.
The address attribute of the naming rule’s reference inner element allows you to specify an indirect reference to obtain values in attributes that can be determined at runtime. Candidates for this feature are attributes stored in base objects. Since it is not clear which explicit base object will really be used for obtaining the value, we simply reference the attribute at which to find the requested value. For example:
<reference baseObject=baseObjectName address=addressName attribute=attributeName/>
where baseObjectName specifies the object at which to look up a particular attribute, addressName specifies the address of this object in the actual object, and attributeName specifies the name of the respective attribute.
The fixedValue inner element of namingRule allows you to specify a fixed prefix or suffix.
The counter inner element of namingRule directs DirX Identity to select a value beginning from "min" up to "max", until the resulting property value is unique. This element can be used to create unique names or email addresses. For example, suppose there are two users "John Doe" for which an email address must be created. The counter element allows DirX Identity to calculate the addresses john.doe0@company.com and john.doe1@company.com.
The random inner element of namingRule permits you to create random numbers within the minimum-to-maximum range.
These inner elements can be specified in an arbitrary sequence.
Note that the sequence of property specification in the XML object description is critical. The default calculation is performed according the sequence in the object description. This is the reason why the above example works: calculation of the cn property depends on the properties sn, givenname and telephonenumber, which are specified prior to cn.
Specifying Naming Rules with JavaScript
You can use JavaScript programs to specify complex naming rules. JavaScript programs can be specified as separate objects next to the object and property page descriptions. DirX Identity currently supports only target system-specific JavaScript programs, which are located below the target system folders.
The following example shows how JavaScript programs can be referenced from the property definition in the object description to create the dxrPassword property for an account:
<property name="dxrPassword" type="java.lang.String"
    defaultvalue="$(script:createPassword)" >
    <script name="createPassword" return="password"
         reference="storage://DirXmetaRole/cn=Password.js,
         cn=JavaScripts,$(./../..)?content=dxrObjDesc"/>
</property>
The script element specifies the name of the script and the script variable that contains the return value. The reference attribute specifies the DN and the property of the object that contains the script code. The DN reference contains a variable part "$(./../..)", which specifies a relative path starting from the object description, as in file systems. In this example, the resulting object DN is:
cn=Password.js, cn=JavaScripts, cn=Configuration,target_system_dn
The source code itself is in the property dxrObjDesc.
DirX Identity installs sample scripts for creating account names, passwords and descriptions in the system and demo domains.
If you write your own scripts, note that you get the current object (here: the account) from the method scriptContext.getObject(). To read a property, use the method getProperty().
DirX Identity does not currently support using Java scripts for plausibility checks of properties.
Example
The following example shows the calculation of the dxrName attribute of an account with the script dxrNameForAccounts. It creates in conjunction with the uniqueIn functionality a unique 8 char long string from the first letter of givenname, the first 5 letters of surname, and the last 2 digits of the telephone number in reverse order.
The snippet of the object description definition in TSAccount.xml is:
<property name="$UniqueCount" type="java.lang.Integer" />
<property name="dxrName" type="java.lang.String" defaultvalue="$(script:dxrNameForAccounts)"
 uniqueIn="$(./../../..)" dependsOn="$UniqueCount">
 <script name="dxrNameForAccounts"
     return="dxrName"
     reference="storage://DirXmetaRole/cn=dxrNameForAccounts.js,cn=javascripts,cn=configuration,$(./../../..)?content=dxrObjDesc"/>
</property>
The script code is:
var StringBuffer = Java.type("java.lang.StringBuffer");
var Character = Java.type("java.lang.Character");
obj = scriptContext.getObject();

gn = obj.getProperty("givenName");
sn = obj.getProperty("sn");

var triesProperty = obj.getProperty("$UniqueCount");
var tries = 0;
if (triesProperty) {
    tries = parseInt(triesProperty);
}

scriptContext.getLogger().log("DBG", "dxrNameForAccount: tries="+tries);

// try 1000 times to create a unique account
if (tries > 1000) {
    // JavaScript.Error stands for "no success"
    dxrName = "JavaScript.Error";

} else if (!sn) {
    dxrName = "";

} else {
    for (i = sn.length; i < 5; i++) {
        sn = sn + "x";
    }
    if (!gn) {
        dxrName = sn.substring(0, 1) + sn.substring(0, 5);
    } else {
        dxrName = gn.substring(0, 1) + sn.substring(0, 5);
    }

    tn = obj.getProperty("telephoneNumber");
    if (!tn) {
        dxrName = dxrName + "99";
    } else {
        number = "";
        currentLength = 0;
        for (i = tn.length - 1; i >= 0 && currentLength < 2; i--) {
            var nextChar = tn.substring(i, i + 1);
            // test if read character is a number
            if (/^\d+$/.test(nextChar)) {
                number += nextChar;
                currentLength++;
            } else {
                break;
            }
        }

        while (currentLength < 2) {
            number = "0" + number;
            currentLength++;
        }
        dxrName = dxrName + number;
    }

    buf = new StringBuffer(dxrName);
    dxrNameTmp = "";
    for (i = 0; i < buf.length(); i++) {
        c = buf.charAt(i);
        val = Character.getNumericValue(c);
        if (val != -1) {
            tmp = new Character(c);
            dxrNameTmp = dxrNameTmp + tmp.toString() + "";
        }
    }
    dxrName = dxrNameTmp.toLowerCase();

    if (tries > 0) {
        dxrName = dxrName + tries;
    }
}
|
is a debug message that shows the progress of the script in the log files. |
Handling Property Dependencies
Properties with naming rules or JavaScript entries may depend on the values of other attributes. You must ensure that their values are
-
Initially calculated after the properties on which they depend
-
Recalculated each time the properties on which they depend have changed
Use the dependsOn attribute to accomplish this task. The syntax is:
<property name=propertyName dependsOn=propertyNameList .../>
where propertyName is the name of the dependent property and propertyNameList is a comma-separated list of local properties like propertyName1, …, propertyNameN.
|
It is your responsibility to:
|
Example:
The example defines the dxrPrimaryKey attribute for a group.
<property name="dxrPrimaryKey"
 label="PrimaryKey (DN in TS)"
 type="java.lang.String"
 mandatory="true"
 multivalue="false"
 dependsOn="cn">
 <extension>
     <namingRule>
         <fixedValue value="cn="/>
         <reference baseObject="SvcGroup" attribute="cn" />
         <fixedValue value=",OU=Sales,"/>
         <reference baseObject="SvcGroup" attribute="targetsystem.dxrOptions(GroupRootInTS)"/>
     </namingRule>
 </extension>
</property>
The dxrPrimaryKey attribute is recalculated when the cn of the group changes (dependsOn statement). If the cn has the value 'NewGroup' and GroupRootInTS has the value 'cn=groups' the primary key gets the value: 'cn=NewGroup,OU=Sales,cn=groups'.
Adding a New User Attribute
To add a new user attribute:
-
Check to see if the attribute is supported by the directory server schema.
-
Extend the schema if necessary.
-
Extend the user object description.
-
Define a default value or a naming rule (optional).
-
Define a list of possible values either by the XML "tags" attribute or by supplying a proposal list (optional).
-
Extend the property page description of the tab that should display the attribute.
Adding a New Role Attribute
To add a new role attribute:
-
Check to see if the attribute is supported by the directory server schema.
-
Extend the schema if necessary.
-
Extend the role object description.
-
Define a default value or a naming rule (optional).
-
Define a list of possible values either by the XML "tags" attribute or by supplying a proposal list (optional).
-
Extend the property page description of the General tab that should display the attribute.
Customizing Connectivity Objects
This section discusses how to:
-
Use the propertypage to extend existing Connectivity object types with additional properties or to create completely new types.
-
Create property page hierarchies
-
Use "design mode" to hide properties at the object instance level that are not needed for this instance of the object
-
Use connectivity default application object naming conventions
About Connectivity Object Descriptions
As previously discussed, DirX Identity Manager is almost completely configurable by XML descriptions. The XML descriptions define all of the specific parameters that are necessary for connected directory types or for agent types. DirX Identity’s standard configuration uses these mechanisms extensively. These mechanisms can also be used for customer-specific connectivity objects. Some of the connectivity objects provided with the connectivity configuration can therefore be virtually extended without actually changing the connectivity configuration’s LDAP data schema. You can extend the following connectivity objects:
-
Jobs
-
Connected directories
-
Channels
-
Bind profiles
When viewed with DirX Identity Manager, these objects consist of tabs and properties. These tabs and properties are defined as propertypages and properties at the XML level. By changing the propertypage and properties descriptions, you can control:
-
The additional attributes to be displayed for this object type or the attributes to be hidden.
-
The way in which these attributes are displayed (for example, as a text field or as a selection box).
-
The tab location at which these attributes are displayed.
-
The visual grouping of attributes.
You can also hide properties that are not relevant to a given object instance; see the section "Using Design Mode" for details.
Because the behavior of DirX Identity can be influenced enormously, you are only allowed to change parts of these XML descriptions. The following sections provide more details about customizing property page and property descriptions.
Customizing Connectivity Object Property Page Descriptions
Connectivity object property page descriptions follow the format described in "PropertySheet and PropertyPage Elements". Note that in the layout formats, you can use the shortcut "_SP" for "dxmSpecificAttributes" to make the definitions easier to read. Let’s look at the LDAP connected directory configuration object to view its definition:
In the Expert View, open Connectivity Configuration Data → Configuration → Connected Directory Types → LDAP → Object Descriptions → LDAP-ConnDir.xml and click the Content tab. Select New Window from the context menu in the editor window.
Search for <propertysheet>. The first property page section looks like this:
<propertypage name="general"
helpcontext="default-conndir"
class="siemens.dxm.gui.components.PropertyPageGeneric"
title="Connected Directory"
layout="properties:dxmDisplayName,description,dxmVersion,
  dxmService-DN,dxmDirectoryType-DN,dxmDirectorySubtype,
  dxmAttrConfigFile-DN,dxmOpenCommand,dxmWizard-DN"
/>
The name of the property page is "general", and then a helpcontext is defined. Next, the Java class that performs the display action is defined. The display title "Connected Directory" for this tab is defined with the title tag. The layout tag defines the sequence of properties, first dxmDisplayName is shown, then the description field and so on.
Verify this while looking at the MetaStore connected directory’s first tab.
Another example in the same object shows group definitions:
<propertypage   name="script"
helpcontext="operattr"
class="siemens.dxm.gui.components.PropertyPageGeneric"
title="Operational Attributes"
layout="properties:dxmOprOperationalAttributes,
  dxmMasterName,[Base Nodes;_SP(base_obj),dxmTombstoneBase],
  [GUID Attributes;dxmGuidID,dxmLocalGUIDAttr,dxmGUIDAttr],
  dxmObjectClasses,dxmPhysicalDeletion"
/>
In this case, after two normal properties (dxmOprOperationalAttributes and dxmMasterName) two groups are defined. A group "Base Nodes" that consists of dxmSpecificAttributes(base_node) and dxmTombstoneBase and a group "GUID Attributes" that consists of dxmGuidID, dxmLocalGUIDAttr and dxmGUIDAttr. After the second group two ungrouped properties are displayed: dxmObjectClasses and dxmPhysicalDeletion.
Verify this while looking at the MetaStore connected directory’s Operational Attributes tab.
Creating a Property Hierarchy
You can construct a configuration object hierarchy in which lower-level objects can inherit properties from higher-level objects. For example:
Generic Job → metaCP job
In this case, the metaCP job by default inherits all properties from the Generic Job, but you can redefine and hide properties at the lower level. The superior property in the <object … section defines the object hierarchy.
Using Design Mode
Connectivity objects are defined via XML object descriptions, which can be extended via virtual object extensions. Sometimes it might not be necessary to use all of these defined attributes.
DirX Identity provides a Design Mode that helps you to adjust objects at the object instance level. This can be done at two levels:
-
Expert View - Here you can hide all properties that are not relevant to this specific object instance. These properties are then no longer visible at the Expert View and the Global View.
-
Global View - Properties that make sense at the Expert View level can be hidden at the Global View level.
This two-level mechanism allows you to adjust your user interface in a very fine granular way:
-
First, you define a new object type with an XML description.
-
Second, you create a specific object instance and hide some properties that do not make sense at this specific object instance.
-
Third, you use a tab of this object in a wizard. There you decide additionally that another property that is perhaps critical shall not be visible at the wizard level.
-
Tabs where all fields are hidden are not displayed when design mode is switched off. This allows you to hide complete tabs for some object instances.
Working with Design Mode in the Expert View
When you start DirX Identity Manager, Design Mode is switched off per default. We will make the Tombstone Base property visible again in the ADS connected directory to show how the mechanism works.
-
Select the object Connected Directories → Default → ADS in the expert view and click the Operational Attributes tab. You will see about 4 attributes displayed.
-
Now click the icon after the delete icon in the task bar to switch on the design mode. You will see more fields now, each one prefixed by a check box. The fields that were visible before are checked, all others are not.
-
You can toggle the Design Mode switch several times to watch the effect.
-
Now click Edit. Click the check box before the Tombstone Base field (it is checked now).
-
Switch off design mode and you will see that the Tombstone Base field is now visible again.
Working with the Design Mode in Global View
Here we will hide the Tombstone Base field at the global view level because we decide that this level of detail does not make sense at this level.
-
Select global view. Switch off Design Mode.
-
Click the ADS connected directory. Select Configure from the context menu. In the Operational Attributes tab, you will see the Tombstone Base field we made visible in the previous exercise. We decide to hide it at the global view level.
-
To switch on design mode, the wizard must be closed. Click Cancel to close the wizard and switch on Design Mode.
-
Open the wizard again and click the Operational Attributes tab. You will see some fields with grayed-out check boxes. These fields are defined in the expert view to be invisible. You cannot change the status here.
-
Click the check box before the Tombstone Base field (it is not checked now). Click Finish to close the wizard.
-
Switch off design mode. Open the wizard again. The field is no longer visible at the global view level.
Default Application Object Naming Conventions
The DirX Identity installation procedure installs a lot of configuration objects into the configuration database in the identity store.
All objects that belong to the default applications are located in Default folders. The next set of topics describes the naming rules for the following default application configuration objects:
-
Connected directories
-
Workflows
-
Schedules
-
Activities
-
Jobs
-
Channels
Although you are not restricted to using these naming conventions, we recommend that you follow them.
Connected Directory Naming Convention
A default application connected directory is located in the folder Connected Directories → Default and has the following naming convention:
cd-type
Example: ADS.
Intermediate connected directories always reside underneath a job folder. The naming convention is:
Data
Example: Data
When several intermediate connected directories are necessary under a job, other names can be freely defined (for example, SpecialData).
Workflow Naming Convention
A default application workflow is located in the Workflows → Default subfolder and has the following naming convention:
cd-source2cd-target_mode
Example: ODBC2Ident
When additional information for the mode must be defined, it should be added as one word and be separated with an underline character (for example ODBC2Ident_Sync).
The mode parameter is optional.
Schedule Naming Convention
A default application schedule is located in the Schedules → Default sub folder and has the following naming convention:
cd-source2cd-target_mode_time (= workflow_time)
Example: ODBC2Meta_Noon
time can be any keyword that indicates a special date such as Noon, Midnight, Sunday, and so on.
The mode parameter is optional.
Activity Naming Convention
A Default Application activity is always located under the corresponding workflow object and has the following naming convention (the same naming convention as for jobs):
cd-source2cd-target_mode_agent (= workflow_agent)
Example: ODBC2Ident_MetaCP or ODBC2Ident_ODBCAgent)
The mode parameter is optional.
Job Naming Convention
A default application job is located in the Jobs → Default sub folder and has the following naming convention (the same naming convention as for activities):
cd-source2cd-target_mode_agent (=activity)
Example: ODBC2Ident_MetaCP or ODBC2Ident_ODBCAgent)
The job includes the configuration (ini- and tcl-files), deltainfo, data channels and mapping information.
These items are named:
-
Tracefile - for trace files
-
Reportfile - for report files
-
Export INI file - for export INI files
-
Import INI file - for import INI files
-
Notify - for a notify object
When several files of a specific type are needed you can choose an appropriate name freely (for example NotifyNotOK or NotifyData).
Channel Naming Convention
A default application channel has the following naming convention:
workflow
Example: ODBC2Ident
For intermediate connected directories, the channels are named:
-
InData for channels which read from the connected directory
-
OutData for channels which write to the connected directory
When more channels are needed you can choose other names freely.
Creating Component Descriptions
DirX Identity workflows consist of a rather limited set of activity types.But each activity and job configuration has a lot of diversity: optional components, different implementations (for example, a large set of connectors), and other differences.Here are some illustrations:
-
In order to add activities to realtime workflows, both the Global and Expert Views of DirX Identity Manager’s Connectivity view need information about the activity type; for example, the number and type of ports and the functionality of the activity.
-
Ports of an activity must be connected to ports of other activities or especially to connected directories.This determines the connector type.Although the connector configurations have some options in common, they differ in others.
-
Filters may intercept the job controller and each connector.We have different types of filters (delta, crypto), each with different configuration properties.
-
Error and notification handling may also differ: in most cases, it is to send an email, sometimes to send a SOAP Request.
Using the object description approach to manage these issues would lead to an explosion of object descriptions for activities.Thus we need an alternative approach: meta data (component descriptions).
The sections in this chapter describe:
-
How component descriptions work
-
The general format of a component description
-
Elements and attributes for structure and data-handling
-
Elements for presentation handling
How Component Descriptions Work
Component descriptions describe the configuration of components such as connectors or activity types. Component descriptions must be associated with an object description, either directly or indirectly. At runtime, the component descriptions are merged with their parent object descriptions and thus form a new object description.
Component descriptions can:
-
Extend a parent object description
-
Extend another component description
-
Implicitly extend a parent or component description. This type of component is included into a set of other object or component descriptions, but it does not know them a-priori and hence cannot reference them explicitly.
Here is a typical usage scenario:
An administrator wants to add a notify activity to a workflow definition. DirX Identity supports a few notification implementations such as email. The administrator either selects an existing template from a palette (that is, a template for an email notification) or first selects an abstract notification and selects an implementation type for the job.
The presentation of the activity must change depending on the selected job type. Typically, each type needs its own specific options and default values. At least one of these is the implementation class name, which is fixed for each type. When the administrator selects the job type, he actually selects the appropriate component description. The DirX Identity Manager presentation and the underlying XML configuration must then be changed on the fly. If another type has already been selected, the data for the old one must be removed and replaced with the default values of the new type. As a part of this procedure, the component description of the selected component is merged into the object description of the parent object. New properties must be added and old ones removed; the property pages also must be updated accordingly.
Here is an example for a real-time activity:
The typical Provisioning activity needs a connector to the Identity domain, one to the target system and a set of standard connections for input events and responses (not in scheduled activities), error, audit and notifications. While the configuration for the standard ones is generally stable, the connector for the target system must change with the target system type. Therefore, the configuration needs a property where the connector type is selected and stored. The DirX Identity Manager must present the connector options on some tab sheet (that is, property page) and store them at the appropriate location within the XML configuration document. Some of the connector options can be derived from the selected connected directory or bind profile; for example, address and port can be taken from the connected directory service as soon as the connected directory is known. Other options are independent and must be entered explicitly by the administrator. In this case, the component description must specify that address and port values can be derived from the connected directory and needs a formula for getting and calculating the value. It does not store the calculated values in the document. Instead, it evaluates the formula when the workflow definition is downloaded to the Identity server.
The administrator may want to insert one or more filters between the join engine and the connector. The Manager supports him by offering the list of filters and the administrator stores them in a multi-value property. In most cases, this cannot be an LDAP attribute, and must instead be stored as part of the XML document. When the reference to the new filter is stored, the Manager needs to extend the object description with the filter’s component description and allow the administrator to enter the options that the filter requires. Most often this will be presented as a new dialogue that just shows the filter options.
To achieve this, the Manager needs to know that there is a multi-value property for filters, where to store the filter configuration within the XML (that is, parent node and sequence), in which XML format to store the options; for example, XML attributes of the filter root element, simple elements named as the option name, name/value property elements or alike. All of this information must be specified in the component description.
Component Description Format
The root element of a component description is <componentDescription>. It is basically separated in a set of <element> sections followed by a <presentationDescription> section. Very similar to an XML schema, the <element>s describe the structure of the component’s XML configuration. You can next <element>s, usually by references such as the following:
<element name="connector">
…
          <element ref="connection" minOccurs="1" maxOccurs="1"/>
</element>
<element name="connection" …/>
In this example, the configuration element <connector> contains exactly one <connection>.
As with XML schemata, the attributes 'minOccurs' and 'maxOccurs' specify the minimum and maximum number of instances. Default values are "1".
The <element>s contain a list of <property>s, which describe the data issues of properties, such as their data type, single- or multi-value, mandatory, default values and their description.
The <presentationDescription> element and its sub-elements deal with the presentation of the properties defined in the component description. Their sub-elements specify their distribution to property pages, their labels, editors and other presentation-related information.
The Property Element
The <property> element inherits the attributes from the object description that deal with non-presentation aspects: name, type, mandatory, multivalue.
The new attribute xmlNotation specifies the XML format of the property in the XML document underneath its parent element. If it is missing, we assume the property is an LDAP attribute (specifying a defaultvalue means initializing the LDAP attribute with this value). The following values are allowed:
-
xmlAttribute: The property name is taken as the name of an XML attribute like this: propertyname="value"
this value can only be applied to single values. -
SimpleElementProperty: The property name is taken as the XML element name. The value is the content of the element. The additional XML attribute "elementname" changes the name stored in XML. By default the property name is used. Elements with the same name may occur several times. For example:
<prop>value1</prop>
<param>value1</param>
-
NestedElementProperty: The property name is again a XML element. The values are also the content of XML sub-elements. Note: this allows multi-values. The additional XML attribute "elementname" changes the name stored in XML. By default, the property name is used as elementname. If you specify an element name then the name is interpreted as xml attribute name(search criteria for reading) .The additional XML attribute "valueElement" changes the value tag stored in XML. The default is “value”.
Here is a default sample for a property "param":
<param><value>this is a value</value></param>
name="to" xmlNotation="NestedElementProperty" elementname=”property”:<property name=”to”> <value>admin@example.test</value> <value>sample@example.test</value> </property>name="to" xmlNotation="NestedElementProperty" elementname=”property" valueElement =”data”:<property name=”body”> <data>admin@example.test</data> </property>name="activitiesToBeApproved" xmlNotation="NestedElementProperty":<activitiesToBeApproved> <value>enterAttributes</value> </activitiesToBeApproved>name="parentNodes" xmlNotation="NestedElementProperty" valueElement="parentNode">:<parentNodes> <parentNode>cn=Users,cn=My-Company</parentNode> </parentNodes> -
NameValueProperty: The property name and value are stored as XML attributes "name" and "value" with an XML element <property>. You can change the element name by specifying the additional attribute 'elementname="OtherElementName"'. By default, “property” is used. This is only appropriate for single-valued properties.
name="propname" xmlNotation="NameValueProperty":<property name="propname" value="value1"/>
name="dxrRole" xmlNotation="NameValueProperty" elementname="param":<param name="dxrRole" value="false"/>
-
DsmlProperty: denotes the DSMLv2 style of attribute value notation.
<attr name="prop">
<value>value1</value>
<value>value2</value>
</attr>
-
component: This defines that this is a generic property. It is described by another component description. To specify this component description use the attribute component. Usually the type is SvcGenericCompDescObject. You need to define a special editor to handle these generic objects.
<property name="attributes"
     type="siemens.dxm.storage.component.SvcGenericCompDescObject"
    xmlNotation="component" component="attribute" multivalue="true">
</property>
…
<propertyPresentations>
  <property name="job/attributes/attributes" readonly="false" multivalueeditor="siemens.dxr.manager.controls.requestworkflow.JnbGenericCompDesc"
  editorparams="compDescName=attribute; properties=name,description,mandatory">
    <label>Attributes</label>
  </property>
</propertyPresentations>
Default Values and Tag Providers
Use value elements to define a default value or a list of tags that represents the valid values for the property. If exactly one value element is specified, this is the default value for this property. If you want to define a list of possible values specify one value element per possible value. DirX Identity Manager displays a combo-box with all specified values if it finds this property in a propertyPresentation. Specify the default value by adding the attribute default=”true”. This is equivalent to the tags construct in an objectDescription.
Here is an example for a property (sign) with boolean syntax and the default value false:
<property name_"sign" xmlNotification="SimpleElementProperty"
        type="java.lang.Boolean"
        elementname="sign">
    <value>false</value>
</property>
In the following example the property execution is specified with the default value parallel and a second possible value sequential:
<property name="execution" xmlNotation="SimpleElementProperty"
        elementname="execution">
    <value default="true">parallel</value>
    <value>sequential</value>
<property>
The CDATA Attribute
The SimpleElementProperty and NestedElementProperty support an additional "cdata" attribute. Specifying cdata="true" means the value is stored as a CDATA element. This attribute is only supported for SimpleElementProperty and NestedElementProperty.
name="code" xmlNotation="SimpleElementProperty" cdata="true":
<code><![CDATA[/*** ***/]]></code>
Parent-Child Elements and Attributes
Component descriptions extend other component or object descriptions. Consequently, a component description must specify where the child component is to be inserted into the parent. Properties of the parent influence the selection of the child type and even the properties of the child. On the other hand, a child component can influence properties of the parent. The <property>, <parentproperty>, <component>, <reference> and <mapto> elements and some XML attributes are used to define these relationships.
Inserting Child Components
The <component> may be inserted underneath an <element>. It references a <property>, which itself holds the link to a component description. By setting this property, the customer selects a child component that is inserted into the parent. The following example defines a connector component to be inserted underneath a <port> element:
<element name="port">
 <component refProperty="connectorTS" minOccurs="1" maxOccurs="1"/>
 <properties>
      <property name="connectorTS"
           mandatory="true" xmlNotation="xmlAttribute"
           insertbelow=".">
 </property>
The <component> refProperty attribute references a property by name. The referenced property holds the reference to a component description (the name of the component description as string) and has to be stored underneath the parent element in the format that the attribute xmlNotation prescribes.
The attributes minOccurs and maxOccurs limit the number of occurrences of the reference. In the above example, only one <connectorTS> is allowed. The default value for each of them is "1". The value "unbounded" for maxOccurs allows an unlimited number of values.
The new attribute insertbelow of the <property> specifies the XML element of the parent, underneath the component’s configuration must be inserted.
You can specify a list of components of the same type (maxOccurs="unbounded") and to specify several components of different type as in the following sample:
<component refProperty="connectorDesc" minOccurs="1" maxOccurs="1"/>
<component refProperty="filterDescription" minOccurs="0" maxOccurs="unbounded"/>
<properties>
 <property name="connectorDesc" type="SvcComponentReference"
      mandatory="true" xmlNotation="xmlAttribute" insertbelow="./port">
 </property>
 <property name="filterDescription" type="SvcComponentReference"
      mandatory="true" xmlNotation="SimpleElementProperty" insertbelow="./port">
 </property>
Here we have a component "connectorDesc" and another component " filterDescription ". Note that a list of filterDescription’s can be inserted underneath a <port> element.
Setting Parent Properties from a Child Component
In some cases, the inserted child component governs the setting of a parent property. For example, in a notification activity, the class name of the job implementation must be stored outside the component configuration as a sub-element of the <job>, but is determined by the selected component:
<job>
 <component>mailNotification</component>
 <class>com.siemens.idm.rqjobs.NotifyClient</class>
 <notification>
      <data>
           <from>admin@example.test</from>
This relationship must be reflected in the parent and child component descriptions. The parent description describes the property as "abstract" and the child defines a <parentproperty> and supplies a default value.
Here is the parent snippet:
<element name="job">
 <component refProperty="component" minOccurs="1" maxOccurs="1"/>
 <properties>
 <property name="component"  …/>
 <property name="class" abstract="true" …/>
Here is the child snippet:
<parentproperties>
 <parentproperty name="class">
      <value>XXXcom.siemens.idm.rqjobs.NotifyClientXXX</value>
 </parentproperty>
Note that the property in the child definition has to reflect the relative path in the parent beginning with the parent’s root node(here the job element) !
In such a scenario, the child must make assumptions about the parent. In this case, it must know that the parent has a property named "class".
Reading Parent Properties from a Child Component
Often the child will re-use properties of the parent for value calculation of its own properties. In this case, the child needs a reference to the parent property as in the following snippet:
<parentproperties>
 <reference name="connectedDirectory"/>
</parentproperties>
Such a property is typically stored as a resolution variable. It can now be used to calculate own property values, as shown in these snippets:
${DN4ID(connectedDirectory)@dxmService-DN@dxmAddress}
${ssl} == 'true'
If a parent contains two children of the same type, which both carry references to a parent property, we need a mapping of property names. Suppose a <job> has two <port>s: one for the Identity domain, one for the target system. The <job> will have a property for the connected directory of each of the <port>s. It may name them "connectedDirectoryTS" and "connectedDirectoryID". Each connector component will find the value for its address property by navigating from the connected directory to the service (or system) entry. Thus it needs access to the parent property, which is from its point of view the connected directory.
We must have a way to reference the corresponding connected directory from the child. This is done with the <mapto> element. The name mapping is done in the parent, which is the only one that knows the different children. The <property> element gets a new child element <mapto>, which specifies the child component and the property name in the child to which it is associated:
<property name="IdentityDomain" type="DN" …>
 <mapto property="port[@name='IdentityDomain']/connector/connectedDirectory"/>
</property>
<property name="connectedDirectoryTS" type="DN"… >
 <mapto property="port[@name='TS']/ connector/connectedDirectory"/>
</property>
The "property" attribute takes the name of the property in the child component. Note that the <mapto> element must select one child element from within a list with the same element name! It identifies the corresponding child by using the child’s "name" attribute.
Presentation Description Element
A component description specifies its presentation issues in the element <presentationDescription>. It can be compared with the <propertysheet> of an object description. The sub-elements of the <presentationDescription> are merged into the <propertysheet> of its parent.
A <presentationDescription> can contain the following sub-elements: <propertypage>, <propertyPageExtension> and <propertyPresentations>.
Property Page Element
A <propertypage> has exactly the same attributes as the corresponding element in the object description: name, title, class, layout and insertafter. It is merged with the parent propertysheet the same way as already realized within the object description.
Property Page Extension Element
A <propertyPageExtension> element extends a parent property page.
The attribute "extendsPage" names the parent page to be extended. This is optional. See below how to insert it into an unknown parent.
The attribute "insertafterattribute" specifies the parent attribute after which the child properties have to be inserted. It is also optional to allow for unknown parents.
The "layout" attribute is mandatory and lists the properties to be displayed in this page. Note that a leading "properties:" string is ignored, since it depends on the parent specification, if the properties are shown in the denoted sequence or not.
How to display properties of several child elements with the same name? Here we use again (see the <mapto> element in "Reading Parent Properties from a Child Component") the XPath notation as shown in the following example:
layout="port[@name='TS']/connectedDirectory, ..."
Property Presentation Element
The element <propertyPresentations> contains a list of <property> sub-elements. They correspond to the <property> elements of the data section and describe the presentation aspects. This <property> element contains the well-known attributes "name" (the reference to the corresponding data description), "readonly", "editor", multivalueeditor", and "editorparams". "label" and "tagprovider" are specified as separate elements. Here is an example:
<property name="connector"
        editor="siemens.dxr.manager.controls.MetaRoleJnbComboBox">
    <label>Connector</label>
    <tagprovider class="siemens.dxr.service.tags.ComponentDescriptions"
            dxmComponentType="connector"
    />
</property>
Initial Content Element
Although the activity and job schemata allow a wide range of definitions, most of our activity definitions assume a certain structure. As an example, a provision activity assumes a list of channels (in, response, error, …), a framework job configuration with the corresponding connectors for the activity channels plus ports for the Identity domain and the target system. It makes life easier for our GUI and for customers, if we deliver initial content for our activity definitions. They set up the expected structure and give default (or fixed) values for some of the properties. It’s up to the object and component descriptions to allow only changes within the given framework structure.
Thus a component description can contain an <initialContent> element that represents the default configuration. Look at the templates for the password synchronization workflows, which can be treated as initial content.
Initial content is defined at the element level. During initialization, all initial content elements are evaluated from the root element down to the leaves. The initialization of the properties with their default values is performed after the evaluation of initial content. So properties default values may override initial content.
Here is the component description:
<element name="activity" abstract="true">
<initialContent>
    <addElement1 attr="avalue"/>
    <addElement2>
         <property name="name" value="aname"/>
    </addElement2>
</initialContent>….
Here is the created XML fragment:
<activity basicType="${DN4ID(THIS)@dxmType}" name="${DN4ID(THIS)@dxmDisplayName}" subType="${DN4ID(THIS)@dxmActivityType}">
<addElement1 attr="avalue"/>
<addElement2><property name="name" value="aname"/></addElement2>
<retrylimit>0</retrylimit>…
| In the previous example, the initialContentElement creates the elements addElement1 and addElement2. The other parts like retrylimit are specified in another component description extending the activity element. |