Manual Migration
Perform all the steps described in this chapter that are relevant to adapting your environment to DirX Identity.
General Aspects
The following manual migration steps are relevant for all DirX Identity versions.
Restoring Preserved Files
Restore the specific information from the files you backed up as described in the section “Preserving Files” in the chapter “Preparing the Migration” by merging the information in the backup files into the files in the relevant locations.
You only need to update the file dxi_java_home/lib/security/cacerts with the information from the relevant backup.
Migrating Passwords for JMS-based Auditing
| Performing this task is only necessary if you use JMS-based auditing; that is, if the JMS-based Auditing flag is checked in the Status and Auditing tab of your IdS-J Server (Java-based Server) configuration object in the Connectivity database. (Connectivity view → DirX Identity Servers → your-ids-j-server → Status and Auditing tab → Auditing – General section). |
In older DirX Identity versions, the password and user were taken from an attribute at the ids-j object where the password was stored in clear text. Beginning with V8.7, the user and password are now taken from a specified bind profile. If you use JMS-based auditing, you need to migrate the configured user and password as follows:
-
Create a bind profile that holds the user and password. We recommend adding the bind profile to your Identity Store connected directory. Only the User and Password bind parameters are required. Enter the text JMS in Anchor.
-
In the IdS-J Server’s Status and Auditing tab, enter the newly created bind profile into Bind Profile.
-
Restart the Ids-J Server.
-
Repeat steps 2 and 3 for every IdS-J Server configuration object that uses JMS-based auditing using the bind profile you created in step 1.
Migrating Passwords for Mail and SMS Gateway Configuration
In the Provisioning view, the SMTP configuration object for sending e-mail notifications and the SMS Gateway configuration object for sending SMS notifications are located in Workflows → Configuration → Services.
If the Authenticate flag is checked for these configuration objects, the password information for these objects needs to be migrated.
For each configuration object, enter the password in the relevant field and then save the object. Now the passwords are stored encrypted according to the type of encryption mode specified in the Connectivity database’s central configuration object (in Encryption Mode in the Server tab).
Migrating Passwords for Sending Notifications in Tcl-based Workflows
You can define notifications in the Connectivity view at the metacp job in the Operation tab. If you have used these notifications with a user and password, you need to migrate the referenced service object, which is usually the Mail Service (Configuration → Services → System → Mail Service).
Open the notification object (it’s usually located below the metacp job object (Connectivity view → Jobs → your_metacp_job → your_notification_object)) and then click the Service link in the Service Definition area to open the service object. Enter the password and save the object. Now the password is stored encrypted according to the encryption mode defined in the Connectivity central configuration object (Encryption Mode in the Servers tab).
Using SAP JCo version 3.1.4 or Higher for SAP ECC UM Connector/Agent
We recommend upgrading to the latest version.
Migrating SPML Provisioning Web Services
After installing and configuring DirX Identity, configure the services according to the section "Runtime Operation" in the chapter "SPML Provisioning Web Services" in the DirX Identity Integration Framework Guide.
After customizing the Provisioning Web Services, merge the relevant configuration information from your backup into the relevant files of the folder install_path/web/instances/provisioningService/provisioningService-technical_domain_name.
For selected migration paths, the files ProvisioningWebServicesChanges.txt* in the subfolder Documentation/DirXIdentity/ProvisioningWebServices of the installation media list all files and folders to be merged.
When upgrading from a version lower than V8.5, the folder install_path/provisioningServlet is obsolete. Keep a related backup outside the DirX Identity installation and then remove this folder. When you are sure that the backup is no longer needed, remove the backup, too.
Migrating SPML Provisioning Web Services Clients
Migrating the SPML Provisioning Web Services clients consists of the following steps:
-
Stop using the obsolete, unsupported sample client and remove the following related files: agentconf.xml, conf.xml, cpappend.bat, fireSOAP-Request.bat, fireSOAP-Request.sh, log4j.properties, request.xml in the folder install_path/provisioningServices/lib. These files represent an obsolete sample client that uses a proprietary format in sent requests and received responses. Using this client is no longer supported. Stop using this client or related customizations and then remove these files.
-
Update the runtime environment of your Web Services clients with the jar files shipped with DirX Identity. The set of jar files to be used is located in the folder install_path/provisioningServices/lib.
-
Ensure that the classpath in your runtime environment of your Web Services clients is computed so that the appropriate set of jar files is on the classpath. You’ll find samples of the correct classpath computation in the file install_path/provisioningServices/spmlv2/fireSpmlv2-Request.bat (Windows platforms) or fireSpmlv2-Request.sh (UNIX platforms).
-
The file install_path/provisioningServices/spmlv2/conf.xml is overwritten at installation time. Therefore, you must adapt this file according to the section "Getting Started with the Test Client" in the chapter "SPML Provisioning Web Services" in the DirX Identity Integration Framework Guide. You can do this either from scratch or by merging the relevant information from a related backup.
Migrating a Customized Web Center
If you have a customized Web Center, you must merge the changes from your backed-up customized version into the new version of Web Center which now contains the domain name:
install_path/web/instances/webCenter-technical_domainname
The files WebCenterChanges*.txt in the subfolder Documentation/DirXIdentity/WebCenter of the installation media list all files and folders to be merged.
Note that the new URL is now
http://host:8080/webCenter-technical_domainname
You can rename the URL by renaming the related file webCenter-technical_domainname.xml in the folder tomcat_path/conf/Catalina/localhost. If you rename the URL, you must update the related URL in the Provisioning Store accordingly. (DirX Identity Manager → Provisioning → Workflows → Configuration → Services → Approval, Property Location (URL, server)).
Migrating a Customized Web Center for Password Management
If you have a customized Web Center for Password Management, you must merge the changes from your backed-up customized version into the new version of Web Center which now contains the domain name:
install_path/web/instances/pwdManagement-technical_domainname
The files WebCenterChanges.txt* in the subfolder Documentation/DirXIdentity/WebCenter of the installation media list all files and folders to be merged.
Migrating a Customized Business User Interface
See the Business User Interface Configuration Guide for more detail information about migrating.
Migrating the ActiveMQ Messaging Server
In some cases, the migration of the repository (file-based database kahadb) from a former ActiveMQ version to the version that comes with DirX Identity V8.10 does not work.
For this reason, we strongly recommend that you verify that all message queues in ActiveMQ are empty before upgrading (enqueuer and dequeuer counters are equal in Web Console). In rare cases, ActiveMQ doesn’t start correctly after migration because of kahadb issues (the repository). In this case, the only choice is to delete the kahadb completely.
Adapting Size Limits for LDAP Searches (using DirX Directory)
The size limit applied to an LDAP search operation limits the number of returned entries in single searches and paged searches.
The source is:
-
LDAP search operations option size limit (user defined)
-
LDAP server‘s configuration property “Ldap-Search-Svc-Ctl” (LSES) (defined by the administrator for each LDAP server)
-
DSA‘s User Policy (defined by the administrator, user specific)
The value in force is 3 or a smaller limit from 2 or 1 (if there is no specific limit for that user; for example, there is no DSA User Policy for that user).
Older directory versions (before release “DirX Directory V8.2B”) had a problem interpreting the size limit in search operations: they applied the size limit to every single search operation in a series of paged searches. Therefore, the size limit could easily be circumvented by specifying a page size smaller than the size limit in force.
Starting with DirX Directory 8.2B, the size limit is applied to the entire search operation regardless of whether or not it uses simple paging control.
Caution: Applications may see a changed behavior:
-
Retrieving the nth page of a paged search operation may return with a “size limit reached” return code and an empty cookie.
-
The size limit in force must be big enough for all entries in all pages returned in one search operation.
-
For anonymous users, the size limit is defaulted to 2048.
-
Use the UserPolicy (USP attribute of the root DSE) to set the required limits.
Please note that DirX Identity has defined user policies with a size limit of 32,768 for non-paged searches and a paged result size limit of 100,000 (for the Connectivity branch and for each domain in the Provisioning branch).
Example (including the sample domain):
dirxadm> show / -attr USP -p
1) /
     User-Policy
         User-Subtree-Name       : /DXMC=DirXmetahub/DXMC=Groups/CN=Read
         Size-Limit              : 32768
         Paged-Search-Size-Limit : 100000
     User-Policy
         User-Subtree-Name       : /CN=DirXmetaRole-SystemDomain/CN=SystemAdmin
         Size-Limit              : 32768
         Paged-Search-Size-Limit 100000
     User-Policy
         User-Subtree-Name       : /CN=My-Company/CN=TargetSystems/CN=DirXmetaRole/CN=Groups/CN=DomainAdmins
         Size-Limit              : 32768
         Paged-Search-Size-Limit : 100000
Normally you should not have any size limit problems; if you do, you must increase either the size limit of 32,768 or the paged result size limit of 100,000 to some higher value.
When configuring a new customer domain, the default values for the two size limits are as described in this section.
Extending the DirX Identity Schema for Customer Domains
If you upgrade to a new DirX Identity version, be aware that the schema for certain target system objects may have been extended for the purpose of provisioning new connected system attributes. The schema for the My-Company domain is updated during Initial Configuration if the domain step with the My-Company domain is selected. If you configure your own customer domain, you must update the schema for that domain by running the appropriate agent schema scripts provided in the install_path*/schema/tools* folder. For a detailed description of this procedure, see the section “Extending the Schema for the Target System Workflows” in the DirX Identity Application Development Guide.
The following sections provide an overview of the schema changes provided for all the supported connected systems. Except for RACF, no migration needs to be done manually.
Agent Schema Changes in V8.9
The following systems are no longer supported:
-
UNIX-PAM
-
SoarianClinical
Agent Schema Changes in V8.6
RACF
The following attributes had an erroneous substring matching rule (caseExactSubstringMatching instead of caseIgnoreSubstringMatching)
-
krbPrincipalName
-
racfLdapBindDN
-
racfLdapBindPw
-
racfNdsUserName
-
racfLNotesShortName
An automatic migration of these attributes is available and is executed while running the DirX Identity Configuration tool. You can also start this migration step by hand at any time. It is located in:
install_path/tools/migration/86/database
As the Provisioning part is migrated, all arguments refer to the Provisioning configuration database.
Usage:
MigrateRACFschema.bat host port user password ssl domain-DN logfile
Example:
MigrateRACFschema.bat localhost 389 "cn=DomainAdmin,cn=My-Company" dirx 0 "cn=My-Company" log.txt
Manual schema update:
After the user data has been migrated, you must drop the erroneous attributes manually from the schema. The erroneous attributes have been renamed in the schema by appending the suffix OLD. Adapt the relevant object classes as listed in the following files:
install_path/tools/migration/86/database/postSchemaUpdate/dirx.racf.ldif (for DirX Directory)
For DirX Directory, the relevant changes are:
# "racfLNotesShortNameOLD" has been dropped
dn: cn=schema
changetype: modify
add: objectclasses
objectclasses: ( 1.3.12.2.1107.1.3.102.6.16.16 NAME 'racfLNotesSegment'
    DESC 'This is a proprietary DirXmetahub objectclass.'
    AUXILIARY
    MAY ( racfLNotesShortName ) )
-
# "racfNdsUserNameOLD" has been dropped
dn: cn=schema
changetype: modify
add: objectclasses
objectclasses: ( 1.3.12.2.1107.1.3.102.6.16.17 NAME 'racfNdsSegment'
    DESC 'This is a proprietary DirXmetahub objectclass.'
    AUXILIARY
    MAY ( racfNdsUserName ) )
-
# "racfLdapBindDNOLD" has been dropped
# "racfLdapBindPwOLD" has been dropped
dn: cn=schema
changetype: modify
add: objectclasses
objectclasses: ( 1.3.12.2.1107.1.3.102.6.16.18 NAME 'racfProxySegment'
    DESC 'This is a proprietary DirXmetahub objectclass.'
    AUXILIARY
    MAY ( racfLdapBindDN $ racfLdapBindPw $ racfLdapHost ) )
-
# "krbPrincipalNameOLD" has been dropped
dn: cn=schema
changetype: modify
add: objectclasses
objectclasses: ( 1.3.12.2.1107.1.3.102.6.16.19 NAME 'racfKerberosInfo'
    DESC 'This is a proprietary DirXmetahub objectclass.'
    AUXILIARY
    MAY ( racfCurkeyVersion $ racfEncryptType $ krbPrincipalName $
    krbPrincipalNameOLD $ maxticketage ) )
-
Salesforce
The following new attributes are provided:
-
dxmSLSFcontactId
-
dxmSLSFcontactName
-
dxmSLSFdefaultPermissionSet
-
dxmSLSFdefaultPermissionSet-DN
-
dxmSLSFpermissionSet
-
dxmSLSFpermissionSet-DN
-
dxmSLSFprofileId
-
dxmSLSFprofileName
-
dxmSLSFprofile-DN
-
dxmSLSFuserLicenseName
The following new object class is provided:
dxmSLSFpermissionSet
Please note that currently only the schema for Salesforce has been extended. These attributes and object classes are currently not supported by the Salesforce Connector and the Salesforce realtime workflow.
Agent Schema Changes in V8.5
ADS
The following new attributes are provided:
-
dxmLyncInternetAccessEnabled
-
dxmLyncOptionFlags
-
dxmLyncPrimaryHomeServer
-
dxmLyncUserPolicies
-
dxmLyncUserRoutingGroupId
-
dxmLyncUserEnabled
-
dxmLyncFederationEnabled
-
dxmLyncDeploymentLocator
-
dxmLyncPrimaryUserAddress
The following new object class is provided:
dxmLyncUser
LDAP Lock Mechanism for User Objects
A lock mechanism (preventing parallel updates for a user) has been implemented in DirX Identity V8.6 and was revised in DirX Identity V8.6-SP1 and again in DirX Identity V8.10. More details are available in the use case document DXI Java Programming.
Migrating Realtime Workflows to Support Client-side SSL Authentication
Client-side SSL authentication is supported in realtime workflows when using one of the following connectors: ADSConnector, LDAPConnector, and RACFConnector.
The XML workflow definition needs to be adapted to support additional connection parameters.
Migration is done automatically during the first Configuration Wizard run. All workflows in the Connectivity database (using any of the connectors listed above) are processed.
You can start this migration step by hand at any time. It is located in:
install_path/tools/migration/89/rtworkflows
As the Connectivity part is migrated, all arguments refer to the Connectivity configuration database.
Usage:
MigratePortForClientSSL.bat host port user password ssl logfile
or
MigratePortForClientSSL.sh host port user password ssl logfile
Example:
MigratePortForClientSSL.bat localhost 389 "cn=admin,dxmC=DirXmetahub" dirx 0 trace.txt
Aspects Relevant to Using DirX Directory V8.6 or Higher
Rebuilding Attribute Indexes to Handle Improved Search Operations
DirX Directory V8.6 and higher versions provides improved search operation processing, especially for AND filter combinations that begin with filter items (for example, uid=b*), “greater than or equal to” filter items (for example, time>=20170716) and/or “less than or equal to” filter items (for example, time⇐20170716) - apply.
For best performance, we recommend re-building the indexes for the attributes where these search filters apply on a regular basis; for example, on a bimonthly schedule.To perform this task, for example, use the following dirxadm db attrconfig command:
dirxadm> db attrconfig uid time -index BUILD
Note that the DSA runs in the POSTINDEXING operation mode while the db attrconfig command is in progress and update operations will be rejected.
DirX Identity attributes that need to be handled this way include:
dxmStatusExpirationTime
dxrCertificationDate
dxrDeleteDate
dxrDisableEndDate
dxrDisableStartDate
dxrEndDate
dxrExpirationDate
dxrPwdExpiryNotified
dxrStartDate
Migration of New LDAP Controls LDAP_CTRL_NO_MODTIME_UPD (1.3.12.2.1107.1.3.2.12.9) and LDAP Conditioned Operation Control (1.3.12.2.1107.1.3.2.12.10)
Starting with DirX Identity V8.10, the Entry Lock Manager has been improved and makes use of two new LDAP controls. These LDAP controls are available with DirX Directory Server V8.9 (9.4.454 or higher) if you installed DirX from scratch. A DirX upgrade will not set the LDAP controls at the LDAP root.
The Configuration Wizard sets these LDAP controls.But please note that a manual migration is necessary if you decide to upgrade the DirX installation after you have already configured DirX Identity.
In this scenario, the migration procedure is as follows:
-
Set the password of the DirX administrator (Tcl variable DIR_PW) in the file install_path*/basic.input.tcl*.
-
Open an MS-DOS command prompt or a UNIX shell in the directory install_path*/schema/role-dirxee/SystemDomain*.
-
Run the following command: dirxadm init.v810.adm.
-
Check the content of the tracefile setup-trace.txt in the current directory.The tracefile should show that dirxadm terminated with exit code 0.
-
Set the TCL variable DIR_PW in basic.input.tcl to “”.
Aspects Relevant to DirX Identity 9.0
Support of Java 21 and Tomcat 11
This version runs with Java 21 (JRE or JDK) and Apache Tomcat 11 only. See Supported Java and Tomcat in the release notes for more details.
Recompilation of Java Source Mappings
Background
DirX Identity 9.0 introduces updated runtime components (including new versions of join.jar, map.jar, spml.jar and the switch to Java 21). Because of these changes, existing Java Source Mappings from DirX Identity 8.9 / 8.10 must be recompiled after upgrading to 9.0.
If Java Source Mappings are not recompiled, Java Realtime Workflows that use them may fail at runtime (for example with MethodNotFoundException or similar errors in the server logs).
| Recompilation is not performed automatically by the Deployment Tool. After upgrading to 9.0, recompilation must be triggered manually in DirX Identity Manager using the context action Recompile all. |
When is this required?
You must perform this step if both of the following apply:
-
You upgraded from DirX Identity 8.9 or 8.10.x to 9.0, and
-
The environment contains Java Realtime Workflows that use Java Source Mappings
How to recompile (post-upgrade step)
-
Complete the software upgrade to DirX Identity 9.0.
-
Open DirX Identity Manager.
-
Navigate to the area where Java Source Mappings are managed (typically under the Connected Directories / channel configuration tree).
-
Use the context menu action Recompile all to recompile all Java Source Mappings.


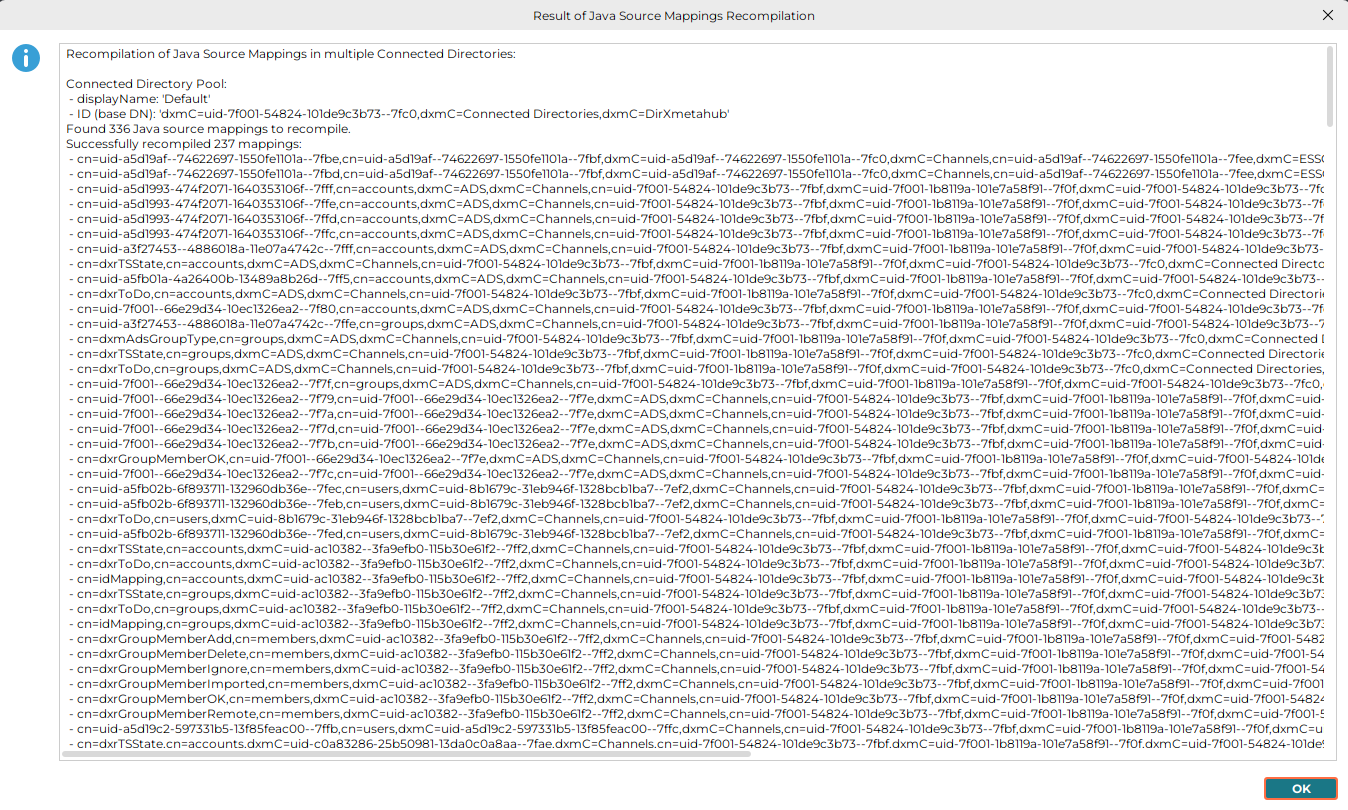
Only then are all existing Java Source Mappings recompiled against the new libraries and Java runtime.
For new 9.0 installations without existing Java Source Mappings, this step has no adverse effect. Any delivered factory mappings present in the directory will simply be compiled.
Expected results
-
The recompilation completes successfully.
-
The compile result (byte code) is stored back on the mapping entries (see verification below).
-
Workflows using those mappings run without the previous runtime errors.
How to verify successful recompilation
-
Directory‑level verification
Each Java Source Mapping is stored as an entry with object class dxmAttributeMapping that contains:-
dxmContent – the Java source code
-
dxmCompiled – the compiled byte code
After successful recompilation:
-
The attribute dxmCompiled is present for the Java Source Mapping entries.
-
In most cases the byte code stored in dxmCompiled differs from the value before the upgrade, because it has been recompiled against the new runtime.
-
-
-
Functional verification (recommended)
-
Trigger Java Realtime Workflows that use Java Source Mappings.
-
Check the DirX Identity server logs.
-
Before recompilation, you typically see errors like:
-
MethodNotFoundException (or similar class/method resolution errors)
After running Recompile all, these errors should no longer occur and workflows should execute normally.
Troubleshooting
-
If recompilation fails for specific mappings, fix the Java source code of the affected mapping(s) and run
Recompile allagain. -
If workflows still fail after recompilation, confirm that the workflow actually uses Java Source Mappings and re-check server logs for the concrete failing class/method.
Aspects Relevant for Upgrade from 8.9 to 9.0
Business User Interface
The content of the Business User Interface template archive "install_path\web\BusinessUserInterface.zip" can now be found in the template folder "install_path\web\BusinessUserInterface.template".
The Business User Interface instance created by the configuration wizard is now located in "install_path\web\instances\BusinessUserInterface-<customer-domain>".
Provisioning Web Services
The Provisioning Web Services template folder has been renamed from "install_path\provisioningWebServices\provisioningServlet.org" to "install_path\provisioningWebServices\ProvisioningService.template".
The Provisioning Web Services instance created by the configuration wizard is now located in "install_path\web\instances\ProvisioningService-<customer-domain>".
REST Services
The REST Services template folder has been renamed from "install_path\restServices\DirXIdentityRestService\DirXIdentityRestService.org" to "install_path\restServices\DirXIdentityRestService\DirXIdentityRestService.template".
The REST Services instance created by the configuration wizard is now located in "install_path\web\instances\DirXIdentityRestService-<customer-domain>".
Web Center
The content of the Web Center template archives "install_path\web\webManager.zip" can now be found in the template folder "install_path\web\webCenter.template".
The Web Center instance created by the configuration wizard is now located in "install_path\web\instances\webCenter-<customer-domain>" and the Password Manager Web Center is now located in "install_path\web\instances\pwdManagement-<customer-domain>".
Aspects Relevant for Upgrade from 8.10, 8.10 SP1, 8.10 SP2, 8.10.x to 9.0
Business User Interface
The content of the Business User Interface template archive "install_path\web\BusinessUserInterface.zip" can now be found in the template folder "install_path\web\BusinessUserInterface.template".
The Business User Interface instance created by the configuration wizard is now located in "install_path\web\instances\BusinessUserInterface-<customer-domain>".
Provisioning Web Services
The Provisioning Web Services template folder has been renamed from "install_path\provisioningWebServices\provisioningServlet.org" to "install_path\provisioningWebServices\ProvisioningService.template".
The Provisioning Web Services instance created by the configuration wizard is now located in "install_path\web\instances\ProvisioningService-<customer-domain>".
REST Services
The REST Services template folder has been renamed from "install_path\restServices\DirXIdentityRestService\DirXIdentityRestService.org" to "install_path\restServices\DirXIdentityRestService\DirXIdentityRestService.template".
The REST Services instance created by the configuration wizard is now located in "install_path\web\instances\DirXIdentityRestService-<customer-domain>".
Web Center
The content of the Web Center template archives "install_path\web\webManager.zip" can now be found in the template folder "install_path\web\webCenter.template".
The Web Center instance created by the configuration wizard is now located in "install_path\web\instances\webCenter-<customer-domain>" and the Password Manager Web Center is now located in "install_path\web\instances\pwdManagement-<customer-domain>".