Installing the Windows Password Listener
This chapter explains how to install the DirX Identity Windows Password Listener on Windows Server 2016 (Long-Term Servicing Channel) or Windows Server 2019 (Desktop Experience).
Overview
The Windows Password Listener is required only if you intend to capture user passwords for password synchronization. Install it on all machines that host an Active Directory installation.
|
The installation creates configuration files:
-
libdxmEventListenerAds.ini -
options.ini
These files contain default values. During upgrades, existing values are reused or updated based on user input.
Upgrade installations are supported from versions 8.9 onward.
Key Points
-
For multiple domain controllers, you can perform one installation, create a response file, and reuse it for unattended installations (see Unattended (Silent) Installation/Uninstallation).
-
The listener uses ActiveMQ messaging from a DirX Identity installation. During setup, you must provide:
-
Host name and port of the messaging service
-
SSL option for secure connections
-
If SSL is enabled:
-
Copy the following files from the DirX Identity
sslfolder to the Password Listenersslfolder:-
ca-crt.pem -
client-key.pem -
password.properties
-
|
The |
For SSL setup details, refer to Securing Identity Server Connections with SSL in the Connectivity Administration Guide.
Installing the Windows Password Listener
-
Run setup.exe from the DirX Identity DVD.
-
In the dialog:
-
Click DirX Identity.
-
Click Install DirX Identity Windows Password Listener.
-
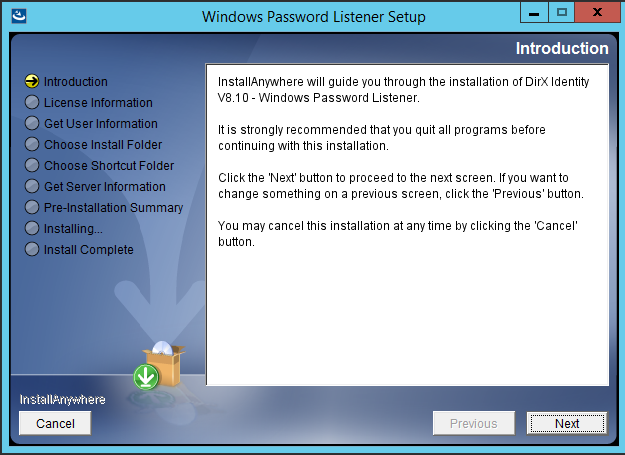
-
Click Next.
| You can click Cancel anytime to exit or Previous to return to the previous dialog. |
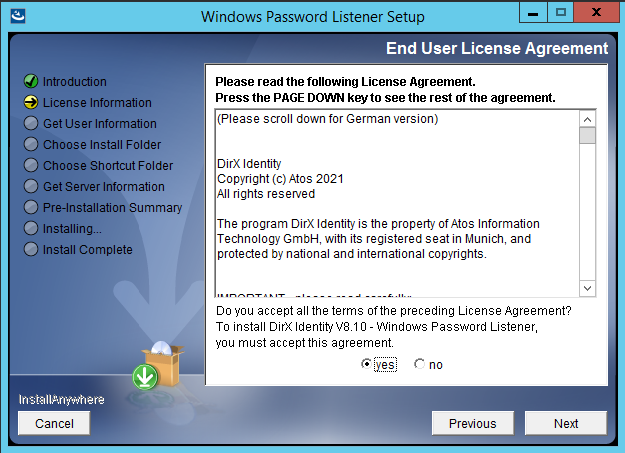
-
Setup displays a License Information dialog.
-
Read the licensing information, and then click Yes and then click Next. Clicking No cancels the installation.
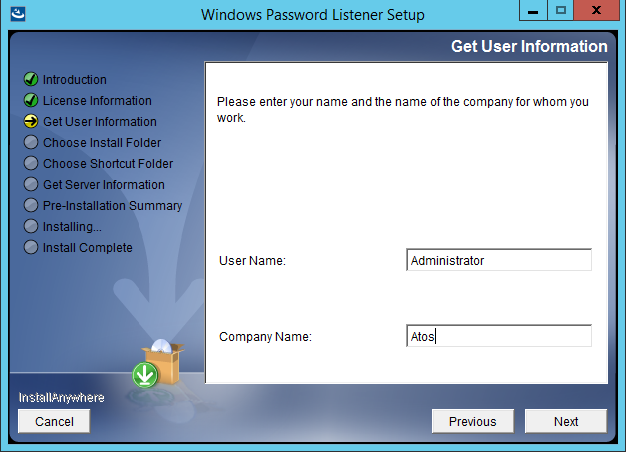
-
Setup displays a Customer Information dialog.
-
Enter your name and your company name in the fields provided, and then click Next.
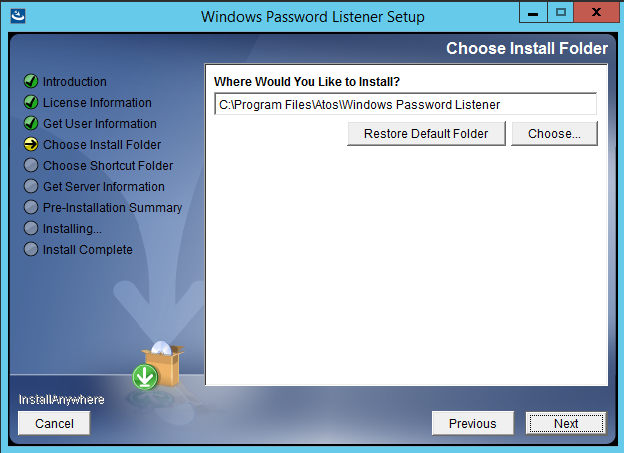
-
Setup asks you to select an installation directory. It displays the default location in the field provided.
-
In this dialog, you can:
-
Click Next to select the default location.
-
Click Choose to select a different directory, and then click Next.
-
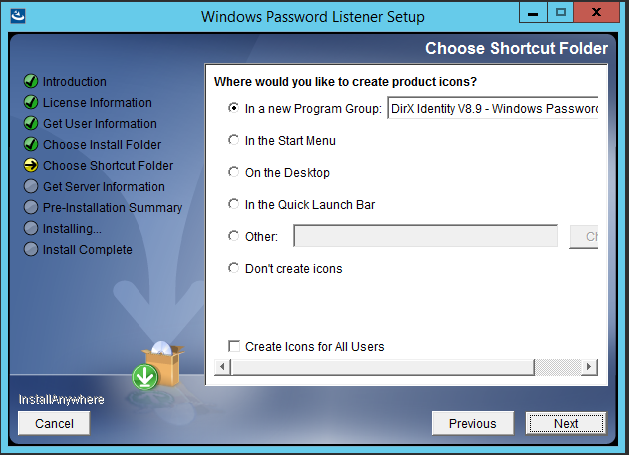
Setup asks you where you would like to create product icons. It displays the default location in the field provided.
Note: If you upgrade from an older version, the currently used Program Group name is shown In a new Program Group: (in the picture above, from version V8.9). Otherwise, a default name is shown. -
In this dialog, you can:
-
Click Next to select the default location.
-
Select a radio button of another predefined location and then click Next.
-
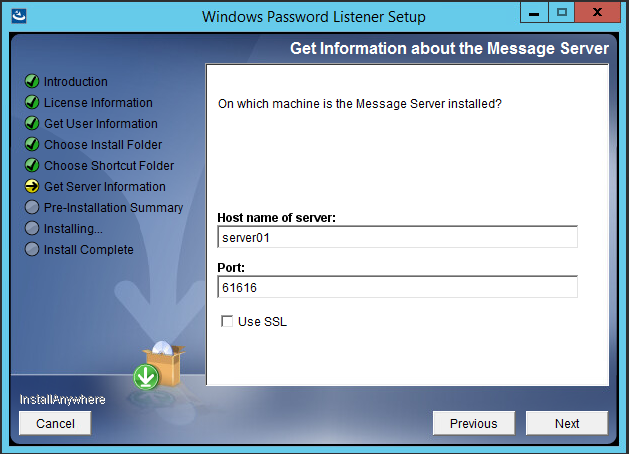
Setup asks you for information about the message server.
-
Enter the host name of the machine on which the message server is installed and the port number of the message server in the fields provided.
-
Check Use SSL if you want to use an SSL connection to the server.
-
Click Next.
| Be sure that your DNS (domain name service) works correctly if you use symbolic names for the host name. If you are not sure, use a TCP/IP address instead. If you use SSL, you must give the exact same server name of the messaging server that is used in its server certificate. |
-
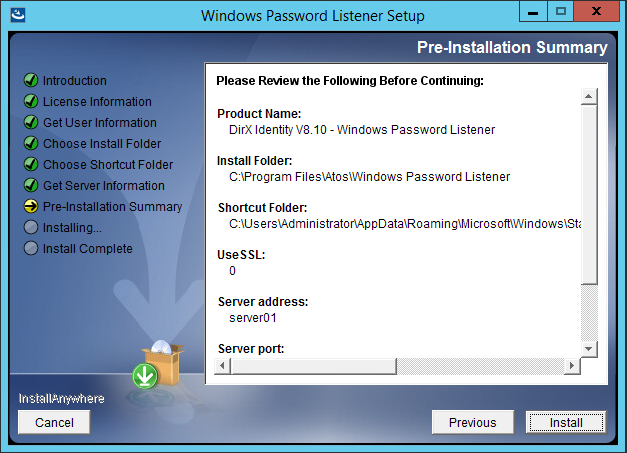
Setup displays the installation selections you have made and asks you to review them.
-
Click Previous to change any settings you have made. Otherwise, click Install.
-
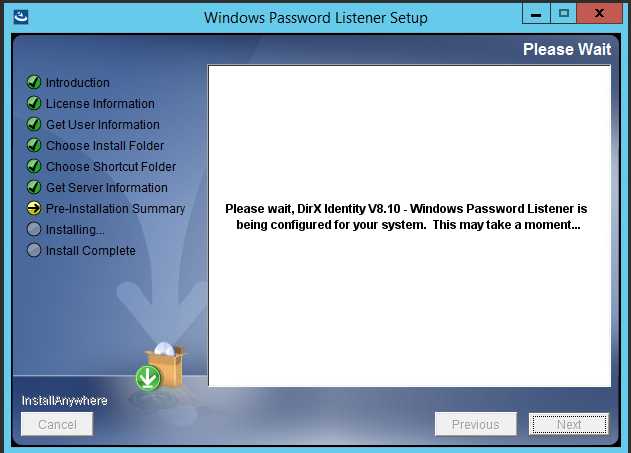
Setup displays the installation status.
-
When Setup completes the installation, it displays the following dialog.
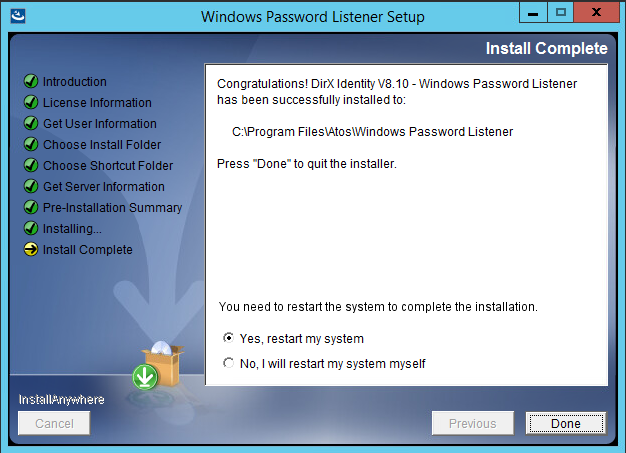
-
Click Done to exit Setup.DirX Identity Windows Password Listener installation is now complete.
-
Wait for restart of the computer.The restart is necessary to register the Windows Password Listener Plugin DLL correctly into the LSASS service of the Windows domain controller.
Unattended (Silent) Installation/Uninstallation
You can install the Windows Password Listener without any user interaction by creating a silent setup.
Follow these steps:
-
Copy the contents of the folder DirXIdentity/WinPWListener from the DVD to a local folder on your machine.
-
Edit and customize the file dirxidty_wpl.properties to match your environment.
-
Run the installation program from the local folder.
-
Verify the installation and check for any errors.
Below is an example of the dirxidty_pwl.properties:
##############################################################################
# DirX Identity - Windows Password Listener install properties for
# InstallAnywhere
##############################################################################
# Release Information
# Release=8.10
# Version=8.10
# Build=nn
# CreationDate=YYYYMMDD
##############################################################################
# installer created with InstallAnywhere by Flexera
# InstallAnywhere 2021 Build 6526
##############################################################################
# InstallAnywhere install properties
##############################################################################
# UI mode for the installer
# INSTALLER_UI=[SILENT | CONSOLE | GUI | SWING | AWT]

# default for Windows: swing
# default for Unix: console

###############################################
# Note for Windows:
# if INSTALLER_UI is set to swing, than installer does not prompt with a
# dialog "Not enough space...", if necessary
###############################################

#INSTALLER_UI=swing
##############################################################################
# own DirX Identity - Windows Password Listener install properties
##############################################################################
#-----------------------------------------------------------------------------
#Get User Information
#--------------------
#PROP_DX_USER_INFORMATION_1=<userName>
# default:
#PROP_DX_USER_INFORMATION_1=<login user>

#PROP_DX_USER_INFORMATION_2=<companyName>
# default:
#PROP_DX_USER_INFORMATION_2=<>

#-----------------------------------------------------------------------------
#Choose Install Folder
#---------------------
# PROP_USER_INSTALL_DIR=<path>

# default for Windows:
# PROP_USER_INSTALL_DIR=$PROGRAMS_DIR$$/$Atos$/$Windows Password Listener

# Note for Windows:
# If an install path for Windows Password Listener is found in the registry,
# then this path will be taken!

# PROP_USER_INSTALL_DIR=$PROGRAMS_DIR$$/$Atos$/$Windows Password Listener
#-----------------------------------------------------------------------------
#Choose Shortcut Folder
#----------------------
# PROP_USER_SHORTCUTS=<program group>

# default:
# PROP_USER_SHORTCUTS=$WIN_COMMON_PROGRAMS_MENU$$/$Atos DirX Identity$/$Windows Password Listener

# Note for Windows:
# If a program group for DirX Identity is found in the registry,
# than this program group is taken!

#-----------------------------------------------------------------------------
#Get Information about the Message Server
#----------------------------------------
#PROP_DX_LOCAL_HOST=<hostName>

#PROP_DX_PORT=<port>
# default:
#PROP_DX_PORT=61616

#PROP_DX_Q_MGR=<Q-Name>

# use SSL
#PROP_DX_USE_SSL=[0|1]
# default:
#PROP_DX_USE_SSL=0
#-----------------------------------------------------------------------------

#Get Service Account Information
#-------------------------------
#PROP_DX_ACCOUNT=<accountName>
#PROP_DX_USER_PASSWORD=<password>
# ------------------------------------------------------------------------------
# sleep time
# installation / uninstallation is waiting, when the service will be removed
#PROP_DX_SLEEP_TIME=<msec>

# default:
#PROP_DX_SLEEP_TIME=10000
# ------------------------------------------------------------------------------

# Restart Windows - (De)-Installation in silent modus
# Note:
# When you want to force a reboot, if necessary,
# you can set the following variable

# PROP_RESTART_NEEDED=YES
# ------------------------------------------------------------------------------